Bigfoot

We have been slowly progressing with finishing the trim around the windows of the laundry room and garden room.

02-upperWindows_2013042903-shortTrim_20130429

I spent almost all day getting the trim to fit in above the windows, and tight against the soffit. Had to splice on a piece at the end, because the board wasn’t quite long enough (above right). But that’s nothing: When I bought the redwood, I got tempted by the slightly cheaper, rough-sawn redwood planks intended for fences. We had to plane and sand and prime them all before putting them up. Silly Turtle – no wonder it takes so long! Now that all the trim is on around the windows, though, it’s starting to look finished.

04-lowerWindowHead_2013042905-routedEdge

This (above left) is the window under the laundry room (‘garden room’). We built out a small box head above the window to shade and protect the windows from rain. Turtle being turtle, I couldn’t resist getting my router out and adding a bit of decorative edge (above right) to the trim. It also serves a purpose: Rounded edges don’t show dents, and they hold paint better than sharp corners.

07-overall_2013042908-corner_20130429

The photo above left shows the back wall of the laundry room — a bit difficult to see, as my home-built scaffolding is in the way. Above right is the corner that faces the deck. So, this is quite exciting (for me): All the exterior trim and siding are installed on the laundry room. Now we need to fill all the holes, sand, and paint.

While we were working on the laundry room trim, the cats sometimes came out to play. All the flowers have been blooming in the back yard, and the bees are loving it. Unfortunately, Bella doesn’t know the difference between a fly and a bee…
01-bigfoot_20130429
She decided to catch a bee, and when she slapped it down on the ground, she got stung. Mole was calling her ‘bigfoot’ for the rest of the day…

Fascia and Soffit

Mole says: “That’s an attractive title.” I think she’s being sarcastic.

The fascia is the finish board that is attached around the edge of the roof to cover up the framing underneath. We’ve been working on putting that onto the laundry room roof.

01-beforeFascia_2013031402-beforeFascia_20130314

This is how it looks before the fascia is installed. I had temporarily attached the gutter to the end of the rafters that stick out and support the roof overhang.

03-oldWood_2013031404-fancyFascia_20130314

As usual for us, we re-used old wood. This wood was the siding on the laundry room before. It’s not Redwood, but it’s old-growth Douglas Fir. The photo above left shows the condition of the paint on the wood: bad! And there was a lot of other stuff stuck to it, such as duct tape (waterproofing?) and caulk. After many hours of removing the old paint with a heat gun, though, the wood is in excellent condition.

Above right is the piece of wood that will be the fascia. I’ve routed a quarter round decorative edge into the wood. Couldn’t resist.

05-primed_2013031406-fasciaInstalled_20130314

To help the paint last better, we primed the boards on all sides before putting them up. This is supposed to help the wood to be more stable in changing humidity, so the paint lasts better. Above right: The fascia is attached. It looks better already. The framing is still exposed at its under side.

07-fasciaCorner_2013031408-molePainter_20130314

At the corner, I carefully shaped the end of the board so that the decorative edge goes around the corner. Above right: Mole is the best painter there is. No drips, and perfect coverage.

09-soffit_2013031410-soffit_20130314

For the finish under the roof overhang, the soffit, I also reused the old wood. Most of the time is spent preparing the boards. Installing them takes relatively little time. I only have one small piece left to install. I’m leaving the gutter off for now, until after we replace the old leaky roof. But the next step is to install the trim around the windows.

a new coat of paint

with new tenants moving in, the first thing on the to-do list was to paint over the PINK! and for the record, not everyone hated it. i’d say only 3 or 4 people really disliked it, and everyone else thought it was kinda great. i mean, this IS san francisco.

late on a saturday night last month, mathew, bella, arwen and i got busy masking off trim, baseboards, the window, doors, ceiling and one wall that would remain white. bella and arwen weren’t all that helpful. mostly they spent their time climbing up the ladder, standing proudly at the top, then working up the courage to climb back down.

mathew applying test swatches on four different walls. after mark, jennifer, mathew and i all decided “queen’s wreath” was the best choice, the paint spraying began.

sprayed and waiting for the paint to dry… it’s amazing how many hours prep takes and then with the sprayer, painting is done in minutes.

ta-da! queen’s wreath is a slightly purple, muted, medium blue grey. mathew was skeptical about such a dark color, but we all think it turned out great and works well with the trim and doors. yay team! (mathew did most of the work.)

while mathew was inside painting, i was just outside the bedroom painting the exterior wall and window trim. in the above photos i’m sitting on the 2nd level of the rented scaffolding.

we masked the windows and trim then mathew used the sprayer to paint the final coat. the new paint looks great! as you can see, above right, we still need to sand and paint the other walls…

but the good news is the scaffolding has finally gone back to the rental company. we’d had it for FOUR months! ack. even though it was getting expensive, it had been a busy summer, we’d had lots of friends and family visiting so we barely had time to work on anything.

now on to one of our other 200+ projects.

and my next post will have absolutely nothing to do with the house. 😉

Change of Plans (again)

I’ve finished the siding on the back side of the laundry room, and got both windows in.

Here are a couple of views showing the windows and the siding before I put the trim around the windows.

Now the trim and the fascia is on. The really hard part was fitting wood around the sewer vent pipe (in the top right photo). If I were to do it again, it would be faster to move the pipe — and the result would be better, too. One more for experience. Just need to finish filling, sanding, and paint!

Maybe these photos of the living room downstairs will give a clue about the ‘change of plans.’

Or these, of the kitchen and the bedroom downstairs?

A couple of things changed: One of them, my friend who stayed at the house when we were first working on the downstairs, was looking for a place to live with his girlfriend in town. Two: We faced up to the fact that the work I’m doing is taking too long to justify waiting to rent out the space as a vacation rental. So we dropped the vacation rental idea, and it’s going to be a regular rental. Not quite so simple, because we need to clear out all the furniture, and repaint the bedroom (the pink is not popular with anyone). The downside is that we will no longer have space for family to stay. The up side is we’ll be getting rent (finally!), which takes some of the pressure off paying bills and reduces the stress to finish the renovation work.

Siding Factory

I received the new motor for the vacuum cleaner, and successfully repaired “r2d2”!

(above left) r2d2 in pieces on my work bench. The old motor is on the left. Above right, all back together. It’s almost smiling 🙂

I put in the window for the bathroom at the side of the laundry room. There’s still one more window, but the company I ordered it from forgot to put the order into the manufacturer! So, it’s going to be a few more weeks. The photo above left is a view from the outside, above right photo view from the inside.

I think I have mentioned before how much work it is to re-use old siding. I’ve not figured out how many hours per foot it is; it’s probably too depressing. But, now that ‘r2d2’ is up and running again, Mole’s siding factory is back in operation. The first step is to strip off paint that is too damaged to save. Then, notches are patched with pieces of wood and waterproof glue, and splits are glued and clamped.

Then each piece is sanded on all sides. Notice the vacuum tube coming out of the sander (above left). Then the pieces are all vacuumed to remove dust.

*news break* Here’s Mole headed off to the store on her bike (above left).

And then back to painting the siding with two coats of primer on all sides.

Above left, Mole is waiting for paint to dry (it’s only slightly faster than grass growing.) Above right, fitting the restored siding on the house again. Cutting the siding to fit around around the pipe penetrations in the wall is tricky. You can see here two locations: the top left is from a sink, the lower right is from the shower.

The black building paper “Jumbotex” is a water resistant barrier, on top of which I put 1/4″ thick strips of wood. The strips space the siding away so that there’s an air gap. This is supposed to help the siding last longer, as moisture doesn’t get trapped between the siding and the building paper.

Putting the siding up takes weeks, because we only manage to sand and paint a few boards every weekend. But it’s almost done. The next step is to use ‘Bondo’ to fill all the nail holes, dents, and scratches in the boards, sand them again, prime them again, and on to final painting!

The siding is up around the new window, and I’m just waiting for the other window to arrive. Above right, you can see the new window, and siding up and around it. On the right of the picture is a temporary piece of wood covering the hole for the missing window.


Roof Extension

I’ve still got the scaffolding up on the back side of the laundry room, so need to finish up this wall.

A month or so ago, I reframed this wall. It’s been sitting that way since, so this weekend I finally cut out the plywood from the window openings, ready for the new windows (one is still not here). This will be the wall of the toilet room back here. Above left is a view from the inside, above right from the outside.

But the main activity: Creating a roof overhang so that when it rains, the wall gets a little protection. The wall used to line up directly with the edge of the roof. Sorry, didn’t catch a photo, but the photos above show halfway through.

I had to take up the roofing, back to the first roof joist inside. We’ve added “outriggers” that extend out and support a joist right at the outside edge. Then I had to replace the roof sheathing boards so that they extend out to the new overhang. In the photos above, we are half way done.

Not a big change, and a “real” builder wouldn’t even bother (in fact, when we hired a roofing contractor to do the main roof, they actually cut some of the overhangs off, much to my dismay). But it will make a big difference to the longevity of the wall. In all houses, especially wood, water is the enemy. Roofing handles water and weather much better than paint on wood. I think, also, many window and door manufacturers will not warranty it if there’s no overhang protecting the window or door.

Above left is after all the roof sheathing boards have been extended. I’m re-using old wood, so it’s covered in random paint. Above right, we’ve put back the roofing felt, and the shingles. We re-used the old ones, so it’s a bit of a patchwork. And since the roof is a bit wider, didn’t have quite enough. No worries. I’m planning to get this all re-roofed because the roof slope is actually too shallow for shingles (it leaks).

Here’s an exciting picture of the high energy walk mole is on with a+b. 😉

R2D2 D:<

It’s been a big family visit month.

My sister Eva had her wedding (again), but this time, in Santa Cruz. My whole family came to visit, including my sister Mia all the way from Asia, and Mum, my aunt and cousin from England, my brother and Aja from Brooklyn… Nice to see everyone, now back to the grind: didn’t get much done on the house…

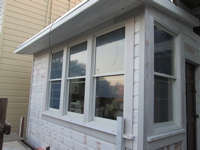
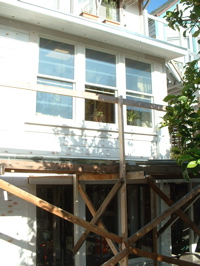
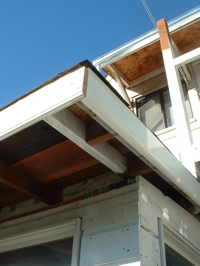
It’s been one wall at a time on the laundry room. This is the lower half of the last wall. Above left, you see the window opening in this wall, and above right, some nice strapping around this window. Although the code doesn’t require it, I decided to paint the edges of the plywood with wood preservative, just in case. That bottom edge is so important for seismic, but is also in the most damp location.

While we were working in the room under the laundry room (the ‘garden room’ I think I’m calling it), we got an unexpected inspector looking down through the hole in the floor.

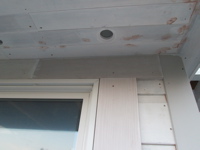
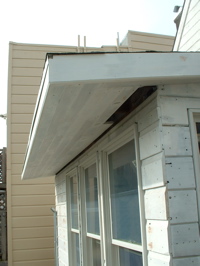
At this point, it had been about a month since I’d disconnected the washing machine. We were making the occasional emergency trips to the local laundromat, but the pile of laundry was mounting. So I spent a weekend plumbing in the washing machine again. Top right is where the sewer line exits at the floor level. The sheet metal and rubber against the wall is a roof jack, intended for when pipes exit through the roof. The rubber seals tightly around the pipe, and is crimped onto the sheet metal. I’ve been using roof jacks to waterproof around these wall penetrations. There are probably equivalent pieces intended for walls, but these are all they have at my local supplier. And it’s a whole lot better than what the plumbers did on other parts of the house: they drilled a hole and squeezed some caulk in there. Lots of rot was the result.

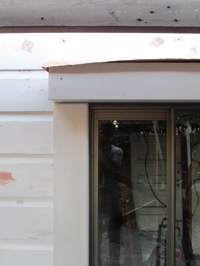
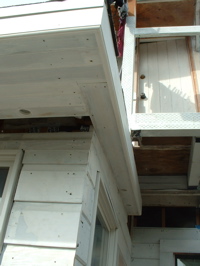
Above right is a view on the inside, looking up. You can see the sewer line that will serve the toilet, and also the washing machine. There is also the pipes for the hot and cold water in the top right corner of the picture, going up through the floor. The photo above left is how the sewer pipe looks on the outside of the building now.

And lo, we have a washing machine again. The room is still bare, but at least we don’t have to hike down the street with our baskets of laundry. We are so spoiled.

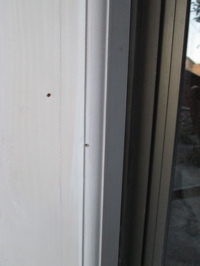
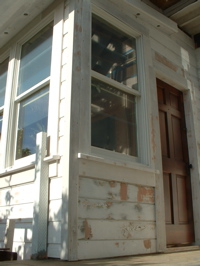
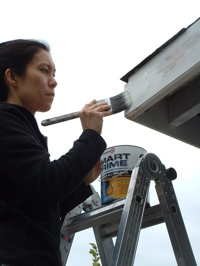
Next comes building paper, and another window. A couple of years ago, when I ordered replacement sashes for the windows in the office, one of them came with single glazing. The supplier replaced it with a double glazed window when I called them, but then I had this extra window left over. It’s been sitting around the garage ever since. So we decided to use it here. Works quite nicely. I’ve made it into a fixed window. Mole sanded and primed the whole thing, on all faces, twice.

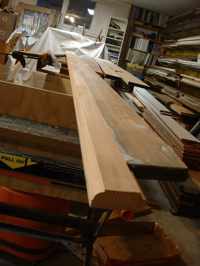
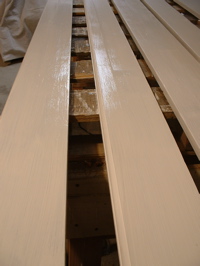
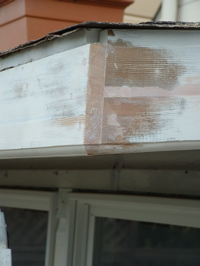
We’re still reusing the old siding that came off the building. Mole spent many hours sanding these, then priming all surfaces. It’s an extraordinary amount of work reusing old materials. The photo above right shows how the wall penetrations look when a roof jack is used. It will all be painted the same color, so not quite so obvious.

When we first started working on the house, we bought a HEPA shop vacuum cleaner. It was quite an expensive model Turbo II made by Fein. I love it, because it doesn’t make a racket like all the other shop vacs, and it’s always hooked up when we are sanding anything that may have lead paint (ie, everything.) It turns itself on and off whenever the sander is turned on or off. One thing that had never occurred to me: it really needs servicing every now and again. It’s probably been running over 5000 hours since we got it. Well, last weekend, “r2d2” as we call it, had a heart attack! I thought it might be just worn brushes, so I took it to pieces. The brushes are worn, but not the problem. The motor’s kaput.

I’ve ordered a replacement motor, but never realized how much I use this thing. We can’t sand anything without it. No siding, no painting, no smoothing wood. Cleanup is difficult. We use it to vacuum off our clothing after working. Wow, this is an important tool.

Four Windows In


For a while, we were giving the cats oatmeal to help them with fur balls. Got to watch the quantity, though, and I get jumped on when I eat my breakfast.

My two breakfast buddies.

Last week, mole’s ‘little sister’ came to visit for a few days. The visit coincided with getting a new bike. And the roses are out.

We spent quite a few weekends working on the old siding. Not only was it suffering from lack of maintenance, it got quite split up when we pulled it off. First I used waterproof ‘Titebond III’ glue and clamped the split boards back together. After a day to set, I sanded them all, to remove all loose paint, and smooth out a lot of the roughness. It took quite a while to get down to solid material. There’s going to be a lot of bondo on this wall.

Janeen primed both sides, with two coats on the backs. Slowly, slowly, siding is starting to climb up the back of the laundry room again.

Once we got to about half way up the wall, I built some temporary scaffolding out of old pieces of wood. I don’t like working up a ladder. Here’s Mole holding the second window in place. She’s standing on the temporary scaffolding.

The instructions for putting in windows are very methodical. You level the window on shims, then carefully measure both diagonals. Surprisingly (for me), the windows are always out of square and need a lot of shimming and pushing around to get them square. Shipping must really bang them about. Each window takes a while. But here’s a view from the inside looking out, with three windows in.

Arwen loves the laundry room. Partly because there’s so much to explore, and partly because that’s the way to go and play outside. When she wants to go through a door, she rubs her front feet on it, over and over.

Here we’ve got all four new windows in, and the siding is up to the underside of the windows. But there’s one more wall to do.

Here we’re tearing out the last wall that needs replacing in the laundry room. This is where the toilet was, so the floor is also quite rotten. Initially, I was trying to save the tile, thinking it would make it faster to get the room done. But I’ve decided to tear it out, because it’s so hard to match, and there are some large areas that didn’t have tile.

The problem with removing the tile, is that it was very thoroughly glued to 1/2″ plywood that was nailed with serrated nails tightly to the sub-floor. When I started pulling up the plywood (really slow going, and hard work), it started pulling up and breaking the rather rotten sub-floor.

So now I had to also replace the subfloor. Here’s a picture with most of the sub-floor along the wall torn out, and the wall completely gone. That plumbing is for the sink that the washer was connected to. That’s coming out too.

Late that night, I managed to get the framing for the wall, and the plywood up. The following day I had my Mum and sister coming to stay.

Hoot Like a Dove?

Since we bought a bird feeder, and I’ve been filling it with wild bird seed every week, we’ve been visited by quite a few birds. One of them hoots like an owl, and mole calls it my friend. I think it may be a mourning dove (not sure if they are in Calif, but it sounds a bit like this):
http://www.learnbirdsongs.com/birdsong.php?id=7

Above left, my friend is looking for seed that’s fallen to the ground. Right, I’m working on sealing up the wall over the window, ready to put siding on.

Finally, we’re getting siding on the wall around the window. This is the window that looks out of the kitchen. It spent the whole winter with duct tape and plastic covering the edges. I’ve finally got the siding on around the window, and the trim. Still needs the more filler, and prime and paint.

When I was building the back stairs, I built them so that they were independent of the house. This was partly so that I could build them without needing to tear down the laundry room or the old stairs first. The problem is, now I want to put a window in this wall, and I have a post in front of the window. So I re-framed this part of the stairs, and extended laundry room roof overhang a few inches, so there’s no longer a post in front of the window.

And then we put in one of the new windows. Four more to go. And no weekend project is complete without a kitten inspection. I think Bella approves (Arwen is just too preoccupied looking at the birds, I think).

New Back Door

I’m still amazed at how fast time goes by. I took off the old back door, extended it, and refinished it back at the end of October, so it’s been five months without a back door downstairs!

Instead of trying to save pieces, I tore off this whole wall and re-framed it. Now it has a door opening and a window next to it. Above right is the view from inside, with the plywood already on.

A problem I am going to have to resolve later is the post from the stairs, right in front of the window (above left). I’m planning to support it from the roof (extend the roof out to make a bit of an overhang, and sit the post on the overhang). Above right, the door is in, and I’ve put the old window temporarily into the window opening (we’ve ordered new windows).

I also got a new toy. I can’t believe I’ve not used a palm nailer before, but they are awesome: The opening at the end accepts loose nails (one at a time). Then you place the nail against what you want to nail it into, and the nailer just vibrates the nail into the wood. It’s so effortless that it’s unbelievable. It’s especially useful in tight spaces that you can’t swing a hammer.

I used it to nail in the clips that support the roof rafters, and to attach the blocking. Notice the ear protection: That nailer is LOUD. Between each rafter, there’s a piece of wood cut to fit. This wood gets nailed to the roof, the top of the wall (usually with a metal ‘A35’ clip) and to the rafters each side. It serves very important purposes: It stops the rafters rolling over, it acts as a connection between the roof and the wall in an earthquake, and it closes off the space between the joists.

The problem with the last part is that when you have insulation, you need to ventilate above the insulation so that moisture does not build up and rot the wood. So we added holes, with mesh screens on them to let air in.

Above left – the door is in, and the wall moisture barrier paper on. Above right, I’m looking out of one of the random holes that’s left when I screw up all the temporary bits of plywood that I find lying around. This wall will be all windows soon. Above my head between the rafters you can see the blocking all in place (primed white).

Another view from inside the laundry room. Before the blocking was in, Arwen almost jumped out one of the openings between the rafters. We didn’t even notice that she was in the room, and then Janeen looked up and saw her hanging out the outside!

Above right, these old windows are the windows we replaced at the front of the house, and in the bedroom (2009!). They have been gathering dust in our garage, and now I’m going to put them to use.

I’m cutting the frames shorter, and reassembling them so that I can use them in the garage back room (under the laundry room). Should get them in next week…

Here’s our view when we are working on the back door.