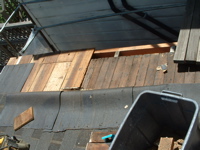
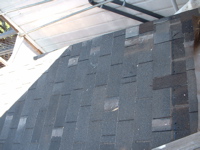
I’ve still got the scaffolding up on the back side of the laundry room, so need to finish up this wall.


A month or so ago, I reframed this wall. It’s been sitting that way since, so this weekend I finally cut out the plywood from the window openings, ready for the new windows (one is still not here). This will be the wall of the toilet room back here. Above left is a view from the inside, above right from the outside.


But the main activity: Creating a roof overhang so that when it rains, the wall gets a little protection. The wall used to line up directly with the edge of the roof. Sorry, didn’t catch a photo, but the photos above show halfway through.
I had to take up the roofing, back to the first roof joist inside. We’ve added “outriggers” that extend out and support a joist right at the outside edge. Then I had to replace the roof sheathing boards so that they extend out to the new overhang. In the photos above, we are half way done.
Not a big change, and a “real” builder wouldn’t even bother (in fact, when we hired a roofing contractor to do the main roof, they actually cut some of the overhangs off, much to my dismay). But it will make a big difference to the longevity of the wall. In all houses, especially wood, water is the enemy. Roofing handles water and weather much better than paint on wood. I think, also, many window and door manufacturers will not warranty it if there’s no overhang protecting the window or door.


Above left is after all the roof sheathing boards have been extended. I’m re-using old wood, so it’s covered in random paint. Above right, we’ve put back the roofing felt, and the shingles. We re-used the old ones, so it’s a bit of a patchwork. And since the roof is a bit wider, didn’t have quite enough. No worries. I’m planning to get this all re-roofed because the roof slope is actually too shallow for shingles (it leaks).

Here’s an exciting picture of the high energy walk mole is on with a+b. 😉
