on vacation

i took the week off work to try to make things go faster. it has been quite successful. so far, i’ve done two more skim coats on the ceiling.

skim coating the ceiling

i’ve also plastered the remaining two walls in the entry hallway. above right, i’m plastering the wall that’s westmost in the entry hallway. that’s the door to the entry foyer and front door.

second wall completed plaster, looking into entry foyerlooking towards living room, final wall

after plastering that wall in the morning, i moved onto the last wall in the afternoon. i can never judge how much plaster to mix; i always mix too little. you are supposed to coat the whole wall, then double back and put a second coat from the same mix. if you do that, the plaster behaves a lot better, it’s easier to smooth, and it is much more predictable and strong. it’s all supposed to be out of the same mix, and the plaster sets in 20 minutes. yep, gotta move really fast.

looking towards kitchen and living room, with last wall to be plastered on the rightmathew putting plaster on the wall above the door

in the living room, i added a junction box where there were just two wires sticking out of the ceiling (for the light). then, this evening, janeen and i installed the medallion. i put glue on the back side, then fit it up around the junction box.

there are two tricky parts: getting the medallion aligned with the room, and holding it up while the glue sets. janeen came up with a really clever system; we put bubble wrap over a bucket, then set the bucket on top of the ladder, and spaced it up with a box and some pieces of wood.

temporary support for the medalion while glue sets

starting plaster

This weekend we did quite a lot. The old anaglypta, while quite nice, was rather badly damaged, and had so many coats of paint, it was difficult to see the pattern. janeen took some photos (the color was white — something funny with the incandescent bulb made it look orange…)

so we bought some new anaglypta wall paper, but have to remove the old stuff first. a multi step process. at first, we tried using the heat gun. slow and messy. then i attacked it with a scraper. the paper separated in the middle leaving a layer of paper on the wall. we then used wallpaper remover to get down to the plaster.

removing the paper that was still stuck

above right, janeen painted all the walls with pink plasterweld. she kept finding more loose paint, and so eventually almost every square inch of walls had been scraped clear of paint. i think janeen made two full garbage bags full of paint scrapings from this one room alone. i sanded all the walls and ceiling, and washed the walls and ceiling with tsp.

hallway ceiling with plaster washers for support

here you can se the state of the ceiling. all the little dots are plaster washers. i probably put up more than 200 plaster washers on the ceiling and on the walls. in the pictures below, i’m adding tape along all the cracks. took a long time to tape around a circle. lots of little pieces of tape.

this is the first of three skim coats of lighweight joint compound that i put on the ceiling. it’s starting to look more even.

we then finished preparing the walls for plastering, and we plastered the wall between our hallway and the entry hallway. janeen likes the shadows…

more paint prep

we continued working on paint prep this week. not a whole lot done, but moving forward.

stripping paint from baseboards

janeen continued stripping paint from the baseboards and the picture rails. it’s quite satisfying, but really labor-intensive.

base board up closejaneen sanding the ceiling

we also sanded the ceiling to help the paint adhesion. still to do on the ceiling: finish skim coating. you can see the white patches where i’ve taped over the cracks and the plaster washers.

Installing the plug for the fan in the kitchenceiling fan reinstalled

i reinstalled the old (ugly) ceiling fan in the kitchen. instead of having it hang down – the way it was before – i mounted it up as close to the ceiling as possible. also, because there’s a window directly behind it, there’s nowhere for the power cord.

it used to have a cord stapled to the ceiling and running down the side of the cabinet. we managed to fish a power cord above the ceiling; i was in the attic with the fish tape, and janeen was listening below to hear where it was because there’s no access directly above the kitchen ceiling. amazingly, it worked, so i added a plug in the ceiling to plug the fan into.

family painters

janeen’s parents were over this weekend, again: they spent all sunday painting the upstairs dining area.

kitchen before move-inkitchen after range hood removed

on the left above, this is how the previous kitchen looked. it’s a photo mole took when we were first looking around the house. on the right, i have removed the hood over the range, so you can see the window on the back wall. it makes the kitchen so much brighter. now we’re trying to figure out how to have a hood that does not block this window. any ideas? you can also see the mold in the lower left of the photo – the old cold box is rotting away.

mathew sanding kitchen ceilingmathew sanding kitchen window

turtle sanding the kitchen.

janeen painting yellowjudy painting stairs

mole and her mum, painting.

john priming ceilingkitchen after white primer

mole’s dad priming the kitchen. looks so much better already. originally we had been planning to paint the trim white and the rest the same yellow as the dining area. once it was painted with white primer, mole decided the keep the whole kitchen white.

vanity cabinet clamping

last month our friend alex made the suggestion to hang the bathroom vanity off the wall instead of support it on the floor, to make the bathroom feel larger. at that point i’d already finished making the cabinet, it was ready to polyurethane. on sunday i hid down in my workshop, taking it apart and altering the pieces. fits with this home remodel project: do everything twice! it’s now glued up again, and clamping.

+

what a weekend.

we woke up thursday morning to find out that my dad had been checked into hospital after having a heart attack and a stroke. he is now out of hospital and recovering well. all my siblings are in town; misha flew in from new york, mia from england, eva from minnesota, and leo from berkeley. it’s been great having misha stay with us and having the space for him; eva even stayed a night at the same time. there has been an incredible outpouring of love and support from friends and family and for that we are truly grateful. we’ve driven many miles in the last few days, but not done anything for the house.

looks like february is not a good month for home improvement but it has been nice to see my family.

movin’ slowly

not much happening here. i pottered around upstairs this weekend, looked at things, stripped some paint off the wainscote boards, and got back into bed:

wainscote paint stripping neededbathroom door casing

it may not look like much, but all that paint, glue and spackle takes about 10 min per foot to remove from each piece. and when your nose is running, it’s difficult (and messy) wearing a respirator.

i also got the head and side casing cleaned up, and attached at the bathroom door (above right). the side casing is the same wood shown in the first photo of last week’s post, after stripping about 1/8″ of paint. it is beautiful tight grained smooth old wood (where it doesn’t have nail holes and dents).

i also finally finished painting the (hopefully repaired) leaky mouldy window, patched a couple of roof leaks from the last storm, cleaned out some gutters. sorry, no photos yet – maybe next post.

jm=bad

i’ve been on a bit of a grump about jm recently: not only did janeen miss a weekend to go on his ‘make money for jm’ cruise trip (nope, it wasn’t even a benefit), but when she came back she’s been sick! now i’m sick too, so not much has been happening around here.

last weekend, i was realizing just how slow it is to try to reuse wood. We have the old wood, covered in paint, chipped and dented with holes in it from nails. Then we need to strip it down to the wood to make sure there are no nails hiding in there that could become projectiles when i cut the wood or shape it with the router. Then we need to sand it, and fill all the dents and scratches. then sand again. then prime. aiiieee!

casing before preparationcasing after stripping and filling

wainscote paint strippingdoor jam started

above left shows the wainscote in the bathroom with most of the paint stripped off it. i’m not sure if we’ll bother to strip it all off, because the left side will be behind the vanity (which i still need to make). On the right, i’ve started to install the door jambs. it took me a long time. the wall framing is not necessarily perfectly vertical, so the door jambs are shimmed away from it with wedge-shaped pieces of wood. I kept shimming the jambs, checking for level with the plumb bob (a heavy pointed metal piece attached to the end of a string), and then accidentally bumping them. there’s probably a better way.

kerdi basekerdi on one wall

Now this part feels like progress: To waterproof the shower, we are using a special waterproofing membrane made by schluter-kerdi that has a bondable surface so you can apply the tile directly to it. I like it because it keeps all the water out of the shower backing. Traditional showers have a layer of mortar over the top of the waterproofing membrane; the mortar never completely dries out between showers: mold. Although we used cement backer board everywhere, apparently this stuff allows you to use plaster (gypsum) board. On the left i’m putting in the bottom piece. it goes in quite easily: you press it down against a layer of thinset mortar. There’s also a special drain with a really wide flange that also has a bondable surface. The kerdi membrane adheres to this also. on the right, half the shower is covered. almost ready to tile.

more finishing work

plaster on plug wallreflection in plaster

Not much more to show, but I got the wall plastered. On the upper right you can see the difference between ‘plaster’ and drywall. Here I’m trying to show how shiny and reflective the plaster gets when it has been worked. Apparently plaster is much stronger and resistant to damage than drywall. I can believe it – it makes a hard shell on the surface of the wall. One thing that I really like about it is that it is a single application. No sanding needed (theoretically) – for me there’s some touch-up needed. hey, i’m not a pro!

trim on windowstarted the wainscote

The new sill that I started repairing on saturday is now installed, along with the trim. The plaster in the repaired area is still drying (it looks grey in the photo on the left). On the right, I’m starting to install the wainscote for the bathroom. It’s all reused wood that was on the walls before, so there are some interesting colors. I’ve stripped the paint off the grooves and edges of the boards so that they fit together. We’ll finish stripping the paint and preparing it while it’s in place.

janeen’s away

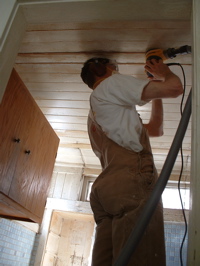
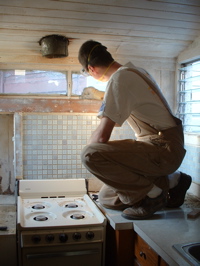
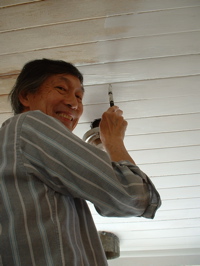
Mole is out of town this weekend, so that leaves me to update. This weekend I concentrated on trying to get upstairs ready for paint. Actually, we’ve been working on that for months…
old single box
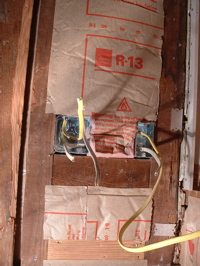
When uncle Ken came to visit last week, one of the first things he commented on was that in the bathroom, I’ve only used a single box to put the GFI (ground-fault interrupter) plug into. This box has a lot of wires in it, and GFI plugs take up more room than normal plugs. He recommended replacing the box with a double box and a ‘plaster guard’ on the front that reduces it for a single outlet. Exactly what the wiring book says, too. Should have read the instructions.

old backing outThis turned out to be quite an effort. It’s always disappointing to have to tear apart work i’ve already done, too. We already had the gyp board up on one side of the wall, and the cement board on this side. fortunately i hadn’t plastered it yet.

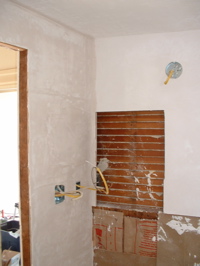
when i installed the boxes the first time, i’d added a piece of wood as a backer to make it easier to screw the boxes in. unfortunately, since the wall is so thin, there was not space for this as well as the double box and the plaster guard. i had to tear out both boxes, and carefully drill out the piece of wood backer i’d installed – without damaging the drywall on the back side – then screw the boxes back in against the studs. getting them aligned and set at the right depth took quite a while.

double box installeddouble box installed with plaster guard

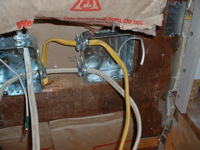
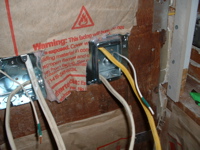
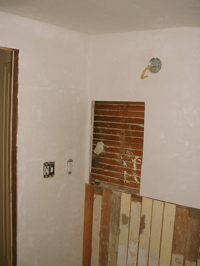
Above left shows the boxes installed. Right is with the plaster guard on.

double box installed and wall back ondoor trim back on

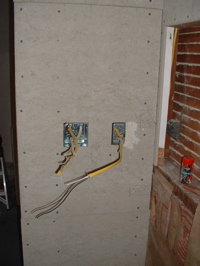
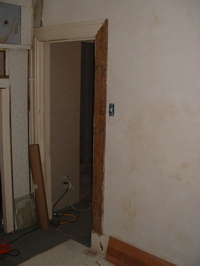
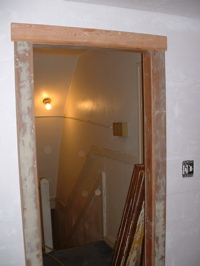
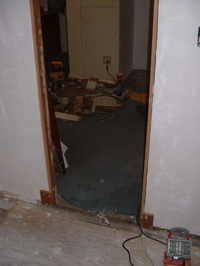
Ahh, backer board is back on. Had to move the hole over slightly because the plaster guard centers the opening on the double box and the stud set the location for the box. Above right shows the trim going back on around the door into the bedroom. Exciting… Janeen stripped the paint off the vertical piece months ago.

dustless sander 1dustless sander 2

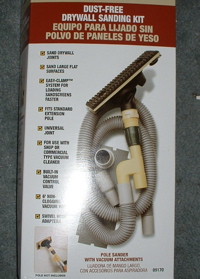
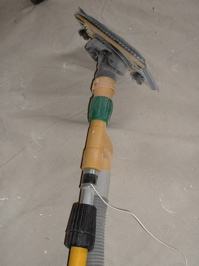
Got a new toy in the mail this weekend: a ‘dustless’ sander. It uses sanding screens and attaches to the vacuum cleaner, so the dust is sucked straight in. nice. except that the sanding motion and the constant air flow through the thing generates so much static electricity i felt like a spark plug! In the photo above right you can see the solution: i attached a piece of wire to the pole and fixed it to the plumbing. ahhh.

chimney bump 1chimney bump 2

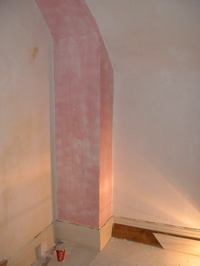
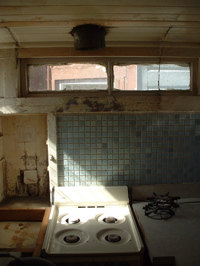
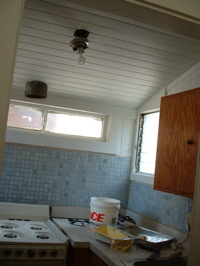
Plastered the bump-out in front of the chimney. ready for paint!

window trim 2window trim 3

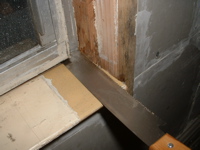
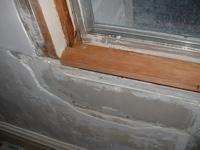
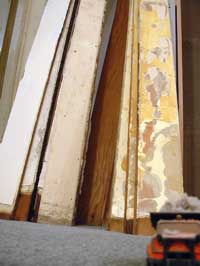
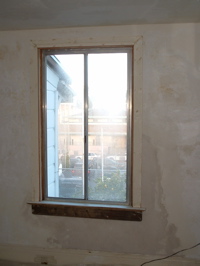
The rotten window. To fit a new sill on the inside of the window, I trimmed off the vertical pieces of wood on each side of the window flush with the top of the trim. Using a piece of scrap wood helped getting the saw aligned. Above right you can see the test-fitting.

window trim 4window trim 5

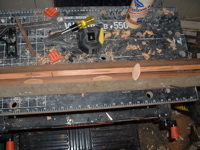
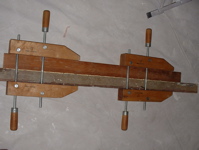
I glued the new piece of wood to the old sill after trimming off the old rotten wood. To hold the pieces of wood together, I used ‘biscuits’. Using a specialized tool, these oval-shaped pieces of wood are really easy to install, and when glued, the join is quite strong. I’ll clamp it over night and attach it tomorrow…