Garden room: Finished!

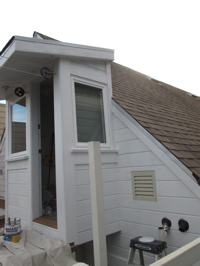
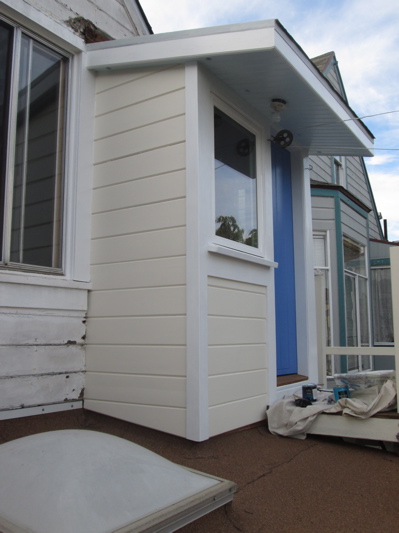
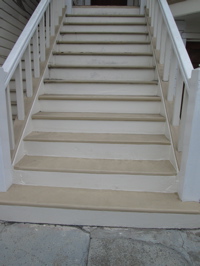
Wow, another project that started out as a “quick” project is finished (two years later.) But it came out quite nicely.

A checklist all checked off: satisfying.

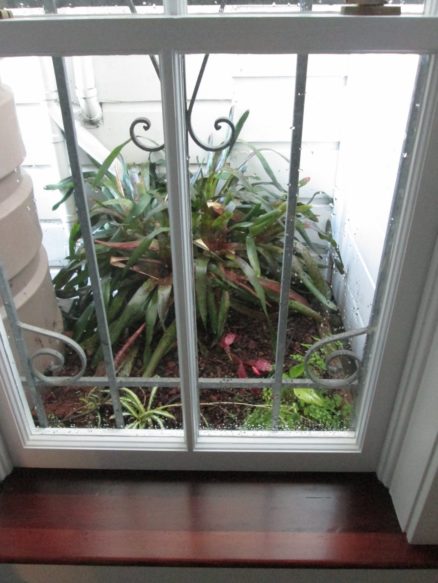
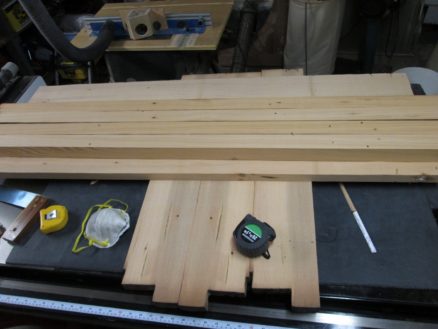
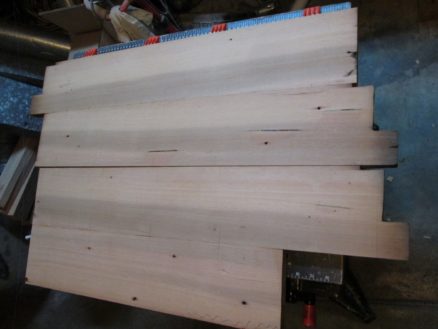
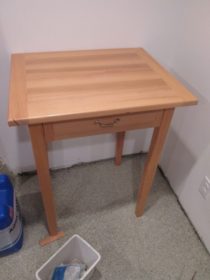
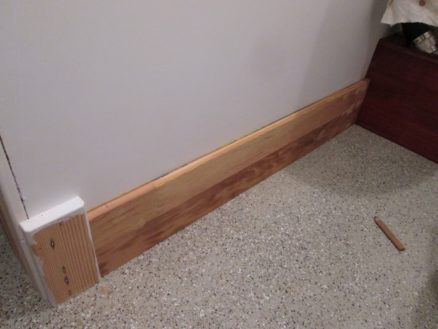
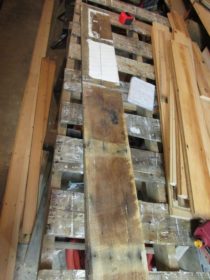
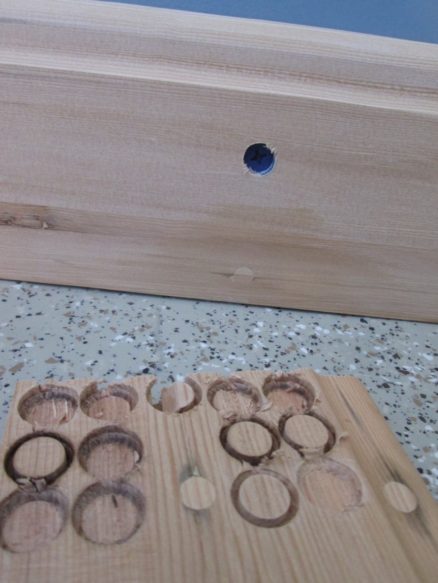
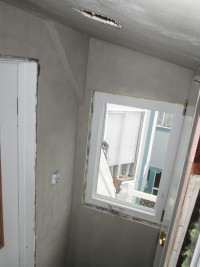
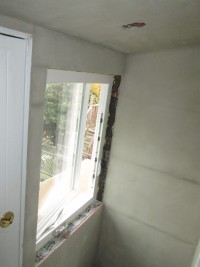
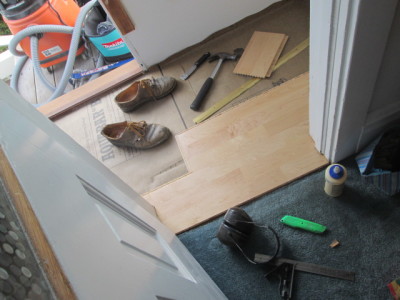
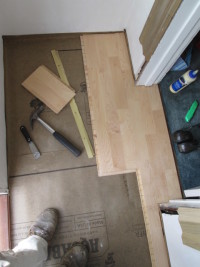
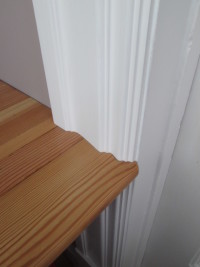
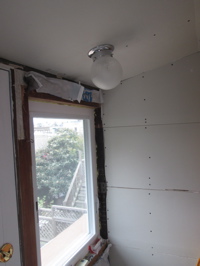
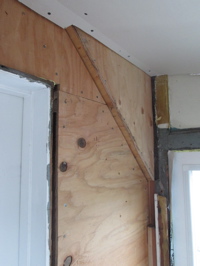
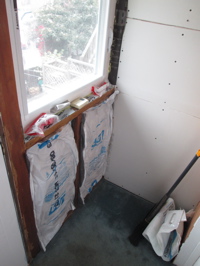
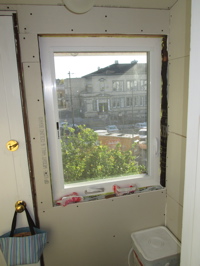
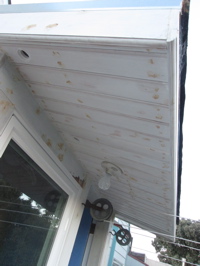
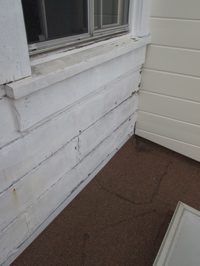
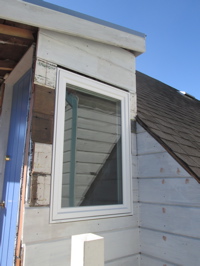
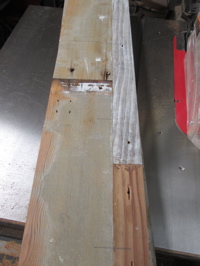
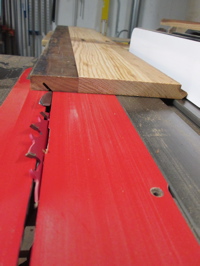
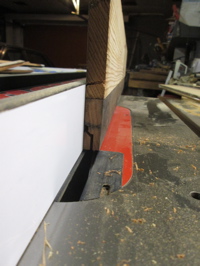
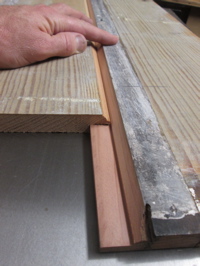
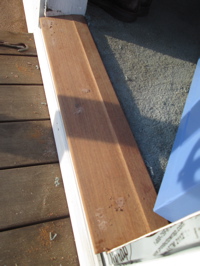
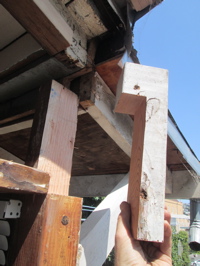
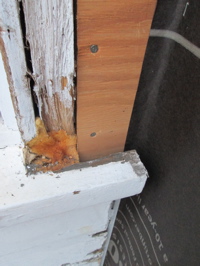
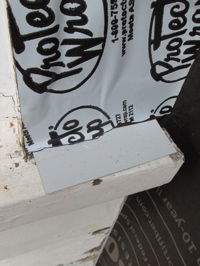
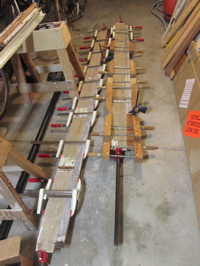
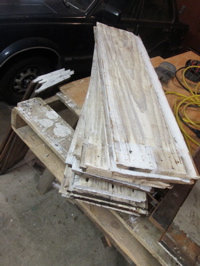
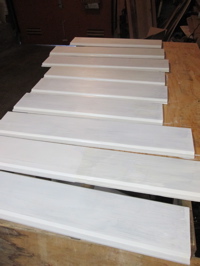
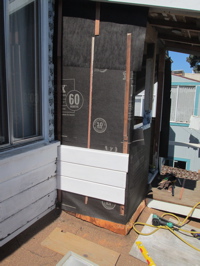
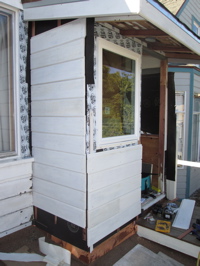
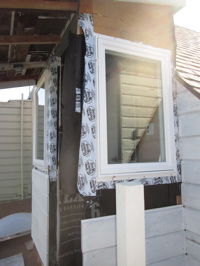
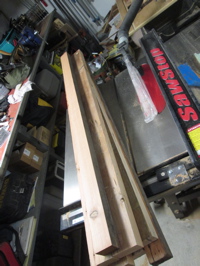
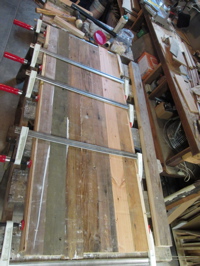
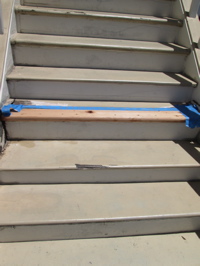
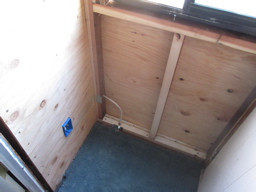
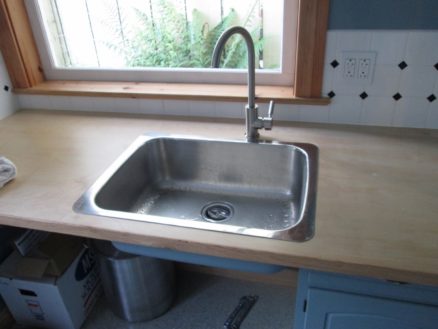
More recycled wood used on the window trim.

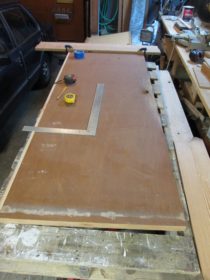
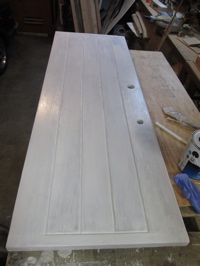
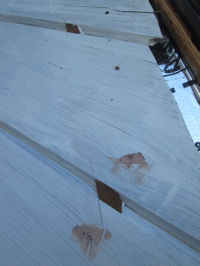
The only problem I had was I bought some different polyurethane by Minwax for the counter top and it’s garbage: It didn’t stick – and I only discovered it when I used tape to mask off the edges while I caulked the joint at the wall. The tape pulled the top layers of polyurethane off the wood! I had sanded between coats, even (and on the can it said that’s not required). Had to sand all the way down to the wood again to get rid of it. I’ll stick with Bona Mega from now on.

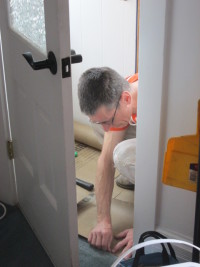
Arwen decided she needed to do some inspection when I was plumbing the sink faucet.


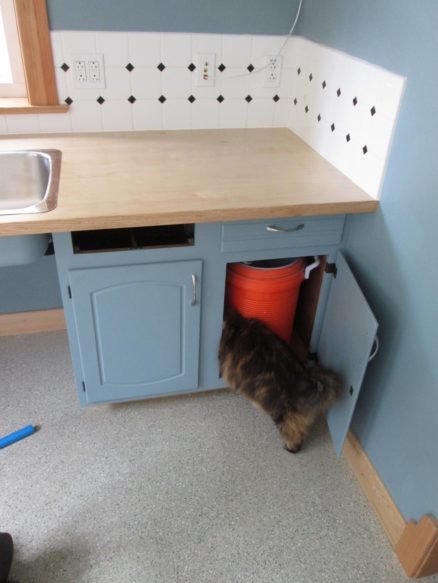
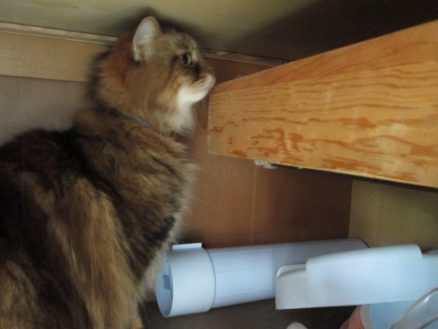
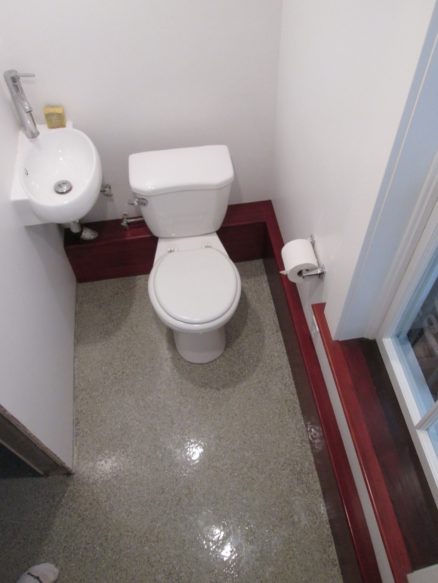
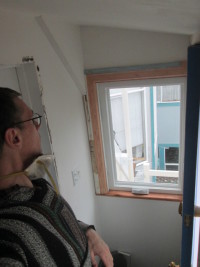
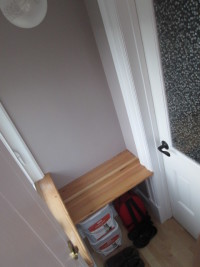
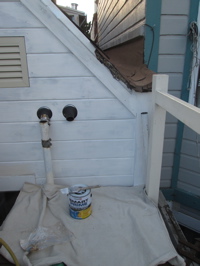
Here’s the faucet installed: I offset it to the right slightly, so it’s not in front of the window, and hopefully it makes the sink more convenient for cleaning the large 6.5 gallon carboys. It’s still the brewery room, right?

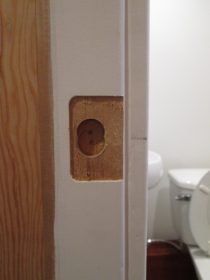
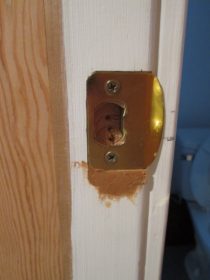
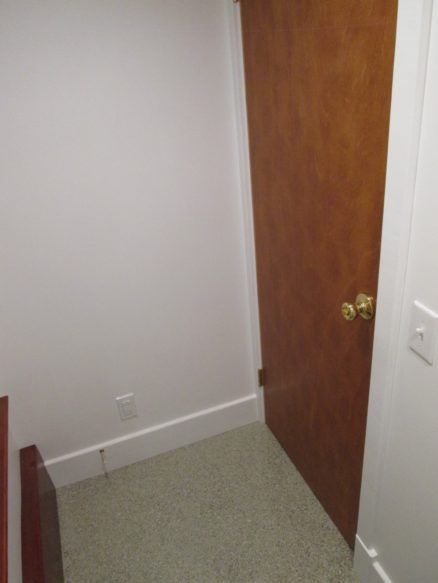
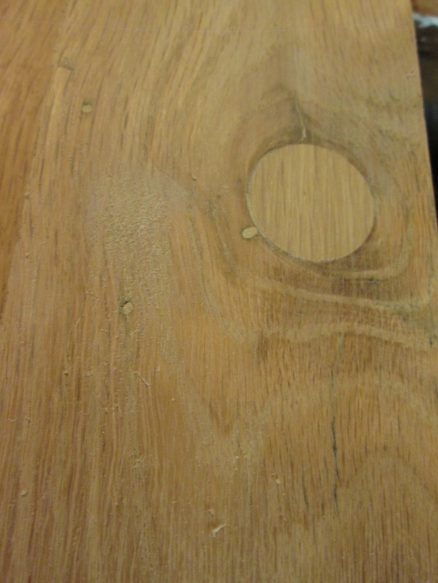
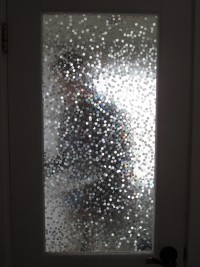
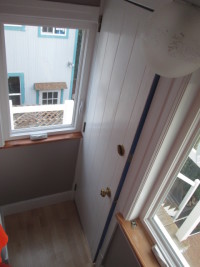
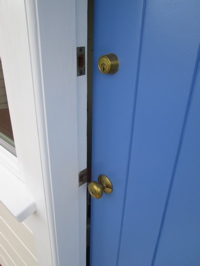
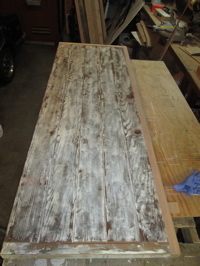
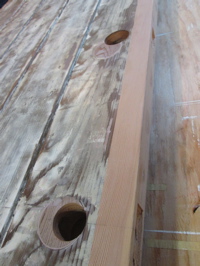
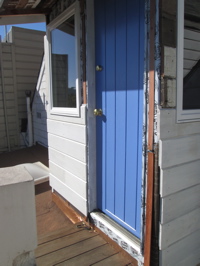
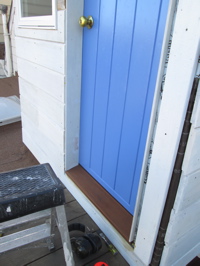
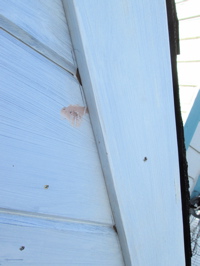
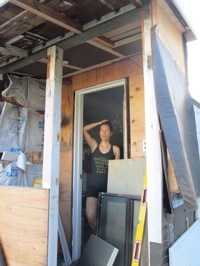
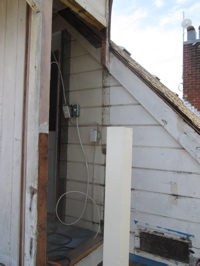
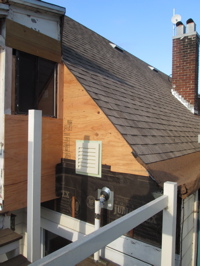
I also sanded, resized, and stained the old front door (that I’ve had leaning around in our garage for years) to close off the space from the garage. Had to also replace the acrylic glass windows because they were scratched and had been painted over.

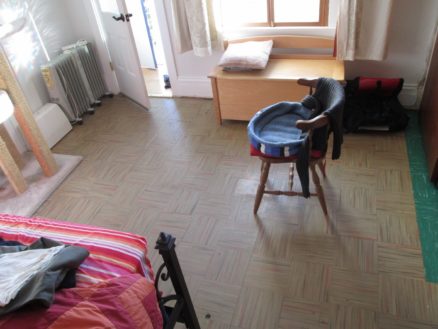
Popo left behind a daybed/couch and it has also been sitting in our garage for years. We bought a cheap mattress at Ikea and I put it into the garden room. That’s mole’s bike on the trainer.

… and mole testing it out while I made the living room upstairs stinky (more on that later).

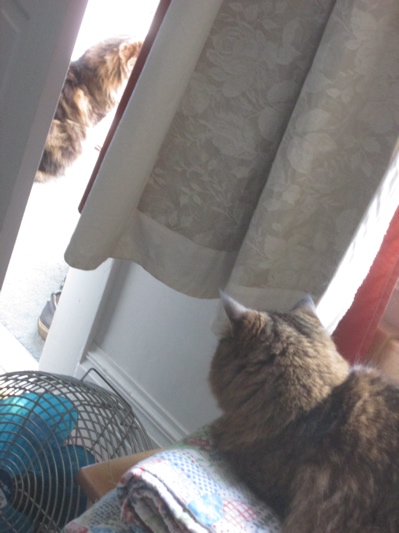
When I first started working on this space, I was thinking of it as potentially a cat-free space for visitors. Little did I realize, but when you live with cats, there’s no such thing as a “cat-free” space: They own the whole house.

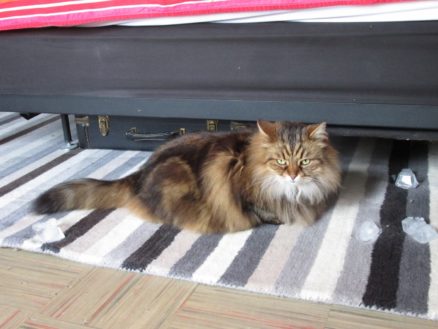
Here’s Arwen checking under the day-bed: She’s not happy until she’s checked every square inch.

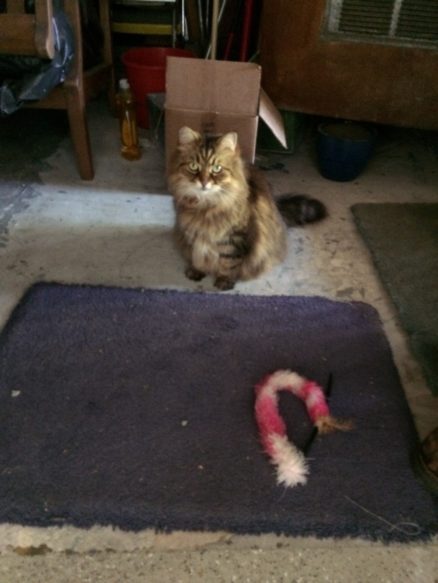
While mole was riding on the bike trainer, Arwen brought down her favorite wand toy for her.

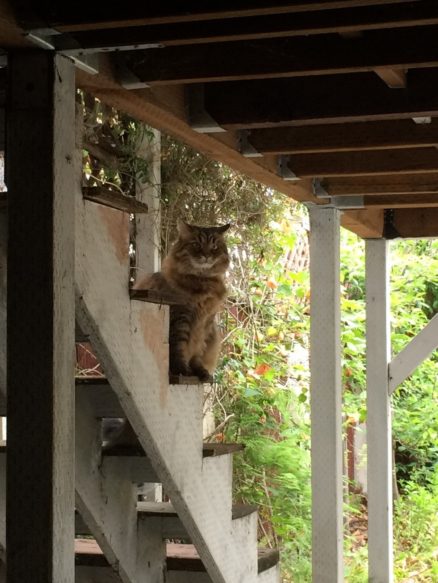
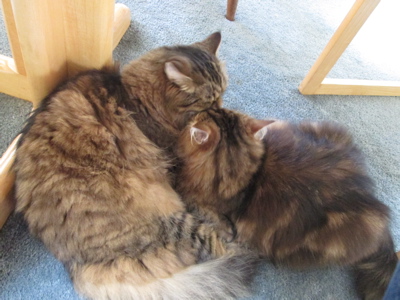
And Bella just waits patiently on the stairs.

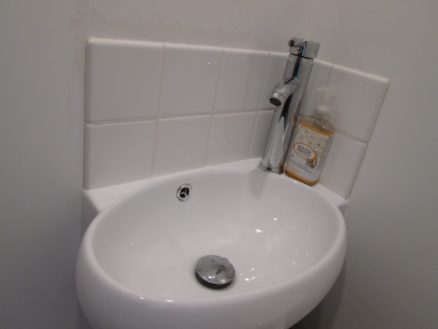
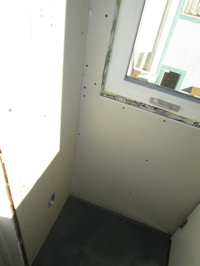
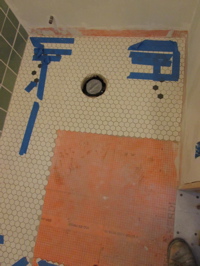
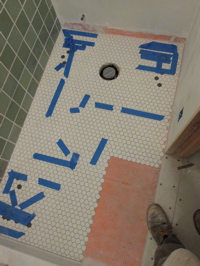
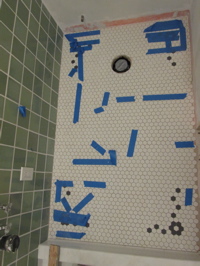
Oh, and here’s the sink in the toilet room, with the tile grouted and finished. Looks neat.

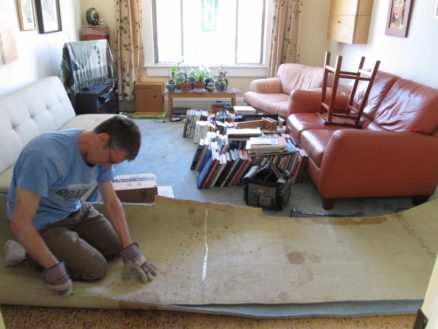
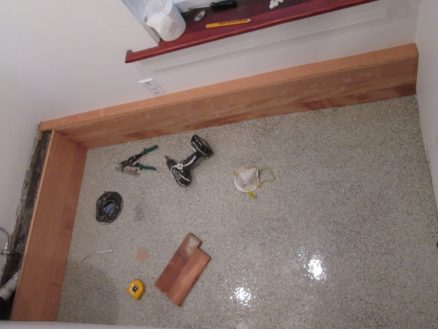
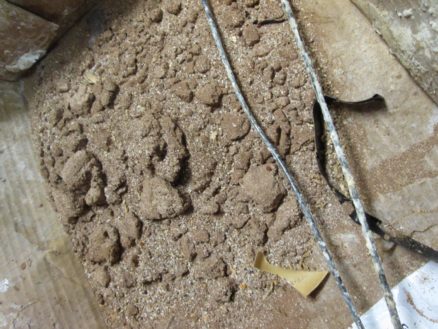
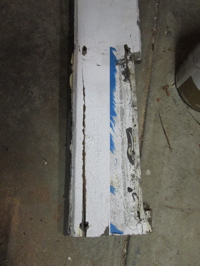
When we moved in (ten years ago!), our plan was to take out the carpets. But we’ve lived with them ever since. I recently decided to take them out: I’m convinced that all that wall-to-wall carpet is not good for air quality. As we took it out, we found that the underlayment had started to decompose, and left sticky red pieces all over the old floor surface, dropping them everywhere as I carried it out: Looked like dried cranberries, but definitely not as good. Lots of work scraping and scrubbing them off.

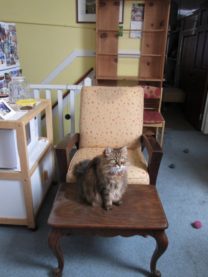
While tearing out the carpet, Arwen enjoyed the new furniture layout.

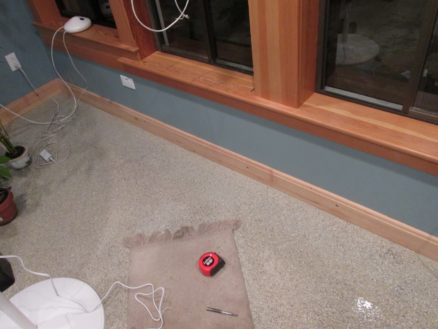
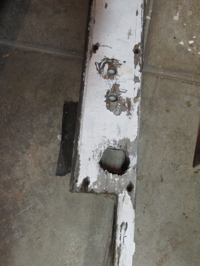
This is the old floor tile after we had removed all the old carpet and underlayment, pulled out the staples, scrubbed and cleaned it up and polished the tile. I damaged a lot of it back when I was working on the wiring for the lights downstairs.

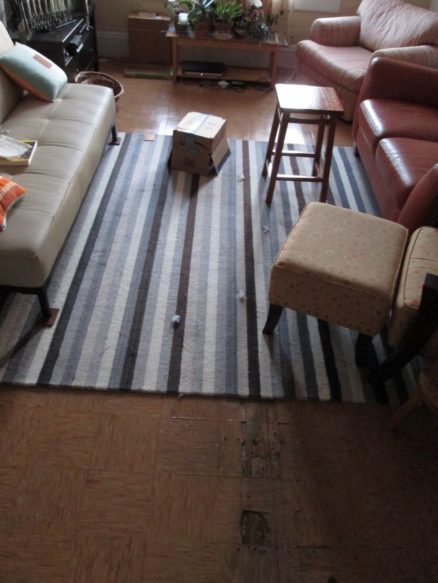
So we covered it up with a rug.

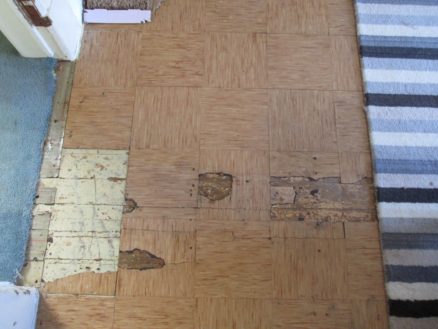
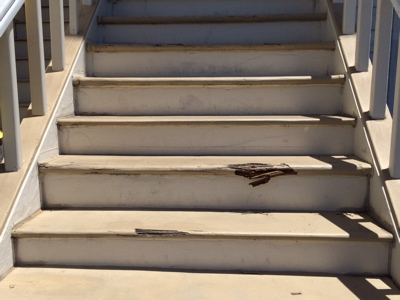
This bit was still exposed, though. And Bella did not like it: She started picking at it and broke off part of a tile.

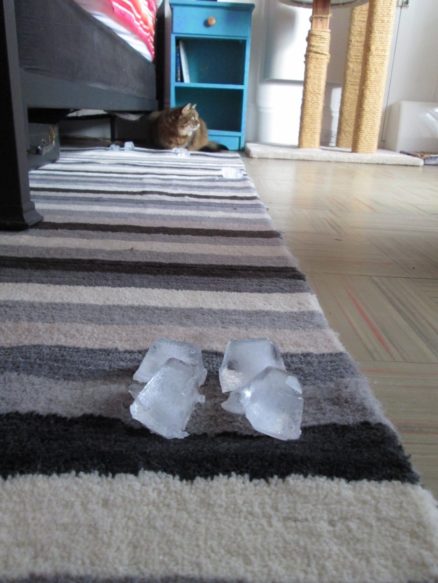
So I decided to replace the broken tiles with some cheap self-adhesive vinyl tile. It was a total pain getting the old tile off (had to use a heat gun). Yes, I’m certain this tile is “hot” (asbestos). Didn’t use protective gear: Hope I don’t regret it. Sometimes I’m just plain stupid lazy. Mole and the cats were downstairs hiding in the garden room.

Done (using the stool my godfather made for me as a weight to glue the corner of an old tile down).

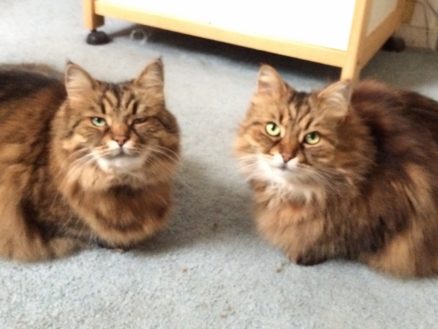
“FEED US! (We are only going to look cute for 30 seconds, then we’re going to melt down and start fighting)”

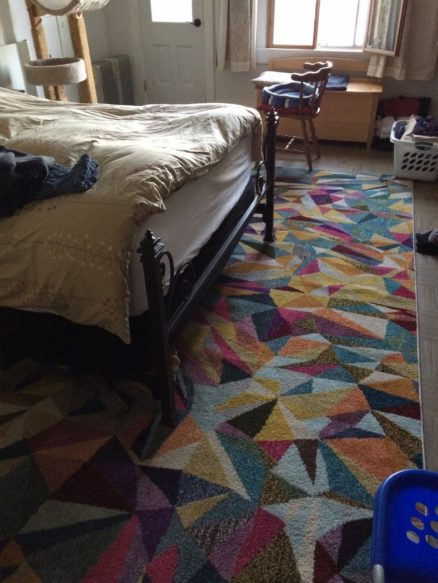
We got a new rug for the bedroom.
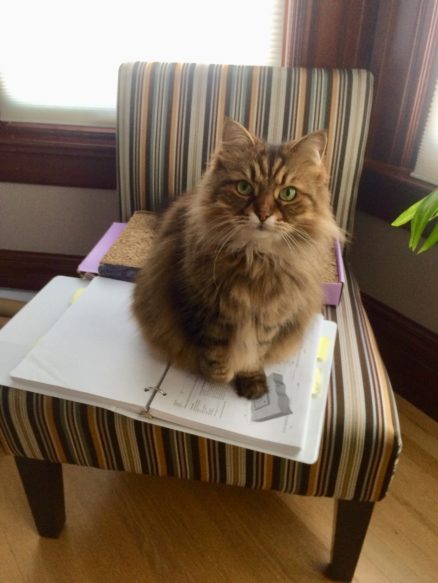
Arwen!

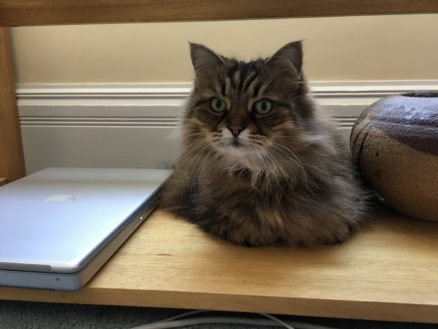
“Helping” with my calculations at the office.

“I’m going to take a nap here, OK?”

Prrrrr…..

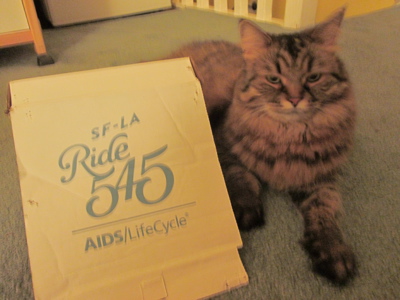
Bella loves this box. We stuck eyes on the box – it comes alive when Bella gets inside it. One lesson I learned the hard way: Don’t stand near it – claws will fly out of the corners and grab toes. The robot has lightning-fast reflexes even through its eyes usually get pulled off or rearranged.

The box robot lives!

Nap time.

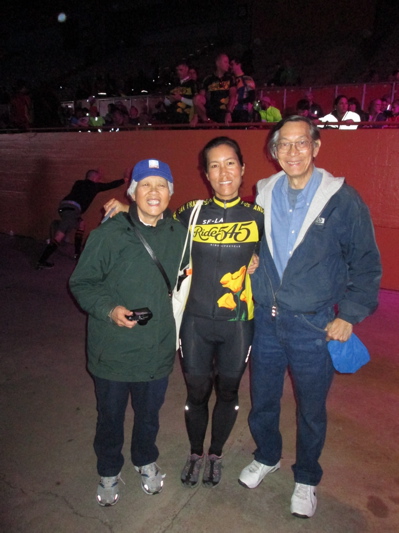
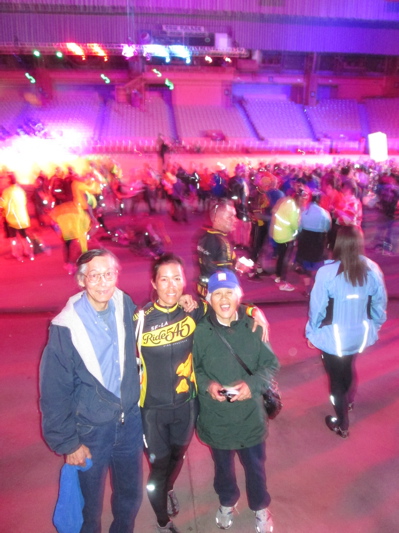
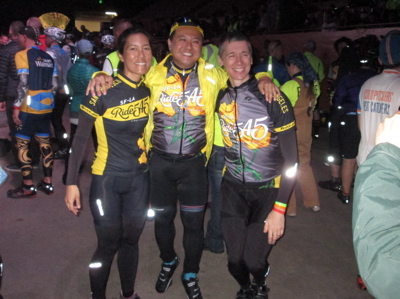
We volunteered for the AIDS/Lifecycle “day on the ride” in April: It’s a one day test ride for the people planning to do the week-long ride to LA in June. We’re not riding, so it was fun to dress up and help to staff rest stop one.

Smorgas-baseboards

Oy vey, so much miscellany: Baseboards, door, water heater, carpet…

But first things first: Kitteys! Synchronized sleeping anyone?

I still have quite a pile of old wood, so I’ve been planing and reusing it to make the molding in the garden room.

There is a stem wall that is wider than the walls above in the toilet room, so I boxed it in with wood. The wood in the toilet room is stained dark red-brown, so I also did that with the base boards.

Here it is ready for the toilet to go back in.

A fully functional toilet in the garage. Such luxury. Except there’s no door yet: Details.

I put a planter box outside the toilet room window, and planted a variety of plants that I think can handle the low light. We’ll see.

Another project that used quite a lot of old wood: I needed to make a table for the laundry room to fit next to the dryer.

Here’s all the wood, planed to width and ready to make into a table.

I glued boards together to make the top.

Here’s the top clamping together.

Here’s the base of the table.

I also made a drawer to go under the table.

This is the finished table.


Here it is, in the laundry room. Doesn’t look like old throwaway wood.

Back to the toilet room (what, you thought I was done already??)

For the rest of the baseboards and trim in the toilet room, I decided to just paint it white instead of deal with staining and polyurethane, etc.

Well, this was instructive: I did such a nice job of fitting the strike plate for the door (above left). Pity I measured wrong. Sadly, I measured wrong not once, but twice. As usual, I do everything three times.


Above right is the door that used to be on the toilet room upstairs. I tried to give it to building resources, but they wouldn’t take a hollow core door. I was planning to cut it up and throw it away, but I needed a door for the toilet room: So I sanded and stained it.

The picture above is after the remaining baseboards and trim were finished, and door is on the toilet room. Now it’s really a functional bathroom.

Recently, a friend mentioned that they had to have their water heater replaced because it leaked all over her garage. That reminded me: Most water heaters have an anode rod that must be replaced every few years to prevent the inside of the hot water tank from rusting. And I’ve never changed the anode rod on our water heater in the ten years (!) we’ve lived here. So I ordered one:

I also had to get a large socket to remove the old anode rod.

The old rod had completely been used up. Ooops. Well, I think most people don’t replace them, so they buy a whole new water heater more often. Hopefully this will make ours last a bit longer.

While draining the tank, lots of rusty sediment came out. Looks like the inside of the tank has been rusting.

Back to wood re-use: There were a couple of solid oak boards that I saved from the floor of the “tear off room” (remember that?) I planed them down to smooth wood, and cut a rabbet into them for trim around the door into the garden room.

There were some pretty large knot holes and rusty nail holes.

I’m getting quite good at making wood plugs to repair holes (above is a knot after it’s filled).

For the baseboards, I planed, glued, filled about 180 feet of old wood subfloor. I also routed an ogee into the top edge. Getting a bit carried away.

Here are a couple of the baseboards installed. It’s quite time consuming installing baseboards over this floor because the floor is so uneven. I have to place the baseboard into position, then mark the baseboard for the shape of the floor, cut along the baseboard with a band saw, and seal the wood before attaching it.

One additional wrinkle: In the garden room, there is a concrete stem wall behind the base boards, so I have to use concrete screws. To fill over the screw, I countersunk it, then filled with wood plugs made from the same wood as the baseboards.

Here is the hole in the baseboard before I’ve filled and sanded. You can see a completed plug at the bottom of the photo.

Upstairs in our bedroom, we still have the same wall to wall carpet that was in the house when we first bought it ten years ago. Mole has been having a lot of allergy issues lately, so I decided, on a Friday evening, to tear out the carpet in the bedroom.

It’s much easier if everything is moved out – but we just shuffled things around while I pulled up the carpet, cut it into manageable rolls, and dragged it out. The hard part, actually, is pulling out all the thousands of staples in the underlayment. I was done by midnight!

Here’s the room without blue carpet: There was tile under it: That will have to do for now with a rug.

We brought the rug into the bedroom from the living room. It had deep dents in it from the furniture: I read online that you can put ice cubes on the dents, then once they melt, fluff up the fibers. Not sure why the ice cubes, not just spray it with water — but I follow directions.

And the girls love ice cubes!

Finishing up the porch

Sooo, winter feels like it is over here in SF. We are getting our false February spring – temperatures are in the upper 60’s (Fahrenheit). And what has turtle been up to all winter? Finishing touches:

02-basecoat_2016021203-basecoat_20160212

Here’s the porch with the base coat of plaster on it. It went quite well once I remembered how to do it.

01-plasterer_2016021206-installingTrim

Here’s the best photo that could be taken of me doing the plastering in such a tiny space. The view is through the door into our bedroom. I really like the patterned film that we put onto the glass: it casts rainbows when the sun shines in. Above right is how it looked after the plastering, and while I was installing the trim around the window.

04-brokenHelmet_20160212

OK, so this winter, we actually got some rain. Great. Except none of us are used to it. I managed to crash on a slippery piece of “safety” plastic on the crosswalk. Broke my (brand new!) helmet, tore some holes in my clothes, but otherwise, just scratches.

05-jaFancyJersey08-floor

Above left, mole in her new long sleeved wool winter cycling jersey. Above right, I’m starting to install the flooring in the porch.

09-floor

10-floor11-floor

Here are some pics of the process… Looks a lot better!

14-paint13-paint

15-fancyEdge16-shelf

Painted and with a shelf installed. I made the shelf out of reclaimed wood, then shaped the edge so that it fit around the door moulding. A fancy cut. The shelf works perfectly so that while we have laundry hanging out, we can put the laundry basket on this shelf and there’s space to walk through. I also set it up high enough so that the spare cat litter and our emergency earthquake backpack fit below it.

17-shelfUse

I added some hooks on the under side of the shelf, so that we can hang the clothes pins and the emergency backpack, so the shoes can go under them on the floor. And (!) there’s also a pole to hang clothes when we need to bring them in if it starts raining. A very space efficient 3ftx5ft space.

Paint!

The best part: Paint! After all the work rebuilding and doing prep, painting goes very quickly.

02-trimDone_2015112204-trimDone_20151122

Here’s the porch with all the trim on. It turns various shades of pink as the redwood turns the color of the primer. Hopefully the paint companies are honest (that two coats of primer will cover it), because California has banned the oil-based primers that really covered the redwood tannins well (air pollution, apparently).

06-insulation_2015112208-insulation_20151122

05-insulation_2015112207-insulation_20151122

So, we did actually get some rain. On that weekend, I worked on putting insulation in the walls, and putting up gypsum board on the walls.

12-Gypsumed_2015112211-Gypsumed_20151122

10-Gypsumed_2015112203-beadBd_20151122

The strange triangular bit is where the porch sticks up above the roof outside. The wall is really thin there – just the thickness of a piece of plywood – so I couldn’t screw the board on: I used glue. Hopefully it will hold.

Also, it’s rather tricky working in such a small space with sheets of gyp board. Sometimes I’d get the board in, also go in there to screw it on, and close the door to get at the wall, but depending on angles and the size of the board, could only manage two of the three. I got it done, though, and the sun came out. Above right is a closeup of the eave with all the bead-board installed, and the nail holes filled.

13-doublecat_20151122

Arwen is still more adventurous than Bella. Arwen will go sit on the porch, and Bella will wait just inside, watching Arwen. What’s she thinking?

“I’ll just wait here, so if something scary happens, it will happen to Arwen first.”

or

“‘Curiosity killed the cat.’ Good thing I’m more cautious than curious.”

or

“I’m gonna jump her when she comes back through the door.”

15-primed_2015112214-primed_20151122

Here’s the porch will a second coat of primer on everything. All holes filled. Ready for paint.

16-jaPainter_20151122

Janeen helped with the painting. Actually, she did most of it.

17-paintingDone_20151122

Done. Difficult to see in this photo, but we painted the eave the same pale blue that we used on the laundry room (apparently it discourages wasps from nesting).

18-todo_2015112219-blueDoor_20151122

Above right: The blue door has grown on me; I really like it now.

Above left: Next I’ve got to deal with the rest of this back wall…

Starting to come together

The siding is all on, and now the trim is going on. It’s all starting to look much better.

01-DoorStripped_2015101802-DoorHandles_20151018

The old back door was a peeling mess. It was also too short, and wasn’t square. Oh, and it was starting to come apart, too. So why did I save it? Not sure – but I did. Above left after I’d stripped off all the paint, and added pieces of wood at the side, top and bottom to make the door the correct size. I also glued it back together. This door was actually a home-made door by one of the previous owners, probably. Above right, I had to fill in the old holes for the door handle and lock, and re-drill because the door changed size.

03-DoorBevels_20151018

They made the door by building a frame, attaching a veneer plywood on the inside, and vertical redwood v-groove siding on the exterior. When I extended the top and bottom of the door, I used a solid piece of wood the full thickness of the door. To match the old v-grooves, I added a horizontal groove at the joint: If you can’t hide it, make a feature out of it!

05-LunarEclipse_20151018

Here’s an 8 second photo of the lunar eclipse from our back porch…

04-DoorPrimed_2015101806-BrokenTree_20151018

Above left, here’s the door after priming. Above right: Someone climbed over our fence and landed on our peach tree. It got completely broken. There is a small limb left, but it was the one that grew towards the fence, so it’s not looking promising for this tree. The main trunk got broken off by the clumsy oaf. This happened in the middle of the morning, yet we didn’t see anyone, and because there’s construction across the street, we didn’t hear anything either. Sad.

07-BellaALC_20151018

We got our welcome packets for AIDS/Lifecycle 2016! Bella loves the boxes.

08-PaintedDoor_2015101809-FinishingSiding_20151018

Here’s the door painted. Janeen picked out the paint color, but the paint store didn’t mix it quite right (she picked a slightly greyer blue). Above right, finishing up the siding. The old pieces on the left are just serving as spacers – they will be covered by the trim that goes around the window.

10-Siding1_2015101811-Siding2_20151018

I ran out of the original siding. The lumber yard sells v-groove siding, but it’s thinner, and doesn’t have quite the same vertical dimension as the siding on the house. So I had to make some more (or buy some custom-milled). Besides, I have loads of wood sitting around that I need to use up.

Above left, first I glued pieces of redwood or cedar together to make boards of the right width. Then I beveled one edge on the table saw (above right).

12-Siding3_20151018 13-Siding4_20151018

Then I have to make the tongue side, with the bevel, so first I cut the bevel (above left). Then I stand the board up on end, and cut out the wood in front of the tongue (above right).

14-Siding5_2015101816-Siding7_20151018

Above left shows the tongue side done. I used a similar process to make the lap side. Above right I’m test-fitting the newly made v-groove siding.

18-DoorSillClamping_2015101819-DoorSill2_20151018

I made a sill for the door. I used the same Ipe wood that the deck is made from. Above left, I’m not going to drag you through the whole process, but I had to make it a bit wider, so here’s clamping another piece on the front edge. I used polyurethane glue, which bubbles up and makes quite a mess while curing (above right after it’s cured).

19-DoorSillInstall_2015101820-DoorSillInstalled_20151018

Here’s the door sill installed. Starting to look good.

22-SidingGrooves_20151018 23-TrimOn_20151018

Whenever a piece of trim is installed on v-groove siding, there will be holes left that need to be filled with small v-shaped pieces of wood (otherwise insects use them as nesting places).

24-Priming_2015101821-StartingBead_20151018

Ahh, finally I have the siding finished at this location. Primed, and ready for the final coat. Above right, I’m starting to put the bead-board on the eve. More on that later!

Finishing the Weatherproofing

With stories of an ‘El Niño’ year abounding (maybe it’s wishful thinking), I’ve been working on finishing the weatherproofing at the back of the house. The back porch has always been a problem: It was built in stages, in the most expeditious way possible at the time. First, I think it was an open porch, with a roof covering. Then it got closed in, maybe windows added at that time. Then the roof was extended out a bit to provide cover over the new back door. But none of it was actually built with any type of water resistant membrane. It was initially just a semi-outdoor porch that became closed in. The wood framing, with lots of caulk, was directly exposed to the weather. So it leaked, paint pealed, rotted.
01-oldSiding_2015092402-noWall_20150924

Above left is the opposite side that I’d started working on in my last post. The corner where the porch wall meets the building back wall is where the main problem is. Water gets in there, and rots even the redwood. Then it gets down into the roof below. So off with the wall! (above right)

03-bareStuds_2015092404-flashing_20150924

I took off all the siding at the side of the window, and cut the siding below the window back from the edge of the porch wall. Above right, I’ve put in a bent piece of metal that laps behind the siding, and will go over my new tar paper.

05-plywood_2015092407-cornerPostExtension_20150924

I’ve put plywood on the part of the wall that will be inside the porch. Above right: Not sure why, but the corner posts holding up this roof are all about 3 inches short – so I had to fashion some extensions that I glued and screwed in place.
06-newWall_2015092410-morePlywood_20150924

Then it’s back on with the wall, and new plywood.

09-electrical_2015092408-electrical_20150924

Meanwhile, I also put the wiring in for the light in the porch. It’s not working yet (needs to be connected to power), but it’s easier to pull the wires before all the wall finishes are back on.

12-deRoof_2015092412-overhang_20150924

The roof extension that had been added was strange, because it stepped down from the other roof – a bit like an eyebrow. It was pretty badly rotten, so off with it! Above right I’m starting to add back in the framing, this time flush with the roof. I saved the roofing, so it was flopping around while I was working. In retrospect, I think I should have just torn the roof off completely. Faster, and the end result would have been better.

14-overhang_2015092415-kitchenView_20150924

Above left is the view from the other side, and above right is the view from the kitchen, while I’m working on it!

16-arwen_2015092417-arwen_20150924

Arwen came outside to check up on me, but decided something down in the garden was much more interesting.

18-bella_2015092420-fascia_20150924

Above left: Bella wondering why I’d left the drill there. Above right, I made new fascia boards, and routed a quarter round at the bottom edge, but still need to finish the corner (by hand so that the patterns match around the corner).

22-fascia_2015092423-roofDone_20150924

This is how the new roof looks.

24-roofRepairs_2015092421-ventilation_20150924

Above left: the reason I was saying I should have just replaced the roofing. You can see it ended up being a lot of joins and patches, so it won’t be as reliable as if I’d just replaced it. Oh well – I can never predict if I should just keep what’s there, or tear it all apart and rebuild. Sometimes the latter feels like a massively expanded project, but I often regret not doing it. Above right, the white pieces of wood with the two half-round cut-outs is blocking that goes between the rafters. The cutouts are to allow ventilation above the insulation. Because the rafters are so small, I’ll use rigid insulation. You can also see the back door: it was fit in with a whole bunch of pieces of tapered wood, so that I always had to duck to go through this door.

31-whatHappened_2015092432-wheresArwen_20150924

So of course, I tore it all out. Mole: “What happened to the wall?” Above right: Where’s Arwen?

27-waterproofing_2015092428-oldRot_20150924

Here I’m starting to put the tar paper on. Above right, this is the rotten area that we ran into the first year we had the house. The orange is the expanding spray foam that I used to fill in where I’d cut out rotten wood. I’ll have to get back to this one day…

29-rainReady_2015092430-oldRotCover_20150924

Above left: All tar papered in. We had our first rain forecast for half a year, so I had to get it water tight. Above right, I covered the rotted area with sheet metal, and flashed over it with self adhesive window flashing.

25-sidingFactory_2015092426-sidingFactory_20150924

Back to the siding factory: I had lots of pieces of wood siding, but much of it was damaged, or the pattern did not match the house. I stripped the pealing paint off it all, then joined all the short pieces to make longer pieces. I also cut and shaped the profile of it all to match the siding on the rest of the house (it’s an unusual size that I’d have to get custom made).

33-sidingFactory_2015092434-finallySiding_20150924

It doesn’t look like much, but those few boards are a huge amount of work.

36-sidingOn_2015092437-newWindow_20150924

Oh, and while I was at it, I got some new windows to replace the aluminum single pane windows.

Brewing, Tiling, Riding, Waterproofing, Siding…

Wow time goes by quickly. Well, I’ve actually done something in the last few months. And here’s some of it:

01-cider_2015082002-FloorTile_20150820

03-FloorTile_2015082003-FloorTileDone_20150820

I bought a jug of apple juice at the farmer’s market, added some yeast & a bubbler: Cider! Much easier than brewing beer. I finished laying the tile in the laundry room bathroom, but am going to wait on grouting it until I’ve also tiled the laundry room.

05-JJJ_20150820

And of course, we rode AIDS/Lifecycle together this year. Here’s a picture from the opening ceremony.

06-JJJ_20150820

Here’s me trying to capture the party atmosphere in the Cow Palace…

07-withAlex

A photo with our friend Alex who rode one day, but work stopped him from doing the whole week.

08-frontStepsBefore_20150820

Well, these front steps have been an ongoing project. Seems I have to fix them every year. The temporary fixes from past years finally gave out. The photo shows how the front of two steps broke off completely. There is also another problem with these steps: The height between steps varies too much for code compliance, so it was high time I did something about it.

10-cuttingBoards_2015082011-glueingBoards_20150820

The reason the step heights vary so much is originally they were built with thick boards. Then (before we got the house), some repairs were done with thinner wood. To fix this, I had to make new steps out of thicker wood. I re-used some old wood that I still have in the garage. Lots of planing, gluing and clamping to make boards that are wide enough for the steps.

09-frontSteps_2015082013-frontStepsDone_20150820

I forgot to take photos while I was working on it. There’s one photo where I’ve replaced part of one step. I also replaced the step below it. The one below that was concrete, but it had a piece of wood glued on top. This made the step heights very uneven, so I took the wood off: The reason they’d glued the wood on top was the concrete underneath was cracked and uneven. So I had to repair the concrete, also. Above right is after I’ve repaired the bottom five steps. Looking further up, you can see that some of the upper steps are also uneven and need to be fixed: Next year!

12-sleepingKitties_20150820

OK, to head off the ‘no cat photos’ complaint: I think Bella was sleeping under the table, and Arwen (love-bug) decided she needed some cuddling. They were actually sleeping like this for a while.

14-BackWallbefore_2015082015-demolition_20150820

One other project that I got partially finished with, but stopped because of ALC and life, was the siding and waterproofing on the back. In the photo above left, you can see where I left things for the past two years. The building paper is exposed (getting damaged by the sun), and I’ve “sealed” the top with some blue tape. Above right, I’ve taken out the wall of the back porch, so that I can take out the siding boards and re-use them. Clearly the rear porch was not part of the original building construction.

16-wallOpen_2015082017-wallOpen_20150820

Here’s all the siding removed. The wiring for the porch lights is hanging loose, and you can see in under the roof.

18-plywoodStarted_2015082019-plywoodStarted_20150820

Here I’m getting plywood on. It’s a bit complicated because the drain for the kitchen sink goes through this wall. Luckily (for the house) we’ve had very little rain for the past few years. But there’s predictions of ‘el niño’ this year: hopefully lots of rain. But I have to get this properly waterproofed and finished first.

20-wallIn_2015082021-wallIn_20150820

Here I’ve added the porch wall back in. Wiring is now much neater.

23-oldBoards_2015082024-oldBoards_20150820

The siding was is very poor shape. Lots of holes cut for various plumbing iterations over the life of the house. But the wood, once the peeling paint is removed, is still good. Thousand-year-old redwood is too good to waste. So I carefully repaired all the boards.

25-repairingBoards_2015082026-readyForPrimer_20150820

Here are the same two boards after I’ve glued in pieces to repair them, and sanded ready for primer.

One Weekend of Work22-startWP_20150820

The photo above left is titled “One Weekend of Work”: Repairing and re-using the old siding takes masses of time. Six boards in two days: Not the sort of thing a contractor would do. Above right, I’m getting the building paper on, and waterproofing around the drain pipes. I also got a new wall vent for the attic space.

28-partWay_2015082029-halfWayUp_20150820

Here are photos of the process of putting the siding back on. Cutting around the pipe penetrations is tricky.

34-moreSiding_2015082030-underPorch_20150820

And here’s where I’ve got to. I’ve ordered new windows for the porch, so can’t go much further here until they arrive. Above right is a view under the porch.

31-underPorchInsul_2015082032-underPorchBoards_20150820

Here I’ve added insulation, and installed wood to cover it. This is re-used wood left over from the laundry room wainscot. It still needs some trim around the edges and paint, but looks much better – and the porch will be more insulated now.

Gold Numbers

We’ve been procrastinating on the transom house numbers for a few years. It’s intimidating doing sign painting. Finally, I got around to doing it.

Mole made a template printed on paper, with the numbers reversed. She just printed the black outline and shadow. I’ll be painting the black outline and shadow on the glass first, then filling it in with real gold leaf.

After thoroughly cleaning the transom glass, I aligned and taped the paper template to the outside of the glass. The numbers are going to be painted on the inside, so I can look through the glass and paint over the black areas. Using ‘One Shot’ sign painter’s paint, I painted the number outlines on the inside of the glass.

There was quite a bit of involvement by our usual inspectors. Arwen couldn’t resist climbing the ladder to get a closer look.

There are two things that make this painting difficult. Firstly, painting is a skill that I’ve never practiced. A paintbrush is much more difficult to control than a pen or a pencil. I kept misjudging how close the glass was, and making a mess. It’s really difficult to paint a smooth, straight line. Secondly, the glass is about 1/8″ thick, so I had to look perpendicular to the glass at the outline drawing on the outside, or the lines would be offset slightly.

A few hours later, I was done with the outline. Next time, I’d make a template with just thin lines for the edges, and paint up to those, or use a color for the template. It was hard to see whether I’d painted, or it was the template, because it was black on black.

I let the paint dry for a few days, then on to the next step.

To get the gold leaf to stick, I painted gilder’s size onto the inside of the glass inside the black outline that I’d already painted. The size has to dry before the gold leaf is applied. The mistake I made, is that you only need a very thin coat of size. I painted it on too thickly, so the size wasn’t uniform and perfectly clear. Oh well, it looks a bit more aged… Then, once the size had dried, carefully, I placed gold leaf onto the numbers. Lesson here: whole sheets are better than pieces. At first I was tearing the sheets, and trying to lay them over only the number. The problem is that at the joins, there is sometimes a gap. Also, the leaf breaks whenever there’s any wrinkle in it, so it makes another gap.

I gently rubbed the gold leaf to burnish it flat, and the leaf that did not have size behind it rubbed off.

Ta-da! Our transom number completed. It looks fine from a distance. Up close, you can see my slightly jagged painting: Mole will be doing the other one, because she’s much better with a paint brush.

turtle work/play

people are always telling mathew to take a break from working on the house. this frustrates mathew, because to him it isn’t work, it’s FUN. he’d rather work on the house than relax, socialize or even eat or sleep.

(left) pieces of wood recycled to make trim for the cabinet. mathew cut then routed them, sanded, stained and polyurethaned them to match. (right) here he’s trimming out a complicated notch so the trim can fit around the picture rail (see below right.)

now that my grandmother has moved out we need to make some changes to the downstairs unit to make it rent-able for someone new. this includes adding a new lockable door (recycled from upstairs) leading from the entrance. mathew cut out the top half and will add tempered glass to let light through.

during one of the heat waves we had recently, mathew realized the skylight installed by ‘professionals’ was still not done correctly. part of the flashing was getting in the way and bending the metal of the skylight making it impossible to close. mathew got his ladder, tools and flashlight and was determined to fix it. this is what happens after 11pm at our house, when most people are sleeping…

mathew doing a load test on the cabinets!

last weekend mathew and i started adding crown molding to the office. i’m realizing these aren’t the best photos to show what’s happening… but the main molding is like a “C” shape, called cove, and when two pieces join in the corners you have to cut the second piece at an angle then cut and file the backside so that they fit together perfectly at the corner. it’s quite complicated but of course mathew knows what he’s doing. there will be a second smaller piece of molding that will go above the cove molding next to the ceiling. and eventually it will be painted white.

it was a 3 day weekend so the other days were spent prepping for the new center window which we finally received. mathew used a heat gun to remove old paint from frame. and there was a weird bump of old wood on the sill so mathew planed it off…

…then chiseled it out and added a new piece which will match the new stained sill.

(left) late on monday night as the sun went down, we got the new window in! (right) and then wednesday we received a delivery in a wooden crate that managed to scratch the floor in the entry really badly. i know these delivery guys are always trying to be helpful but no one seems to realize how damaging it is to drop a heavy box on a wood floor then push or drag it! i was pretty upset about this all day but mathew says he can probably fix it.

the windows are finally in!

SuperTurtle!

as active as our social lives have become, mathew still manages to get A LOT done on the house. i’m just a little slow at posting. maybe we should change the blog to “SuperTurtle+snail”…

on a warm morning i helped mathew with masking of the wood trim using paper, tape and plastic.

the room ready for painting. after all the masking was done i think it took mathew about 30 minutes to paint with the electric paint sprayer and about 3 hours to clean the silly machine.

now with the primer on the walls we were ready to start trying out colors. since this will be my office mathew wanted to paint it my favorite color, a medium blue-purple which i often call “blurple.” the large swatch proved to be too much for the entire room. (the colors are not showing up correctly in these photographs, it’s a fairly bright periwinkle but my photos look more like a medium cornflower…)

we decided to choose a warm ‘elephant grey’ for the room and the ‘blurple’ for two accent walls, where my desk will go and above the mantle.

i’m not sure if i even like this… i find it ironic that friends ‘hire’ me to choose colors for their homes and businesses but i can’t even choose colors for myself!

the skylight saga continues..! so you may remember back in april we hired roofers to re-do our roof and put in a new skylight. they completed the roof but completely messed up in installing the skylight, they even threw out installation parts! so two months later, after the drama of not being able to replace the parts, they returned to finish the job. just to make sure things were done correctly, mathew took the morning off work to supervise and even help with some of the work. i think they found him helpful, he thinks they found him annoying. (above) here he is happy that it’s finally done and making some adjustments to things that were still done incorrectly.

later that day he came home from work excited to finish the interior details of the skylight. (above left) cutting and installing gypboard to fit the curves above and below the skylight. (above right) not sure if you can see, but our friend mike is here visiting and mathew is STILL working.

after a late night and a fairly early morning, mike heads off to watch the world cup with their mutual friends while mathew stays to complete the skylight. (left) he bought this rigid plastic corner reinforcement and is cutting it to fit curves.

(left) installing the corner reinforcement. (right) applying plaster.

the skylight after a few coats of plaster. it still needs sanding and painting but it looks pretty amazing and very professional.

here’s the finished skylight after more plaster, sanding and paint.

mathew is very happy with how this turned out. he likes the modern, contrasting curves of the ceiling, sloping wall and skylight opening. i love that this project is where we have all of our meals so mathew can sit and enjoy his work every day. (above left to right) top and bottom details.

but wait there’s more!

mathew ordered new wood windows for my office. they are double paned, argon filled with a low-e coating. this means they are going to insulate against heat, cold, sound (neighbors!), and protect against the sun fading things when the sun streams in in the afternoons. it also means they’re expensive! (left) here mathew is fitting the top piece into the left window frame. (right) because this house is old and has done some settling, the windows aren’t totally square. here mathew is down in the garage planing the lower piece to fit.

after all the side windows have been adjusted to fit and sanded until incredibly smooth…

(left) staining and polyurethaning of the insides happens, (right) and priming the outsides after that.

unfortunately there was a mistake in the ordering of the larger middle window, the lower piece was made with only a single pane of glass, so that window will have to wait. these windows are custom built and may take another two months to receive the correct window… no worries, there’s always other stuff to work on!