Real Pros

When I went to buy roofing materials, the person at Western Gravel & Roofing Supply talked me into hiring a contractor: He was afraid I’d burn down my house with the torch (!) and recommended a contractor who happened to be in line.

What a contrast to the last roofers we hired. These guys were awesome!
01-roof_2013071002-roof_20130710

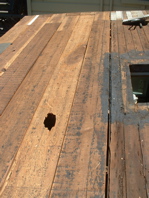
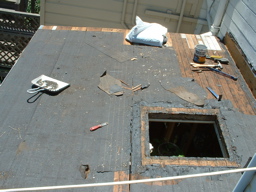
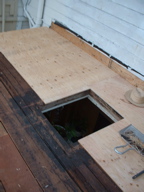
I did the prep work before the contractor arrived. I forgot to take a photo before I started ripping off the old roof. Above right the photo shows where my foot went through the old rotten wood!
03-rotten_2013071004-plywood_20130710

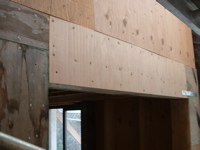
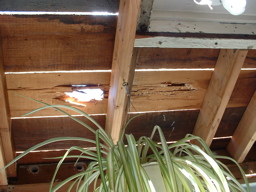
Above left is the view from below. That piece of wood had to be replaced. One top of the old wood, I installed plywood. This is both to provide better earthquake resistance, and to span over weak old wood.
05-insulation_2013071006-thePros_20130710

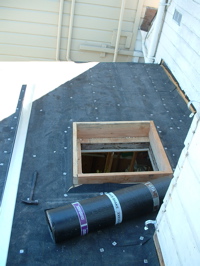
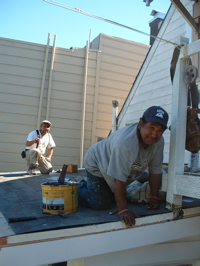
Now the pros showed up. Actually, they told me they’d arrive at 3pm, so I thought I had time to finish the prep before they got here. They arrived three hours early. So they helped me install the insulation for free (I added 2″ of rigid insulation on top of the roof). Above right, Enrique and his assistant smile for the camera.
07-torch_20130710

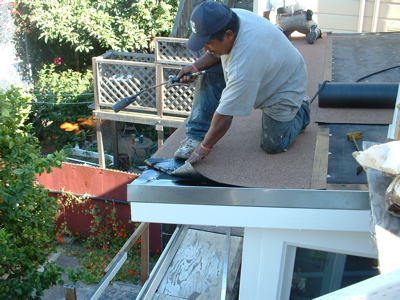
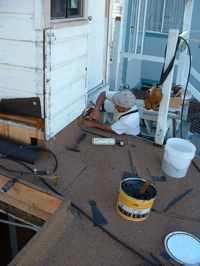
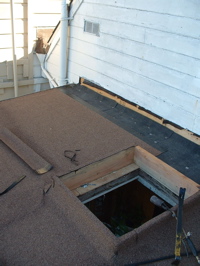
This is the reason the roofing supply salesperson didn’t want me doing the roofing myself: Notice the 18″ long flame coming out of the torch? This is on low. Here, Enrique is melting the back of the modified bitumen roofing, so that it seals down to the roof. Each strip is melted to the previous strip to make a continuous membrane over the roof.
08-corners_2013071009-almost_20130710

Ironically, after watching the roofers, I realized that fitting the roofing around and over all the tricky corners was where their skill and experience really helped. It would have taken me weeks to do this, and it probably wouldn’t have been done as well in the end. Pick your battles!
10-finishing_2013071011-done_20130710

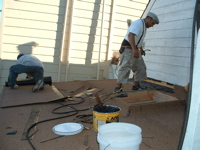
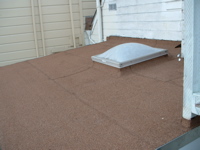
One more photo as they finished up, and here it is done. Beautiful, eh? I managed to salvage the old skylight; took some serious chipping and heat-gun action to get it off the old curb. I’ll probably replace it one day, but for now, it’s fine.
12-gutter_2013071013-garden_20130710

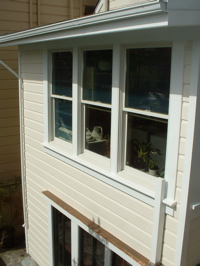
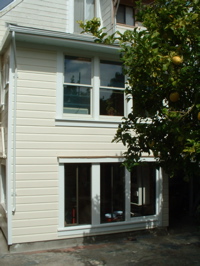
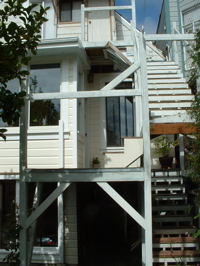
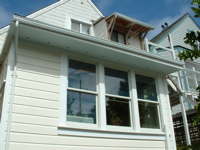
So now we’re done with the outside of the laundry room. All I had to do after they finished the roof is to put the gutter on and paint it. Here’s photos with the scaffolding down.
14-todo_2013071015-closeup_2013071016-closeup_20130710

Now I can start working on the inside without worrying that it will get ruined by rain. Sometimes, it really is worth getting the pros.
Bigfoot

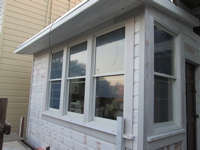
We have been slowly progressing with finishing the trim around the windows of the laundry room and garden room.

02-upperWindows_2013042903-shortTrim_20130429

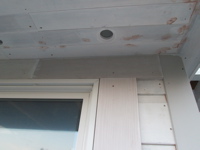
I spent almost all day getting the trim to fit in above the windows, and tight against the soffit. Had to splice on a piece at the end, because the board wasn’t quite long enough (above right). But that’s nothing: When I bought the redwood, I got tempted by the slightly cheaper, rough-sawn redwood planks intended for fences. We had to plane and sand and prime them all before putting them up. Silly Turtle – no wonder it takes so long! Now that all the trim is on around the windows, though, it’s starting to look finished.

04-lowerWindowHead_2013042905-routedEdge

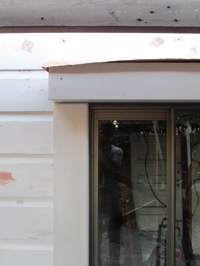
This (above left) is the window under the laundry room (‘garden room’). We built out a small box head above the window to shade and protect the windows from rain. Turtle being turtle, I couldn’t resist getting my router out and adding a bit of decorative edge (above right) to the trim. It also serves a purpose: Rounded edges don’t show dents, and they hold paint better than sharp corners.

07-overall_2013042908-corner_20130429

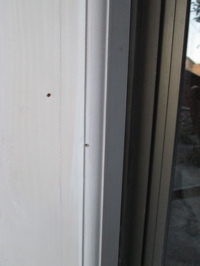
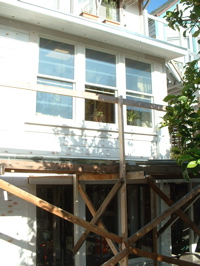
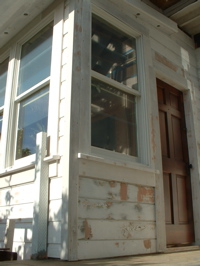
The photo above left shows the back wall of the laundry room — a bit difficult to see, as my home-built scaffolding is in the way. Above right is the corner that faces the deck. So, this is quite exciting (for me): All the exterior trim and siding are installed on the laundry room. Now we need to fill all the holes, sand, and paint.

While we were working on the laundry room trim, the cats sometimes came out to play. All the flowers have been blooming in the back yard, and the bees are loving it. Unfortunately, Bella doesn’t know the difference between a fly and a bee…
01-bigfoot_20130429
She decided to catch a bee, and when she slapped it down on the ground, she got stung. Mole was calling her ‘bigfoot’ for the rest of the day…

R2D2 D:<

It’s been a big family visit month.

My sister Eva had her wedding (again), but this time, in Santa Cruz. My whole family came to visit, including my sister Mia all the way from Asia, and Mum, my aunt and cousin from England, my brother and Aja from Brooklyn… Nice to see everyone, now back to the grind: didn’t get much done on the house…

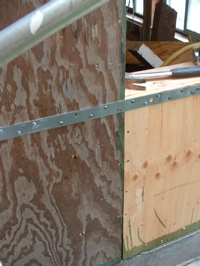
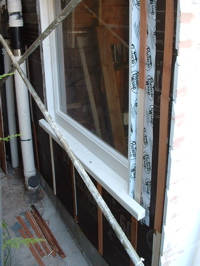
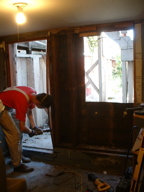
It’s been one wall at a time on the laundry room. This is the lower half of the last wall. Above left, you see the window opening in this wall, and above right, some nice strapping around this window. Although the code doesn’t require it, I decided to paint the edges of the plywood with wood preservative, just in case. That bottom edge is so important for seismic, but is also in the most damp location.

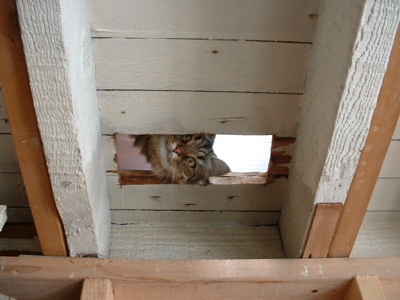
While we were working in the room under the laundry room (the ‘garden room’ I think I’m calling it), we got an unexpected inspector looking down through the hole in the floor.

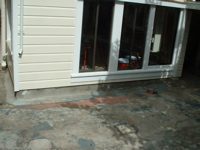
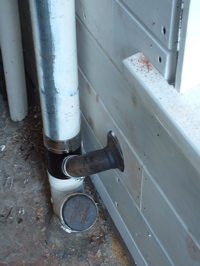
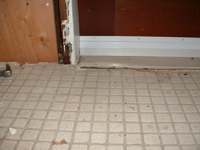
At this point, it had been about a month since I’d disconnected the washing machine. We were making the occasional emergency trips to the local laundromat, but the pile of laundry was mounting. So I spent a weekend plumbing in the washing machine again. Top right is where the sewer line exits at the floor level. The sheet metal and rubber against the wall is a roof jack, intended for when pipes exit through the roof. The rubber seals tightly around the pipe, and is crimped onto the sheet metal. I’ve been using roof jacks to waterproof around these wall penetrations. There are probably equivalent pieces intended for walls, but these are all they have at my local supplier. And it’s a whole lot better than what the plumbers did on other parts of the house: they drilled a hole and squeezed some caulk in there. Lots of rot was the result.

Above right is a view on the inside, looking up. You can see the sewer line that will serve the toilet, and also the washing machine. There is also the pipes for the hot and cold water in the top right corner of the picture, going up through the floor. The photo above left is how the sewer pipe looks on the outside of the building now.

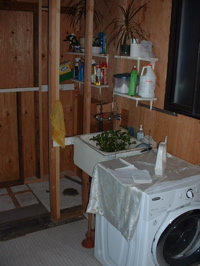
And lo, we have a washing machine again. The room is still bare, but at least we don’t have to hike down the street with our baskets of laundry. We are so spoiled.

Next comes building paper, and another window. A couple of years ago, when I ordered replacement sashes for the windows in the office, one of them came with single glazing. The supplier replaced it with a double glazed window when I called them, but then I had this extra window left over. It’s been sitting around the garage ever since. So we decided to use it here. Works quite nicely. I’ve made it into a fixed window. Mole sanded and primed the whole thing, on all faces, twice.

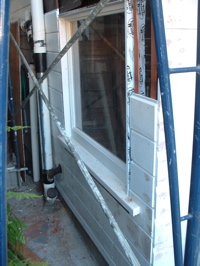
We’re still reusing the old siding that came off the building. Mole spent many hours sanding these, then priming all surfaces. It’s an extraordinary amount of work reusing old materials. The photo above right shows how the wall penetrations look when a roof jack is used. It will all be painted the same color, so not quite so obvious.

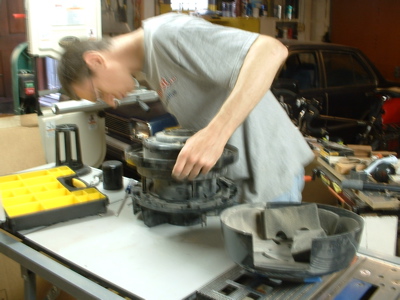
When we first started working on the house, we bought a HEPA shop vacuum cleaner. It was quite an expensive model Turbo II made by Fein. I love it, because it doesn’t make a racket like all the other shop vacs, and it’s always hooked up when we are sanding anything that may have lead paint (ie, everything.) It turns itself on and off whenever the sander is turned on or off. One thing that had never occurred to me: it really needs servicing every now and again. It’s probably been running over 5000 hours since we got it. Well, last weekend, “r2d2” as we call it, had a heart attack! I thought it might be just worn brushes, so I took it to pieces. The brushes are worn, but not the problem. The motor’s kaput.

I’ve ordered a replacement motor, but never realized how much I use this thing. We can’t sand anything without it. No siding, no painting, no smoothing wood. Cleanup is difficult. We use it to vacuum off our clothing after working. Wow, this is an important tool.

Garden Room?

I realized we don’t even have a name for the room below the laundry room. How about Garden Room?

We really didn’t do a whole lot, though, this weekend. We did put the windows in that I’d worked on last weekend. This back wall is almost ready for the new windows on the back of the laundry room, too.

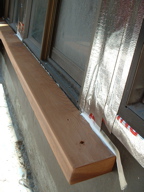
I started making a window sill out of the redwood that came off the tear-off room. The white caulk is polyurethane caulk. It is really sticky, and supposedly lasts very well, but you can’t paint it. So the only places I’ve put it is where there will be wood trim covering it.

Next step is to start putting the siding on. The black tar paper does not do very well with sun exposure, and it’s been HOT in city over the last few days (by our standards.)

Jack!

We did jack this weekend.

It took most of Saturday to get the supports and bracing in place. I added diagonal bracing below, to try to stabilize everything as much as possible. When the back room is cut off the house, the only thing stopping it from toppling over will be these braces. I wore my hard hat so that I didn’t keep hitting my head. Looks more professional, too!

Using a reciprocating saw, I cut all the way round, through the nails that held the laundry room onto the house, completely separating it from the house. We also disconnected piping (well, most of it – see later) and other things that held the floor to the house.

Above left you can see the step (red) between the kitchen and the laundry room.

Once we started jacking, Janeen ran outside and took a photo (above right). You can see a gap under the framing that is going up with the floor, and the wall below.

Above left, there’s about six inches between the floor and the wall below. Above right, this is half way there.

While we were pumping the jack, there were all sorts of creaking noises. Sometimes there was the sound of splitting wood, or sudden cracks. After one noise, I went outside, and found that I’d forgotten to disconnect the sewer pipe from the wall, so it was being lifted up with the room and had separated at a joint. I had to disconnect it, and carefully slide it back down into place (while up on a ladder, leaning on the room sitting on temporary supports – above left).

Above right, you can see light shining through a gap between the house and the laundry room. The whole thing would tilt sideways as we jacked up one side. Then it would tilt back when we jacked the other side. I didn’t realize it would tilt around this much, and am really glad I put in the bracing. It’s quite scary being underneath all this with the jack.

Janeen kept calling it ‘reverse Jenga’. I have one 20-ton jack but have six support points to lift the room at. We put the jack onto one of the supports, and pumped it until it lifted that side about 1 1/2″. Then I slipped a couple of 2×4’s into the gap, and let the pressure off the jack. Then we moved it to the next location. It took all day.

Above right, here’s the gap after getting the floor to the right level.

Above left: Flush! There’s no more step down. Above right, the whole room was moving around while we jacked it up. At one point, I noticed that as I was jacking, the room was moving sideways. A piece of wood had got stuck, and was levering the whole room sideways about 1/4 inch before I stopped. To get it back into place, I screwed a block of wood to the floor joists of the laundry room, and a block to the side of the house. Then I tightened a clamp between the two pieces of wood to pull it over. It worked!

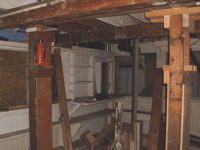
Above left, here’s a nice (scary) pile of wood supporting the laundry room. Above right, at this side of the room, it raised up about a foot, because the floor of the laundry room (in addition to the step), sloped away from the building.

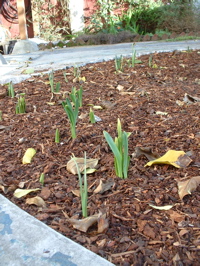
It’s been a funny winter. Actually, I think there was none. It only rained two or three times. And now it’s spring. The daffodil, crocus and iris bulbs that we planted around the tree are popping up. And the peach tree is coming into blossom already. Janeen took a photo of a couple of sprigs we brought in and put into water.

Head Banger

Besides working my tail off on paid work, I’ve been plodding forward on the house, preparing to raise up the floor of the laundry room.

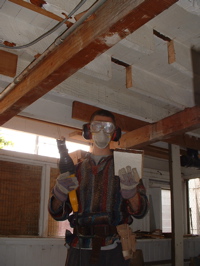
The floor framing in this space was done without much help from engineering. It also did not leave much head room in the space below (I can’t remember how many times I’ve hit my head — probably once a day — working on this.) In place of the two undersized beams that span across, I’m replacing with a slightly deeper beam, but I’m setting the top of it flush with the top of the joists. I have to cut all the joists to get it in. Janeen caught a photo of me after I’d cut a couple of the joists. No going back now.

Janeen spent most of last weekend pulling nails out of old pieces of wood. I’ve got such a pile now, I need to figure out a project to use it all on.

Using some old wood, we made some support contraptions to fit the jack, and support the floor while we jack it up. It was a bit tricky getting them in place: I managed to break two windows simultaneously when the post fell over and smashed them (left). Right now, I’ve got the beam in the middle, and have put load onto the first two support posts. How do I know that they are carrying the weight (see below)?

This is a photo looking at one of the old beams (above left).

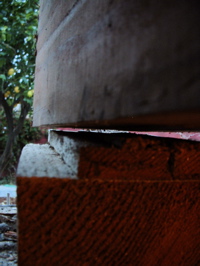
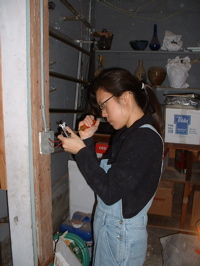
Two things: One, there’s now a gap under it, because all the weight is on the new beam. But the second is the troubling thing in earthquake country: When the previous person did this, they just sat the beam on top of loose blocks of wood. That’s fine until the building starts shaking around: Then, the blocks would just slide out, and the whole room would have come down! Speaking of earthquakes, I also added more plywood on the wall upstairs. The wiring for the light switch is just temporary!

Next, I have to get the outside walls supported, and disconnect this room from the building. Then I can start jacking…

Rotten Surprise

I rented a mixer – and my neighbor, Nick: We got all the rest of the footings poured in an afternoon. Many hands – and machinery – make light work.

Nick carried about a ton of concrete bags through the obstacle course that is the back stairs construction site. Another great thing about using the mixer is that you can get the water ratio just right. We measured it using a gallon paint can.

After we finished the footings, I spent an afternoon putting the list of wood we need for the deck together (above right).

For quite a while now, the structural engineer in me has been nagging at me that the back wall of our house has no shear wall. A shear wall is basically a solid piece of wall that is specially built to keep the house standing up in an earthquake. You really need this solid piece of wall to extend from the foundation up to the roof. Well, there’s a small piece of wall coming down from the roof to the bottom of the first floor. But at the garage, there’s a door under it.

So I resolved to wait no longer, and move the door over to where there’s now a window.

Above left is the door, and the window has been removed already. I’m going to move the door into the window’s location, and make a shear wall where the door is.

This was the first sign of trouble. The door frame came out with chunks of wood attached to it. When I looked into the wall, I discovered that the wall framing was completely rotten. In fact, it was so bad that I could pull it out with my hands

When I started removing the rotten wood, it just kept going. The wall on the left is supposed to be a bearing wall. It carries the weight of the two floors above. But six feet of it were so rotten that they couldn’t possibly be supporting anything. What’s surprising is that I’d noticed no sagging or sloping upstairs at all in this corner. I shored it up with a temporary wall in front of the rotten wall. All the studs I cut about 1/8″ too long, and jammed them in with a hammer to try to force load onto them (instead of the rotten wall).

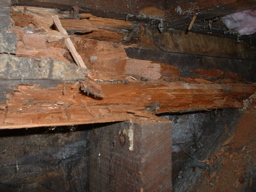
Above left is some of the rotten wood. It was practically powdery in some places. Above right, I’ve got the corner of the house shored up on 2×4’s – don’t show this to an engineer ;).

The rot had traveled along the grain of the wall top plate. Above right, I’m making a new top plate (it’s a single 4×6). The old framing is all true 6″ dimension, so I need to either shim things to fit, or cut down larger pieces.

Above you can see the new top plate. I soaked it in wood preservative – just in case. With the top plate replaced, I needed to move on to the bottom of the wall. In the future, I plan to replace all the foundations (that are currently brick) with new concrete foundations. Far in the future. For now, I’ll just have to be happy with bolting the wall to the old brick foundation.

I started drilling, and only got about 1″ deep. I moved a foot over, tried again. Same. So I took a cold chisel to the concrete topping. Above right, I found a metal file, still in good condition (except I’d cracked it when I was drilling), buried in the concrete. And there were various other metal objects, including brass dead bolt and some other mysterious brass element that I’ve just left embedded.

Once I started chipping, the brick just crumbled. I took out two courses of brick, epoxied in some threaded rod, added some rebar… You can see the embedded brass device above left, sticking out of the concrete topping. Above right, ready for concrete.

Didn’t take any photos, but I poured the footing for the wall last week, and today managed to get all the new framing in. I used a jack to lift this corner of the house about 3/8″ to get the new post in at the corner. That was a bit scary, as I was using a piece of 2×6 that was about 4 foot long. When I looked up, the 2×6 was bending dramatically. I gently lowered the house, and used a heavier piece of wood. Note to self: Use 4×4 or bigger when jacking!

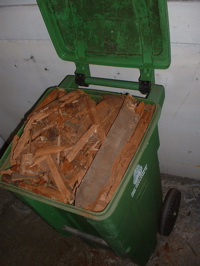
We’ve got a new solid shear wall almost finished, and no more rotten wood (I fit most of it in the city compost bin).

Now I need to get back to the project I was actually supposed to be doing: The back stairs.

the biffar family visit

my good friend margaret and her family visited san francisco after christmas and finally got to see our house for the first time!

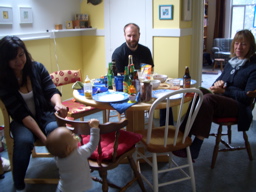
i was excited for them to meet the kittens, who had only been here for 2 days. but arwen and bella took one look at baby max, enthusiastically crawling towards them, and started hissing and growling! i’m sure they thought he was some big, scary, hairless animal, but as you can see he’s adorable.

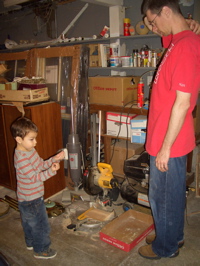
after lunch walker (age 4) asked mathew to show him the garage and his power tools. above, a conversation about the miter saw.

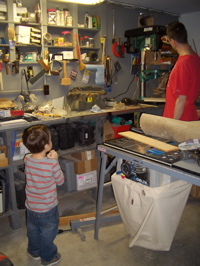
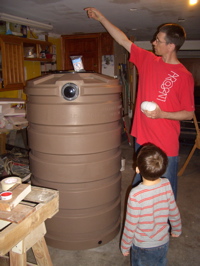
there were a lot of questions! “what is your most dangerous tool?” “do you have tools for working with metal?” “what is that?” mathew demonstrated his drill press and explained how we use these barrels.

they went outside to see more rain water collection barrels. and they played with water, flowing leaves down streams.

they looked at plants. then walker said, “i’m freezing. can we go back inside?” back in the garage he had more questions. 🙂

upstairs sue was talking with margaret and wes. and when mathew and walker came back they all played “ben 10 alien creation.”

me and margaret in our almost matching outfits. when we worked together in palo alto (12 years ago?) our boss would call us “the bobsey twins” at least once a week. i guess we still dress alike!

(left to right) wes, max, margaret, mole and walker.

it was a nice visit.

a monster

this post is a catch up. it’s got so much in it, it’s a monster…

Janeen putting decorative film on back doorclose up of decorative film

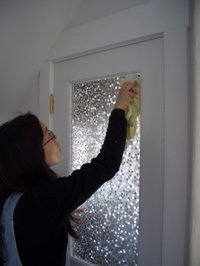
We bought decorative window film for the back door about eight months ago. We used to have a curtain on the other side of this door, but it started to smell really moldy, so I took it off. The decorative window film is intended to obscure the glass. Janeen’s done this once before, putting a plain frosted film on the windows of Popo’s bathroom. This weekend, Janeen put it on our back door. You have to clean the glass really thoroughly, the the film is sprayed with soapy water and squeegeed onto the glass. I’m making it sound easy. It’s meticulous work.

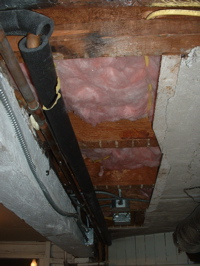
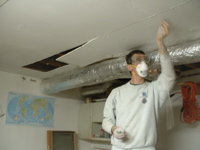
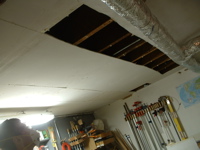
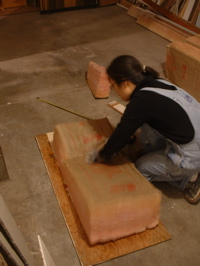
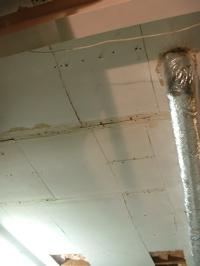
I got tired of trying to stuff insulation into the gap between the ceiling and the floor above, so I tore off the plaster ceiling in part of the garage that still needed insulation.  Quite a mess pulling it all down. It was already falling apart, and had holes, so needed some fixing anyway. Much more enjoyable.

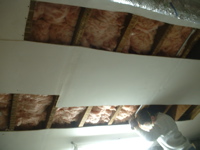
Putting in the insulation was then super fast.

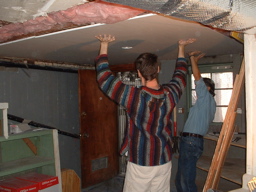
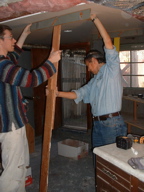
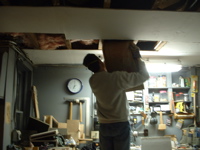
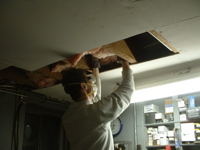
The following week, John helped us to put new gyp board on the ceiling. He came up with T shaped props, so that we didn’t need to hold it up on the ceiling while trying to screw it on.

Some places were really difficult to cut and fit.

John is the master of custom fit. He made a very carefully measured drawing of all the cuts before starting.

There were cutting and sawing noises for an hour, and then…

The floor was covered in powdered plaster dust, but the pieces of gyp board all fit perfectly. Janeen took a photo of the portable tool kit that her dad brings with him in his pockets…

We also spent half this weekend patching the plaster in the office. We’re using ‘hot’ (setting type) joint compound (“Easy Sand 90”) over fiberglass mesh tape and plaster washers. Next week I’ll plaster the lower half of the walls; but above the picture rails, it’s easier to just use a skim coat of the joint compound and sand it. The extra durability of plaster is not necessary where nobody can reach it.

And now that we’ve got the garage and insulation all done, spring is here. The white peach tree that Janeen’s aunt Janet gave us last year is in flower.

Oh, and Janeen knit a monster to give her friend’s son. The pocket on the front holds a baby monster.

stuffing fiberglass

Spring. We spent the first half of the weekend with Janeen’s family visiting; Popo kept talking about how many lemons were on the tree and insisted that Janeen’s mum bring lemon pie for her. Before they left, Jason and John went out to the garden and picked more lemons. The photo below is just one branch — after picking two bags of lemons. We’ve probably got two boxes of lemons still on the tree! Lemonade, anyone?

The peach tree is starting to flower, as is the jasmine. Janeen planted some freesia bulbs, and the gladiola bulbs Janeen planted last year are already starting to pop through the soil. The jasmine is really growing well on the East wall of our garden; quite amazing from just a twig that we took from a neighbor’s fence and rooted!

I tore out most of the Ice plant that I’d unwisely bought as cute little plants two years ago (it has very nice blue/purple flowers, but it overtakes the whole garden in a hurry), and sprinkled native California wildflower seed in its place. The snails had a great winter, practically eating everything — except the ice plant of course. I must have found fifty of them. Janeen took a photo as I was filling up a third container. The problem with urban gardens: Nature is all out of balance. Where are the hedgehogs, frogs, toads, snakes, caterpillars and birds when we need them?

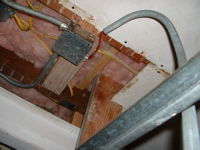
We moved on to the garage ceiling on Sunday. I’ve left open holes in the gyp board for about a year, planning to stuff insulation in. I’d been procrastinating, because it’s such unpleasant work.

First we cut out strips of the gypsum board on the ceiling. The best method so far seems to be multiple passes with a utility knife to just cut through the board. (I’ve tried cutting it with a saw — messy! and it risks damaging the joists).

Using a magnet, I can find the nails, so that I can carefully cut around them. By not damaging the board when I take it down, we can reuse it.

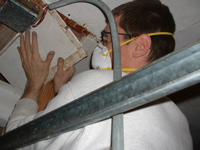
Finally, cutting and stuffing the insulation batts in between the joists is really unpleasant. Even with a dust mask, goggles, gloves, and long sleeves, it gets everywhere. I should have just rented the insulation blower, and used blow-in insulation: a) it’s easier — drill a hole and blow it in b) it gives better insulation — fills the cavity completely c) it improves the fire resistance of the house d) it’s recycled e) did I say it’s a lot easier? Can’t think why I came up with the hair-brained idea to do this. The only advantage I can think of is that it’s much easier to service wiring within the ceiling space when there’s fiberglass batt insulation.

One really itchy, sweaty, awkward day later, half of the work had been done.

The cut out ceiling pieces fit right back in like a jigsaw puzzle. Almost no waste.

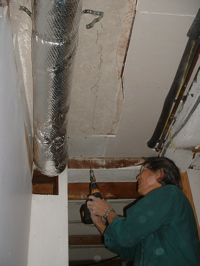
Fitting the gyp board was difficult around the new electrical box and the bracing I’d added to the beam over the garage door. We had to dismantle part of the conduit so I could slide the board underneath it. It’s no surprise the work takes us so long!

Janeen wired in the three-way switch again.

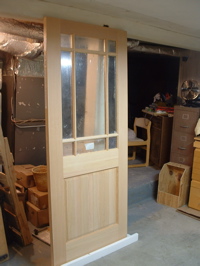
When Janeen’s family was visiting, John helped us pick up our new front door. It needs to be cut to fit into the door opening, and stained and sealed. Exciting.