I’ve still been working on the house, but not posting much. Last year, I started repairing the fence between the deck and the neighbor’s house.
Next I started covering it with Cedar. I bought 2×4 boards, and ripped them to 3/4″ thick, sanded and stained, then attached to wall. I put 1/8″ thick spacers behind the mineral paper to allow a little air circulation.
I tried to make all the gaps consistent, including at the mitered ends. I used copper flashing over the top of the wall. I’ll get a piece of Ipe to top the wall – eventually.
I have to stop here until I’ve put tile on the steps. But I’ve not decided what tile to use. It’s always difficult using tile on stairs: Either I have to buy special tile with a nosing, or buy some type of metal stair nosing. I also poured the curb under part of the wall – still have two sections to do though.
The roses really liked this rainy winter. They are looking good again this year.
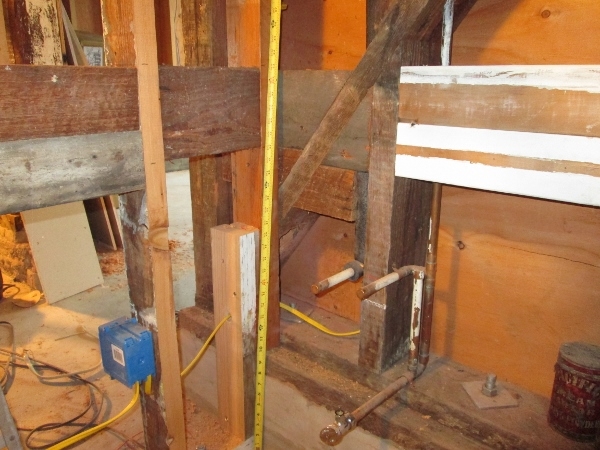
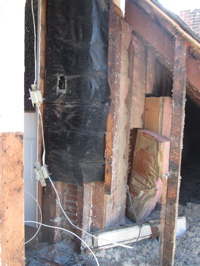
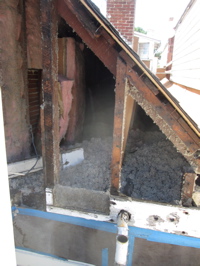
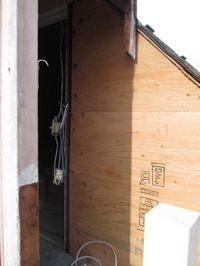
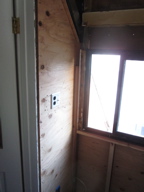
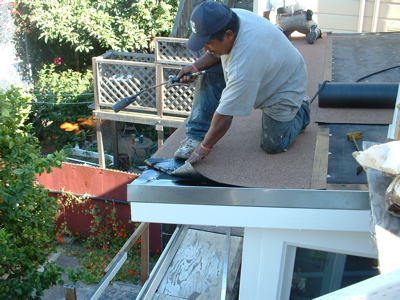
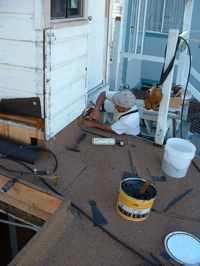
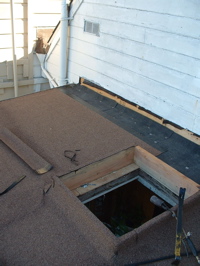
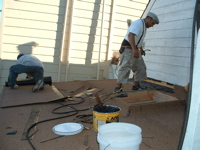
Haha. Nothing goes quickly. So what’s happened since May? Mark moved out of downstairs, my mum came to visit, we went to visit my brother, I rode my bike a lot, my brother came to visit here, and… I finished the railings on the stairs and deck, and started replacing some of the fence between the deck and the neighbor.
It’s Arwen–wearing her medal: 1st place cuteness.
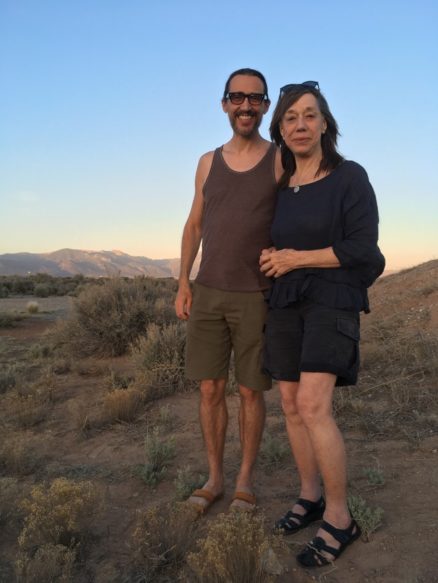
But before I got to the fence, Mum came to visit. And we went to Taos, NM.
Misha and I managed to get some running in: My knee seems to have healed itself with all the cycling I’ve been doing over the past few years. Before I started cycling, even running to the bus would make my knee swell up the next day.
In Taos, we stayed at an ‘earthship.’ The one we stayed at was beautifully decorated with some intricate tile work, and bright, colorful paint. Mum loved it.
We also spent some time in Santa Fe. It was really hot while we were there. I can’t resist taking photos when I see bright colors – this is outside the Museum of Contemporary Native Arts.
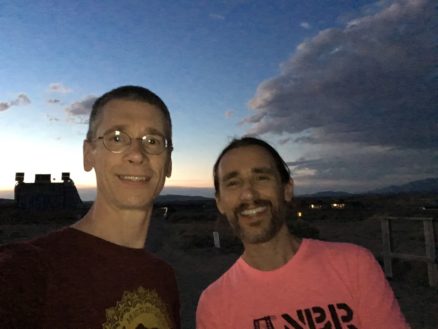
And back near home, I went for a walk in Santa Cruz on the beach with both my parents. Haven’t done that in 40+ years!
Oh, and before I get to the house work, I did do a couple of Santa Cruz rides this summer, too. One of them round trip, the second I stayed overnight in Santa Cruz before riding back the next day.
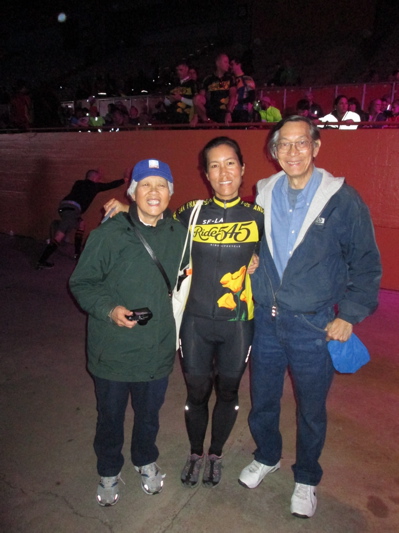
Two sisters and nieces for a Dad’s pre-birthday while my sister was in town.
Oh, and I love this sign:
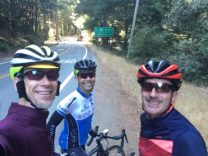
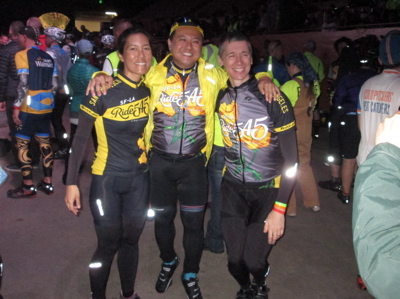
Lots of bike rides with friends…
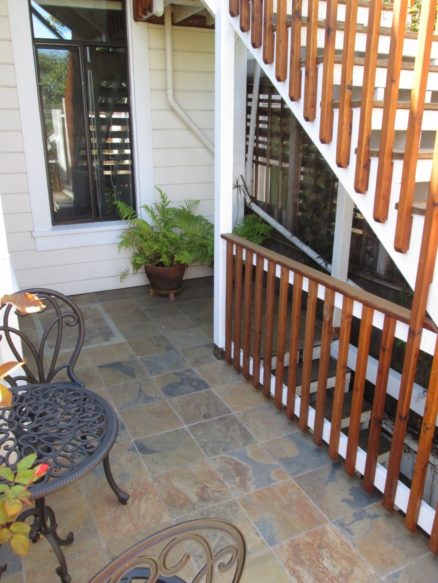
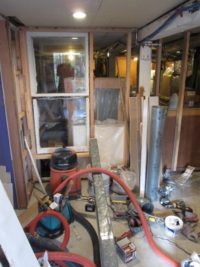
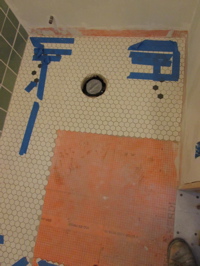
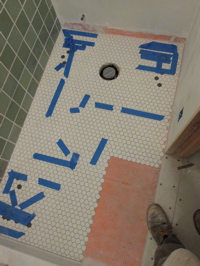
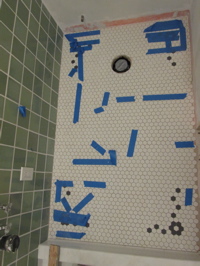
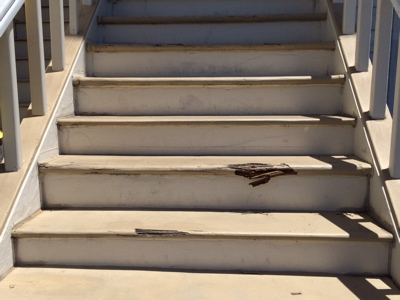
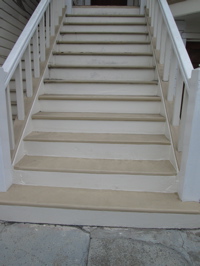
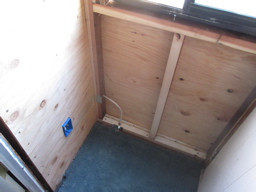
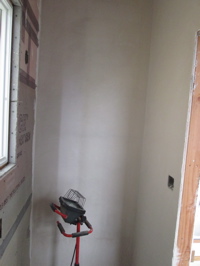
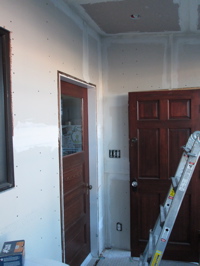
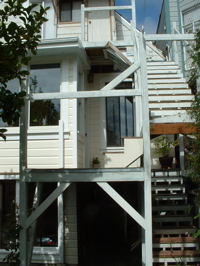
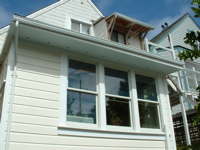
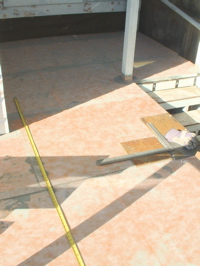
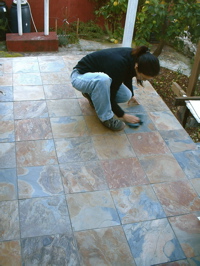
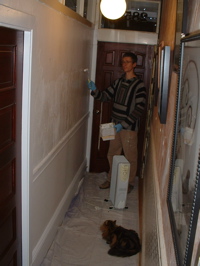
Alrighty then: This post was about the railings on the back stairs. We built the stairs years ago, and I never got around to finishing the guard railings. So they were quite dangerous, but we got used to it.
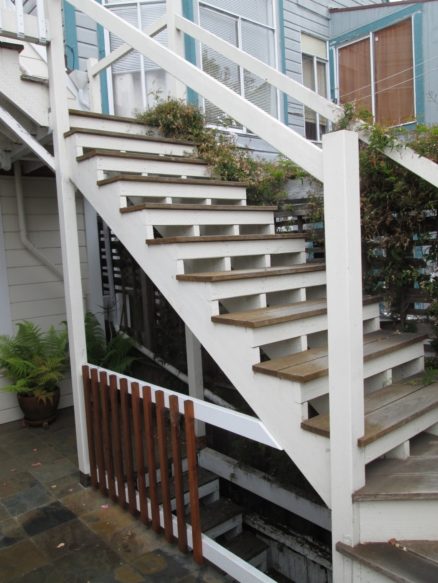
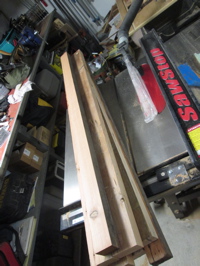
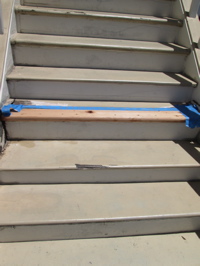
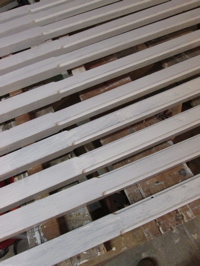
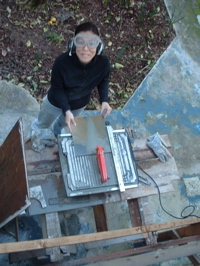
So this summer I finally got around to making the balusters to fill in the railings.
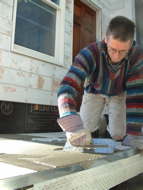
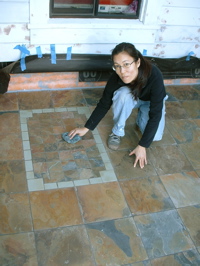
Quite a production effort because there are so many of them. And of course, I’d started making them with a routed detail on the bottom, so that had to continue. On the side of the stairs, the balusters have to be spaced away from the side of the stair stringer. Whenever wood is held tightly together, it stays wet in the joint, so that’s where the rot starts. So I figured I’d fill the gap with waterproof glue: I glued and clamped spacers on all of the balusters.
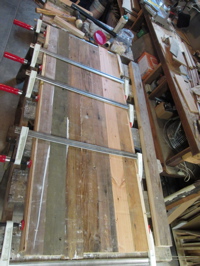
Here are about half of them when I was staining them:
Mole and Arwen: The railing and balusters at the top landing are all white, because I made those balusters back when we built the stair. At the time I’d planned to paint all of them white.
Here I’ve got balusters on one side of the stair:
Both sides done:
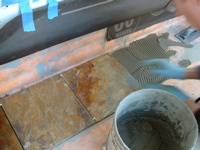
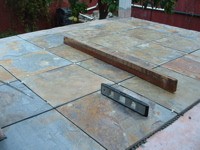
The finishing touch is I added an Ipe plank on top of the railing. It strengthens the rail, but it also looks better I think.
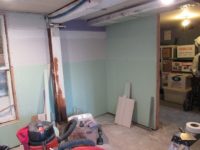
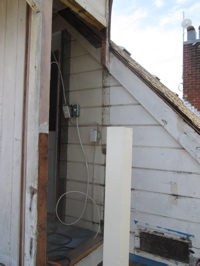
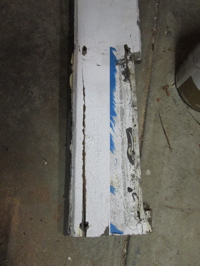
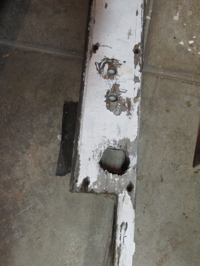
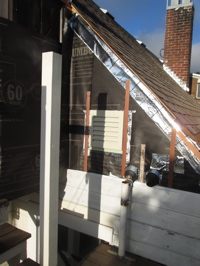
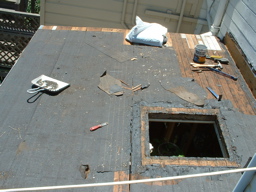
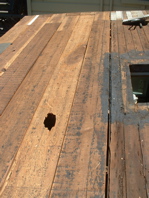
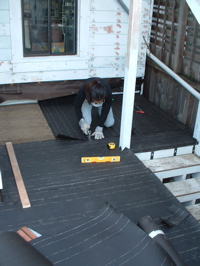
The next project is the fence. It’s very rotten, plus my neighbor doesn’t walk their dog: He just goes out back to do his business. Sad and stinky.
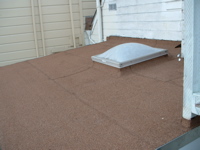
When I took down the old fence, this is what their deck looked like: Utterly insect infested and rotten through. I added some temporary shoring under there so it doesn’t collapse while I’m working, and warned him.
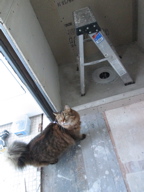
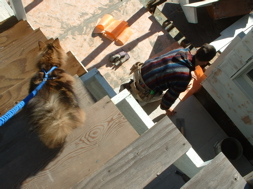
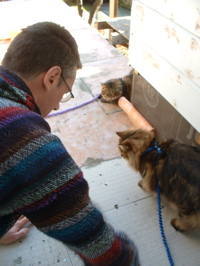
I had to take down my stairs at the bottom to replace the fence. Arwen figured out how to climb up and down the ladder quite quickly. Also, I decided to change the stairs so that they are slightly steeper: This will make it so that there will be more head room at the bottom of the stairs.
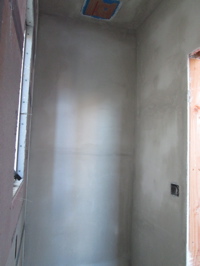
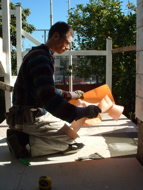
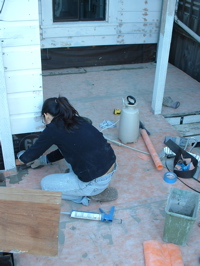
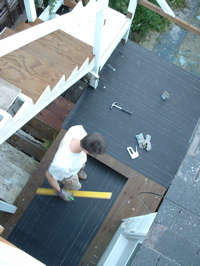
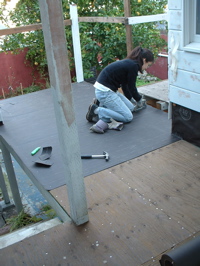
Even though I was just changing the stairs slightly and then re-painting, it took a really long time. Stairs are painstaking work because they have to be very accurate. Any unevenness can be a trip/fall hazard.
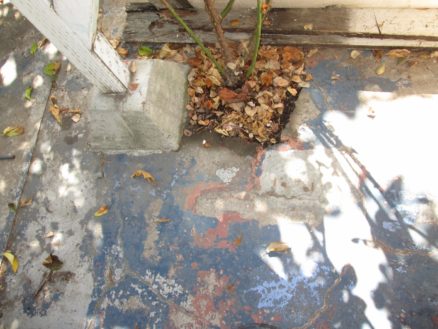
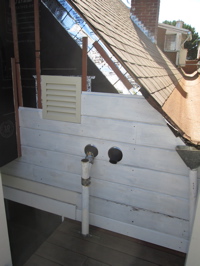
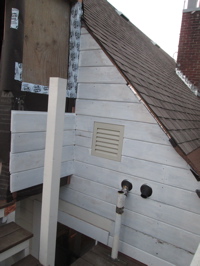
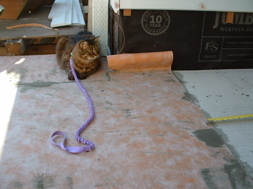
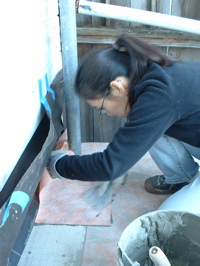
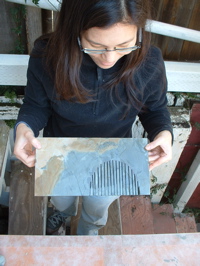
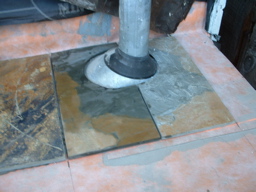
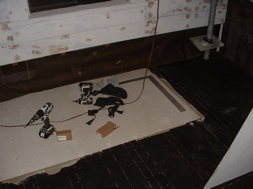
Oh, and to add another wrinkle, the drain pipe was in the way of the old fence. Rather than build the fence around it, I decided to move the pipe over. Which which meant I had to break out out more concrete: The ever expanding project.
While I had the jackhammer, I decided to expand the bed for the rose bush. This was waaay more work than I’d bargained for, because there was an old concrete footing there, full of rebar. Really hard to break up. Before on the left, six hours later on the right.
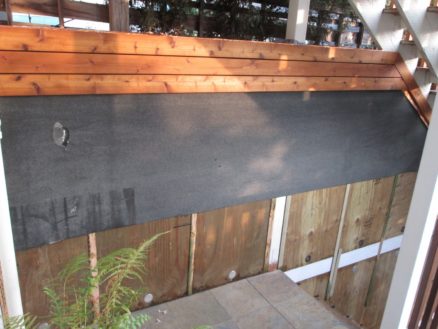
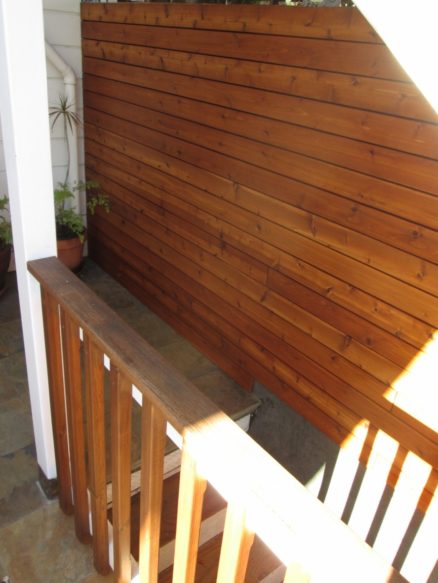
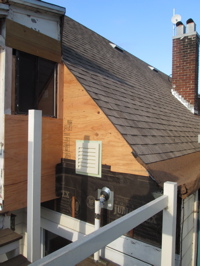
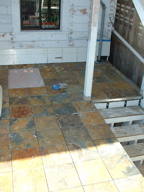
At the deck level, I built the wall up tall enough that we can’t see over to the neighbor’s side. If the stink still comes wafting over, I’ll put windows up at the top. Still need to add the finishes to make it look more like a fence, but the wall part is done:
I think mole snapped this photo of Arwen while mole was riding zwift in the garden room. It’s a bit worrying riding on the trainer with the cats in the room: There’s a fast spinning back wheel that could really hurt them. We don’t usually let them in, but sometimes they insist.
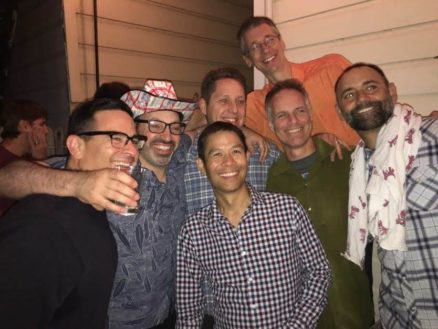
Oh, we had a party: Mark, who’s lived downstairs for about five years, is going to Lithuania. So we had a big leaving party/birthday party for him. We strung lights up in the back yard, and it was a great time.
We put a Lithuanian flag out front, too!
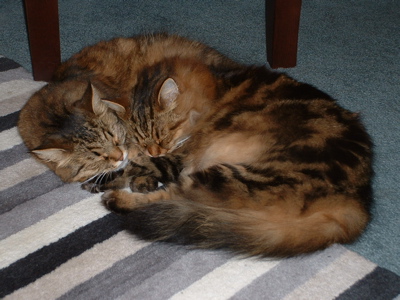
On hot days, Arwen and Bella stretch out to try not to over heat. Looks like they are flying:
Mole and I stopped in at Davenport on the way down to Santa Cruz for dad’s birthday; wandered around a little. I guess you can have great views even when not riding a bike:
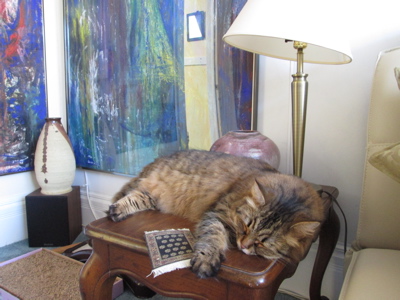
Phew! It’s been a long haul, but I’m starting to get drywall up. That gives some shape to the space:
Getting drywall on the ceiling, and the insulation up, was a major effort. Holding a 4ftx8ft piece of drywall over my head, by myself, while screwing it in was hard enough. But there are no 90 degree angles in this place, so every measurement seemed to be off and I had to lift it into place to test fit multiple times. Ugh.
The “before” photos would have been daytime…
Insulation…
In the toilet room (above right), I added wood into the wall behind where the sink will be (so I have something to screw into).
This is the same view with purple (moisture resistant) drywall installed.
This is looking at the doorway into the toilet on the right, and the door into the garden room on the left.
It’s actually looking like a ‘garden room’…
And the rain continues here in California: We’ve started using the garden room as a workout room. I bought a trainer and mounted my bike to it. Mole even tried it last week – we’re still not very familiar with bike trainers, so it’s been a bit bumpy (but not as bumpy as all the crashes on wet pavement I’ve been having lately).
Headroom is a big problem in this space: there’s none. A big duct runs from the furnace to the outside wall for the kitchen above. I have to walk under this duct. After I hit my head two or three times, it’s usually enough for me to do something about it. I changed the duct from round to flat and thin, so there’s just enough room for me to walk under it without losing more of my remaining limited supply of brain cells.
Here’s the duct installed. You can see bare studs around that will soon have drywall on to make walls…
More views of the space between the garden room and the garage…
Above left is the state of the slab in this space. Needs some work. Above right I’m getting drywall on the “garage back room” (between the garage and the garden room).
The green drywall is also moisture resistant – just a different brand. The photos above are the walls that were bare studs in the duct photo above.
Meanwhile, we are working on the guard railings around the stairs and deck at the back. Above left is mole sanding the pickets. I’ve lost track of how many years it’s been: This is the last unchecked item on my todo list for those stairs.
It wouldn’t be a turtle project without some intricate details. Cedar: I love the smell of it.
We still haven’t decided if we’ll paint it, or use deck stain. I’m leaning to the latter, both because it’s faster, and because it’s sad to cover up this beautiful wood.
Wow time goes by quickly. Well, I’ve actually done something in the last few months. And here’s some of it:
I bought a jug of apple juice at the farmer’s market, added some yeast & a bubbler: Cider! Much easier than brewing beer. I finished laying the tile in the laundry room bathroom, but am going to wait on grouting it until I’ve also tiled the laundry room.
Here’s me trying to capture the party atmosphere in the Cow Palace…
A photo with our friend Alex who rode one day, but work stopped him from doing the whole week.
Well, these front steps have been an ongoing project. Seems I have to fix them every year. The temporary fixes from past years finally gave out. The photo shows how the front of two steps broke off completely. There is also another problem with these steps: The height between steps varies too much for code compliance, so it was high time I did something about it.
The reason the step heights vary so much is originally they were built with thick boards. Then (before we got the house), some repairs were done with thinner wood. To fix this, I had to make new steps out of thicker wood. I re-used some old wood that I still have in the garage. Lots of planing, gluing and clamping to make boards that are wide enough for the steps.
I forgot to take photos while I was working on it. There’s one photo where I’ve replaced part of one step. I also replaced the step below it. The one below that was concrete, but it had a piece of wood glued on top. This made the step heights very uneven, so I took the wood off: The reason they’d glued the wood on top was the concrete underneath was cracked and uneven. So I had to repair the concrete, also. Above right is after I’ve repaired the bottom five steps. Looking further up, you can see that some of the upper steps are also uneven and need to be fixed: Next year!
OK, to head off the ‘no cat photos’ complaint: I think Bella was sleeping under the table, and Arwen (love-bug) decided she needed some cuddling. They were actually sleeping like this for a while.
One other project that I got partially finished with, but stopped because of ALC and life, was the siding and waterproofing on the back. In the photo above left, you can see where I left things for the past two years. The building paper is exposed (getting damaged by the sun), and I’ve “sealed” the top with some blue tape. Above right, I’ve taken out the wall of the back porch, so that I can take out the siding boards and re-use them. Clearly the rear porch was not part of the original building construction.
Here’s all the siding removed. The wiring for the porch lights is hanging loose, and you can see in under the roof.
Here I’m getting plywood on. It’s a bit complicated because the drain for the kitchen sink goes through this wall. Luckily (for the house) we’ve had very little rain for the past few years. But there’s predictions of ‘el niño’ this year: hopefully lots of rain. But I have to get this properly waterproofed and finished first.
Here I’ve added the porch wall back in. Wiring is now much neater.
The siding was is very poor shape. Lots of holes cut for various plumbing iterations over the life of the house. But the wood, once the peeling paint is removed, is still good. Thousand-year-old redwood is too good to waste. So I carefully repaired all the boards.
Here are the same two boards after I’ve glued in pieces to repair them, and sanded ready for primer.
The photo above left is titled “One Weekend of Work”: Repairing and re-using the old siding takes masses of time. Six boards in two days: Not the sort of thing a contractor would do. Above right, I’m getting the building paper on, and waterproofing around the drain pipes. I also got a new wall vent for the attic space.
Here are photos of the process of putting the siding back on. Cutting around the pipe penetrations is tricky.
And here’s where I’ve got to. I’ve ordered new windows for the porch, so can’t go much further here until they arrive. Above right is a view under the porch.
Here I’ve added insulation, and installed wood to cover it. This is re-used wood left over from the laundry room wainscot. It still needs some trim around the edges and paint, but looks much better – and the porch will be more insulated now.
We had a week of hot weather for San Francisco. The poor cats have been losing their summer coats and getting their winter coats at the same time.
Above is Bella trying to stay cool.
Continuing on the shower rebuild in the laundry room bathroom, I made the shower pan. Because I’m using Kerdi as the waterproofing membrane, I use their special drain flange, and cast it into a bed of mortar.
Above left is the finished shower pan. Above right mole is putting bondo onto the pressure treated wood we used for the back stairs. The wood gets incised when it’s treated, so has all those holes all over it. Looks much better when filled.
Above: Before and after filling with Bondo.
Over a year ago I made some balusters for the back stairs. I just got them primed, and will put them up soon.
But the most interesting thing we’ve done lately is go to Fireclay tile and we bought fancy tile for the bathroom. Above right are two nice decorative pieces we’ll add in. The only downside is that this tile is $$expensive$$ !!
We went to their ‘boneyard’ and bought a couple of boxes of seconds at about 1/4 the price. Now we need to figure out exactly how much more we need and order it.
Some other tile we looked at was at Latch tile in San Francisco. The person working there was super helpful and patient. Above left, cool shapes, but how to use it? Above right, these tiles are beautiful (reminded mole of her parent’s house) — maybe we’ll use a few as accents.
We’ve been watching a lot of Downton Abbey lately… Funny, with all the fancy stuff “upstairs”, the thing that caught our eye was the tile in the kitchen. We may do something like this on the floor in the laundry room & bathroom. Above right Bella came to inspect right before I started plastering.
This is the first time I’ve used basecoat plaster. It’s similar to plaster, but has sand in it. It goes on slightly rough so that the plaster sticks to it properly. Above you can see the ceiling after the basecoat is on and drying.
On top of the basecoat, I put a finish coat of veneer plaster. I forgot how much I enjoy plastering. Yes, I did get quite a bit in my face and on the floor while working on the ceiling. Still, it’s very satisfying to start out the day with rough uneven surfaces, and end with perfectly smooth white plaster.
In the laundry room, I taped all the joints. I don’t need to be very careful with the taping, because it will be covered in veneer plaster.
When I went to buy roofing materials, the person at Western Gravel & Roofing Supply talked me into hiring a contractor: He was afraid I’d burn down my house with the torch (!) and recommended a contractor who happened to be in line.
What a contrast to the last roofers we hired. These guys were awesome!
I did the prep work before the contractor arrived. I forgot to take a photo before I started ripping off the old roof. Above right the photo shows where my foot went through the old rotten wood!
Above left is the view from below. That piece of wood had to be replaced. One top of the old wood, I installed plywood. This is both to provide better earthquake resistance, and to span over weak old wood.
Now the pros showed up. Actually, they told me they’d arrive at 3pm, so I thought I had time to finish the prep before they got here. They arrived three hours early. So they helped me install the insulation for free (I added 2″ of rigid insulation on top of the roof). Above right, Enrique and his assistant smile for the camera.
This is the reason the roofing supply salesperson didn’t want me doing the roofing myself: Notice the 18″ long flame coming out of the torch? This is on low. Here, Enrique is melting the back of the modified bitumen roofing, so that it seals down to the roof. Each strip is melted to the previous strip to make a continuous membrane over the roof.
Ironically, after watching the roofers, I realized that fitting the roofing around and over all the tricky corners was where their skill and experience really helped. It would have taken me weeks to do this, and it probably wouldn’t have been done as well in the end. Pick your battles!
One more photo as they finished up, and here it is done. Beautiful, eh? I managed to salvage the old skylight; took some serious chipping and heat-gun action to get it off the old curb. I’ll probably replace it one day, but for now, it’s fine.
So now we’re done with the outside of the laundry room. All I had to do after they finished the roof is to put the gutter on and paint it. Here’s photos with the scaffolding down.
Now I can start working on the inside without worrying that it will get ruined by rain. Sometimes, it really is worth getting the pros.
The roofing felt and cement board do not themselves waterproof the deck. On this deck, I’m using the same material that we used in the showers: Kerdi. It’s a polyethylene sheeting that has a fibrous material bonded to both sides so that it sticks to thinset mortar.
Here I’m sticking down the Kerdi over the cement board. Arwen is watching from the stairs.
To stick it down, I use the same cement-based thinset mortar that’s used under the cement board, and also will be used under the tile. I spread it out with a notched trowel, and then lay the Kerdi onto it. Then I smooth the Kerdi down with a flat trowel. The problem we were having is the cement board was dry, so it was drying out the thinset mortar before I could spread the sheet down. We had to wet down the cement board with a water sprayer so that we had enough time to stick the Kerdi down properly.
Above right Bella is watching the progress.
They both really like tiling, I think. Almost as much as plumbing (they love to sit in the shower and watch the water go down the drain.) Janeen got all the difficult parts of the waterproofing – like fitting it around a pipe penetration.
See, another difficult spot: Mole attaching the waterproofing to the side of the building. Above right we are starting to lay out the tile grid. I drew a grid on the Kerdi before starting the actual tile.
Here are the first tiles. Actually, it’s not tile; we’re using a very colorful slate. We really liked the variety of colors in the slate. Each piece is like a little work of art.
Unfortunately we learned, after buying it all, that this slate has a flaw: The color is made by thin layers of impurities in layers within the slate, so it tends to delaminate. We tried to pick through carefully to avoid the tiles with bad layers in them. Hopefully we caught them all.
Mole did almost all the cutting. She became the tile-saw queen. Even got into some really complicated cuts to fit the slate tiles around pipes.
Once all the slate was done, we let it dry for a week. Because the slate has such a rough surface, I used a pre-grouting sealer on the slate before grouting. Hopefully it will make it easier to clean the grout off the surface.
The crocuses are already up! The bulbs we planted under the lemon tree last year have come back this year. So nice. Above right, you can see a rectangle that we left unfinished. I wanted to make a virtual doormat in front of the door, by changing the tile pattern.
We used some ceramic tile that a friend gave me for the border (the same tile I used on the front porch as an accent tile). In the field, we just cut the same tile as on the rest of the deck to about 1/3 the size.
Above left, this is the ‘door mat’ ready to be grouted. Because the tile is so colorful, we chose a grey grout. I had to get mole to pick out colors, because I’ve learned: I wanted to get a really colorful grout… The grey looks really good.
Above left mole is wiping off the grout from the tile surface. Above right, after the grout dries for a couple of hours, we came back with a dry cloth and polished off the haze on the surface of the tiles.
Mole is polishing up the ‘door mat.’ Now we can get back to finishing up the siding! Here’s a pic of Arwen and Bella looking out the window from their cat tree.
Well, a lot happens, and I’ve failed to post any of it. Here’s part one..
Before we moved into this house, mole found a lampshade made out of shells that she really loved. Unfortunately when she ordered it, it was out of stock, and no longer available. Just recently, the store got some more, so she bought it. We put it up in the bedroom.
Bella and Arwen really like it too. So, back to house projects: almost a year ago, I stopped working on the back stairs, because I started working on the laundry room. It sounds a bit as if I got distracted and went off to another project. But there’s a reason: After dealing with all the rot in this area I had decided that the deck would be waterproofed. The waterproofing needs to attach to the side of the house, but since the laundry room was so strangely built (there was no waterproofing membrane, just vertical boards) I had to rebuild the wall to add a waterproofing membrane.
One thing led to another, and we started jacking the whole thing up to level it… OK, so it did become a bigger project than I planned. The deck at the first floor sat out in the sun and rain for a year, unfinished, while we basically rebuilt the whole laundry room. I don’t want the deck to endure another winter unprotected, so it’s back to the stairs. Above right, I’m putting down heavy weight roofing felt.
We stapled it down and lapped it, starting at the lowest side of the deck. Here’s mole just finishing up.
The felt is just the first layer. This deck is going to have tile on it, so we put down cement board. To make sure there is a uniform surface under the cement board, we put down thinset mortar first, and set the cement board into that. We then screwed it down to the plywood.
It got pretty late working on this. I think I finished about 10pm. I wanted to get the cement board on before the rain, which was due in the next couple of days.
They are so sweet when they sleep together. We just can’t help taking photos.
About four years ago, when we were doing the wallpaper stripping in the lower unit, we started stripping the wallpaper in our front hallway too. We stopped, because it smelled moldy, and we figured we’d need to replace the plaster. Well, it sat with the wallpaper partly stripped for all those years. Talk about bad Feng Shui in our entry! So I decided to just paint white over it. At least it will look better until I get around to the replacement work. Because there’s still no heating, the paint wasn’t drying: I had to bring an electric radiator down there. Arwen came down to watch the progress.
My family came over for Christmas Eve again this year. One of my Christmas traditions now is baking bread. Above right I’m just starting to mix.
Here’s a pic of everyone who came over. Dad got a picture of Elijah for Christmas, and wanted to include him in the photo!
Been so busy lately, that almost nothing has happened on the back stairs. But I am starting to make some fancy brackets out of old redwood…
I took a photo of the brackets on the front of the house, traced them and adjusted the image to fit the dimensions I need on the back deck in CAD. Then I printed out the CAD image.
I pasted the printout onto a piece of wood, and cut it out. Above left, I’m showing off the template to Janeen and Bella.
The wood from the tear off room is now stacked up in the garage. I ran one of the planks from the old sub-floor through the planer to see how it looks. Above right – it’s actually quite nice old oak. Bella likes it. It has some stains from rusting nails that would need to be plugged, but I think I can use it.
Using old pieces of Redwood from the rotten stairs and tear-off room, I’m piecing together new brackets. Above left, clamping and gluing. Above right, after I’ve run it through the band saw. I still need to rout out the sun-ray part, rout in beading, and sand the whole bracket smooth. And I’m making five of these.
The weather has been weird this winter. We’ve had almost no rain. Last week, we went out and bought a bird feeder, and hung it in the lemon tree! We also had an arborist come over and prune the lemon tree.
While the Arborist was here, he planted a new Espalier apple tree where we used to have the Avocado. It’s a funny looking tree right now, because it’s been carefully pruned so that it grows horizontally and flat.
Sad that we tore out the Avo, but hopefully we’ll have nice Fuji apples, and the tree won’t take up the whole garden. We’re also waiting for a pear tree.
Last weekend my neighbor came over to help again, and we finally got the “tear-off room” (as we called it) torn off.
Above left, with all the roofing and siding removed. I got really covered in dirt, as I had to cut through the roofing from below.
A last look into the tear-off room from the laundry room (left), and the view from up above. It’s strange taking something apart like this. Most contractors pull out a sledge hammer, and smash everything down. It’s done in half a day. Then they have a huge pile of landfill.
I’ve been trying to carefully deconstruct the space so that I can reuse much of the materials. Still, there’s quite a pile: Roofing breaks up, and has come to the end of its useful life anyway; some wood is too rotten or broken or small to salvage; the old aluminum single pane window didn’t slide any more and the catch was broken….
But the result of working like this is that it’s exactly the reverse of building it.
Here’s Nick, my neighbor-assistant, monkeying from the last of the roof joists before he tore them down. Above right, when my neighbor on the other side came out and saw this, he told me a story.
He reminiced how Mr Simmons, who was born in about 1870, built this room. Even though the ceiling in this room was about 5′-10″ high, apparently Mr Simmons was about my height. He built the room as a sewing room for his wife. “Mrs Simmons’ Sewing Room” makes it sound so nice; I can almost forget what a dingy, damp, moldy, cramped, low-ceiling little cell it was.
Above is the view of the back of the laundry room. The two doorways are boarded up right now. I plan to put windows all across this wall, looking out onto the garden. Even though Mrs Simmons’ sewing room was tiny, it really took up a lot of the garden.
Now I have a big pile of wood. Nick started pulling nails. But I still have a huge pile to pull nails out of.