More ugly

So I’ve started working on the ‘garden room‘. I think we used to call this the ‘creepy room’ before. Here are some photos Mole took before we bought the house:

I have big hopes for this space: I want it to be my ‘brewery room’ for brewing beer. But it could also serve as a guest room for people who are allergic to our “hypo allergenic” cats (apparently not so much). There were three major things I had to do to get started on this space.

Firstly, there was a wood floor in the ‘garage back room’ part of the space. It had no ventilation under the wood, so the wood is rotten, and it smells moldy. It also reduced the head room so I kept hitting my head on the wood beam. I swear a lot when that happens, so the floor had to come out.

IMG_3643 (450x600)IMG_3644 (450x600)

The wood was hard to take out, because all the nails had rusted, and the wood kept breaking.

IMG_3672 (450x600)

To add to the fun, they had made the wood floor slightly smaller than the room, and poured concrete to seal all around the edges. Lots of work to break out all the concrete, and another pile of concrete in the back yard to dispose of (eventually). Talking to the previous owners, apparently their grandfather used these two rooms as his storage space. He was probably trying to make sure that no mice would get into the rooms with all the concrete sealing every crevice.

The second part was to add support for the floor framing above. The previous framing to support the large wood beam and back wall was under-sized, and held in place with a couple of nails. Not secure enough for me.

IMG_3676 (450x600)

The photo above shows the temporary support (including my trusty jack) while I replace the post. Also, on the right side is an opening. I’ve put a door opening where there was an old window. I filled in the opening on the left side of the post, and put a new concrete curb and sill in, and made a good solid post to support the beam. I’ll add plywood to the wall once I’ve got all the electrical wiring installed.

IMG_3677 (450x600)IMG_3682 (450x600)

Above left you can see the new curb, above right is the new connection for the post. I re-used some old wood that has been piled up in the garage.

IMG_3685 (450x600)

Then I took out the curb at the opening on the right, and removed the rest of the concrete that had been put around the wood floor.

I also had to fix the drain plumbing. There were three drain pipes sticking up out of the concrete floor in the garden room. I had to chip out the concrete to get down to the sewer line and remove them.

IMG_3637 (600x450)IMG_3687 (450x600)

Above is before and after. I had a piece of pipe lying around that I reused for this (hence the white paint). The more difficult part: I want a toilet in the garage, so I plumbed in the sewer pipes for that on the other side of the wall.

IMG_3684 (450x600)IMG_3686 (450x600)

Above left is the hole I dug to go under the wall, above right is the plumbing in place. Then I filled it all back in again. Filling it in was actually a lot of work, because I had to compact the soil. If the soil isn’t compacted, then it will settle by itself over the years, leaving a void under the floor slab, which would eventually crack and collapse, making an uneven floor. To compact the soil, I worked in “lifts”: Put about 2″ of soil back in the hole, spray it with water to dampen it slightly, and then compacted it with a sledge hammer and a piece of wood until it will not compress any more. Then another lift of 2″, and repeat until all the soil is back in the holes.

IMG_3690 (450x600)IMG_3691 (450x600)

Here are the holes filled back in, and gravel (from the broken concrete) on top of the soil. The gravel is a ‘capillary break’ under the slab. It prevents moisture from the soil coming up through the slab. At least in this little part of the floor it will.

IMG_3692 (450x600)

Here it is after I repaired the floor with concrete. Next: the plumbing for the hot and cold water.

Five year project

The laundry room has been the project that keeps on giving. It started out that I was just going to replace the back stairs in August 2011. Then I ran into problems waterproofing, so I stopped the stairs, and started working on the laundry room. Five years later, it’s finally DONE! So I thought a before-and-after photo post is in order:

Checklist

This is the checklist I scribbled on our white board, back when I thought it would be a quick project. I kept adding items as I went. Very satisfying to have all boxes checked.

DSCF0012 (450x600)IMG_3571 (450x600)

Above left is the back door to the kitchen before. Above right is the same view after, with the door moved to approximately where the window used to be.

DSCF0009 (450x600)IMG_3583 (450x600)

Looking a bit to the right, the dryer used to be jammed into the corner so tightly that the back door wouldn’t open unless you pushed against the dryer. Actually, it was such a tight fit, that the previous owners had cut out part of the back wall to make it fit. You can see the old back door location at the right side of the photo. Now it’s all windows in that area, looking out to the garden. I’ve put a small couch in this space… Hmm, maybe I should have used a photo with the couch in it. Oh well… You’ll have to come visit to see.

DSCF0010 (450x600) DSCF0014 (450x600)

Here are two more photos of the old back wall of the laundry room. You can see the door opening into the moldy ‘tear-off’ room. Funny, in these photos it looks so sunny and airy, and you can hardly notice that to walk in there, you have to be under 5′-10″. On the right side is the wood door to the toilet. Actually, it was more like a closet with an always stinky toilet in it.

IMG_3587 (600x450)

This is the same side, now. I put a wall all the way across that side, so made the laundry room a little smaller, but a more functional bathroom. Bathroom door is now a nice restored redwood door that I hung on sliders to make it a pocket door.

DSCF0015 (450x600) IMG_3585 (450x600)

The washing machine is in a similar location, but there’s now a sink behind it, instead of next to it. The new arrangement is not perfect – but was the only way I could figure out how to make this work. One other solution was to not put a sink in this room at all, but I find it so useful to have a utility sink.

This room used to have loads of shelving, so I added some shelves. Living in earthquake country, shelves scare me a bit, so nothing on them yet… We used to have lots of plants in this space, but I’ve found that if I put plants in there now, they die because I don’t go in there often enough to remember to water them.

IMG_3600 (450x600)

Instead of that stinky little closet with the toilet in it (sorry, no photo), I expanded the space to make a tiny, but functional, bathroom. On the left is the shower.

IMG_3668 (450x600)

And last weekend, I finished putting up the mirror and an electric towel warmer. There’s no heating in this space, so hopefully this will help a little (?) I’ve still got to figure out how to deal with the power cord – probably just some white wiremold aligned over the grout lines would do it.

IMG_2031 (600x600)

prrrrr

Finishing up: Paint and a Bathroom

Finally: Paint.

IMG_3566 (450x600)IMG_3565 (450x600)

Painting the wood trim is always the hardest part. I tried (and failed) to use the airless sprayer to paint the walls and the trim. The result was sagging, dripping paint on the trim, because it puts far too much on. Had to wait a week, sand out all the sags, and repaint by hand.

IMG_3569 (450x600)

Paint colors are so difficult; even more so because when they mix them, it seems like the mixed colors just don’t match the samples. Luckily I have mole to pick colors. She picked the ‘november skies’ (medium blue on the card in the photo above). But when it was mixed, I put a bit on the wall and it was way too light – looked like the powder blue that old VW bugs were sometimes painted. My feeling: Hate is not too strong a word for that color. So I went back to the paint store and asked them to add pigment. I used the recipe for the darkest color on the sample card. They fought me, because they said that the darkest color used a different base. Eventually, they agreed, and we got the color that’s on the background. Not a standard color, but we like it more than either!

IMG_3562 (450x600)IMG_3563 (450x600)

IMG_3567 (450x600)

IMG_3568 (450x600)

Some painting action photos!

IMG_3575 (450x600)

All painted, before the washing machine went back in.

IMG_3577 (450x600)

Here’s the bathroom before the toilet. Actually, the sprayer worked well in here. The difference? I used cheap paint. Seems like cheap paint sprays better.

IMG_3583 (450x600)

Painting the wood wainscot and window trim was a lot of work.

IMG_3585 (450x600)

IMG_3588 (600x450)

I bought the glass shower door very cheaply at overstock.com about a year or more ago. At the time I bought it, I hadn’t put the tile on yet, so I estimated the space. The door also allowed some adjustment for width, so I thought I was safe. Not! Once the tile was on, the space was one eighth inch less than I’d estimated. All the adjustment happens on the wall opposite the hinges, at a 12 inch wide fixed panel. I spent an entire day trying to grind down the aluminum adjustment piece so that it would fit. No luck.

Eventually the solution I came up with was to order some stainless steel brackets from China, and screwed them to the wall and to the aluminum edge piece on the glass. Instead of the supplied slotted aluminum piece that was supposed to close the gap at the wall, I just used silicone caulk. But it looks fine now, and I didn’t have to buy a new glass piece. Lesson learned: Order the glass after the tile is finished.

IMG_3589 (450x600)

The sink is tiny tiny. This room is so small, that there’s not much room for the sink, and to allow the shower door to open. When I laid out the tile, I put that diamond shaped decorative tile above where I thought the sink should go. But once the sink was attached there, it was obvious that it was much too close to the shower door (see the door handle relative to the sink edge, above). Very awkward.

IMG_3600 (450x600)

So I took it off the wall, and re-did it. That required some tricky plumbing for the waste line (which I had to redo three times.) The glass shelves are part of the shower door – quite a neat solution to bracing the fixed panel. The only sad part for me is that there is a hole in one of the tiles to the left of the sink. Maybe I can glue a decorative tile on top of it, or find some way to make not show. Suggestions welcomed!

IMG_3599 (450x600)

And now there’s a toilet. Now I just need a towel rail, a mirror, and to finish the lights.

IMG_3602 (450x600)

The sliding pocket door for the bathroom has a beautiful old-style lock. Unfortunately it’s impossible to find the correct keys for them now, so I bought a nice solid cast bronze key and filed it down to fit. Only problem is that traditionally, the key would have had a loop that could fold flat so the key wouldn’t get in the way when the door slides closed. We’ll just have to remember to take the key out before trying to slide the door into the pocket…

 SSPX0197 (450x600)SSPX0195 (450x600)

So, trying to take a selfie while riding a bike is a bit dangerous, and doesn’t work very well. Here’s Janeen and me while riding the Primavera century in April. I think Janeen was suffering a bit from the headwinds at this point so I was trying to ride in front to block the wind. We had a great time, and also rode it with a couple of good friends (Kirk and his twin brother Derrick).

IMG_20160417_173728596_TOP (600x338)

England, the Garden, and Tile (plus kitties)

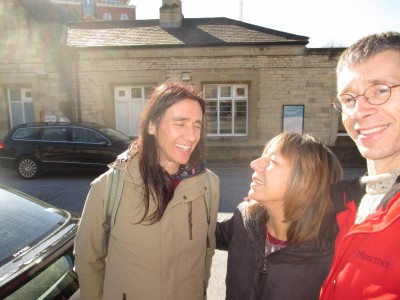
Well, one of the big things that happened last month is that I went to England with Misha. It was a short visit (the pictures are linked to a larger version).

18-farmersMkt 37-changedPriorities

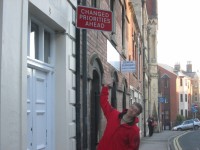
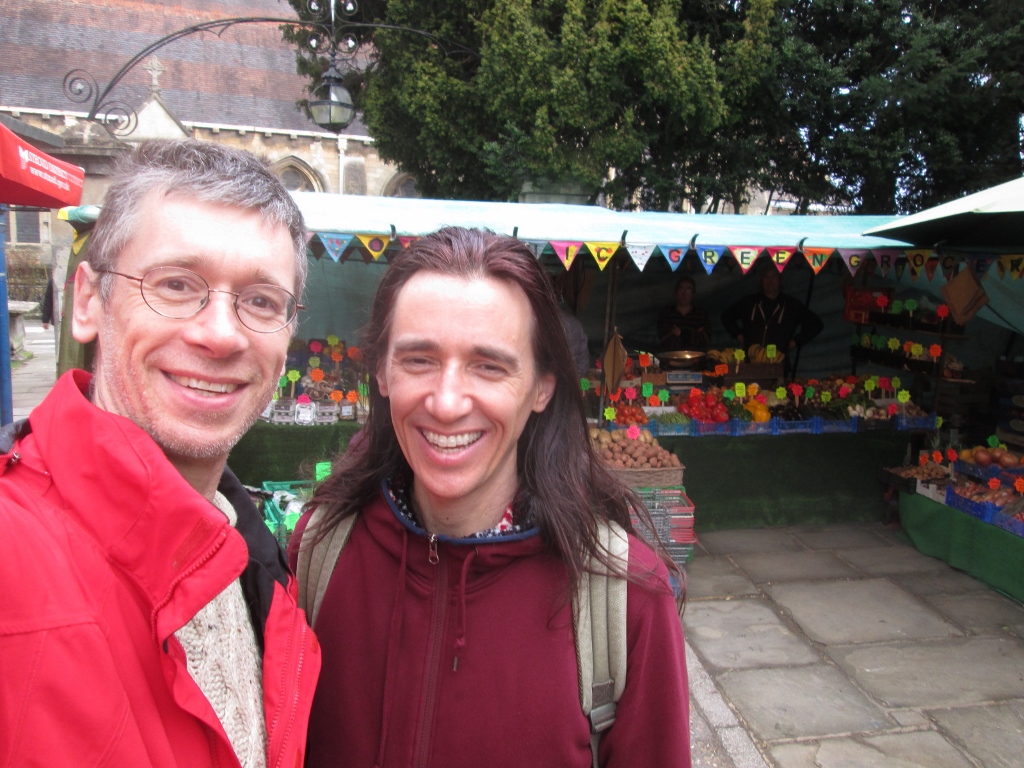
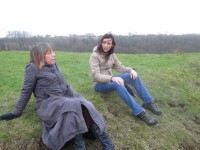
On the way up to Mum’s house on the first day, we walked through the farmers market – I got a bit turned around, and didn’t realize which street we were on and assumed it was really small this time of year (above left in front of the only vege stand we found on this street). Above right: “Changed Priorities Ahead” (hopefully they are enjoying themselves more).

18-farmersMarket

We went back to the farmers market with mum – a bit late as everything was getting closed down for the day. We still got some yummy flapjacks, though.

26-badgerArt

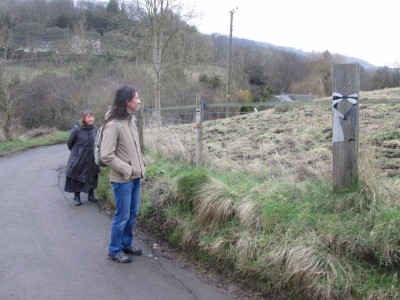
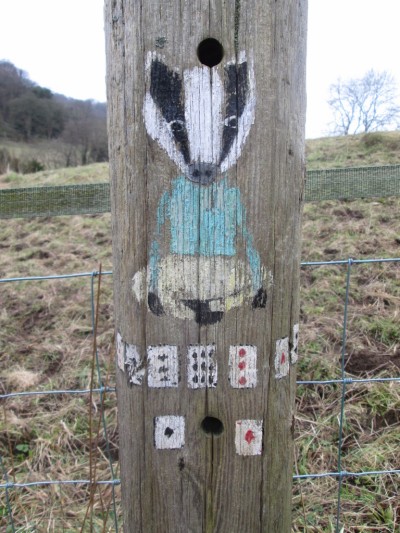
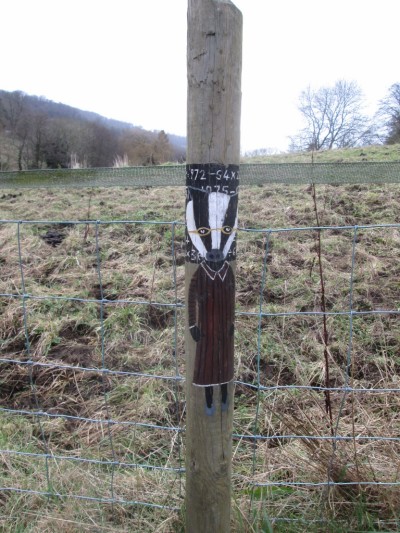
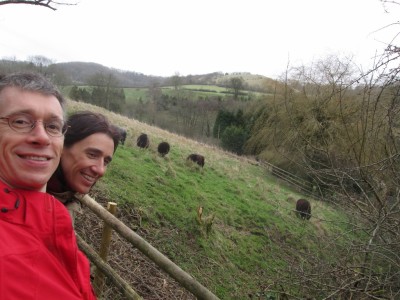
We went on a long hike to the Woolpack (famous because the author Lorrie Lee used to love this pub), had a pint and some “chips”, then continued the hike up Swift hill. On the way up the hill, we came across paintings of badgers in many different costumes on the fence posts. There must have been over thirty paintings. They were painted as part of a protest against the “badger cull“.

28-badgerArt

27-badgerArt

29-viewFromSwiftHill

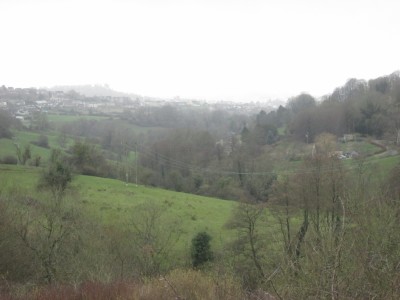
The weather was quite warm (for February), but drizzled on the day of our hike. This is the view from the top of Swift hill, looking down over the Stroud valley toward the river Severn (off in the haze somewhere…)

31-mumMisha32-snowDrops

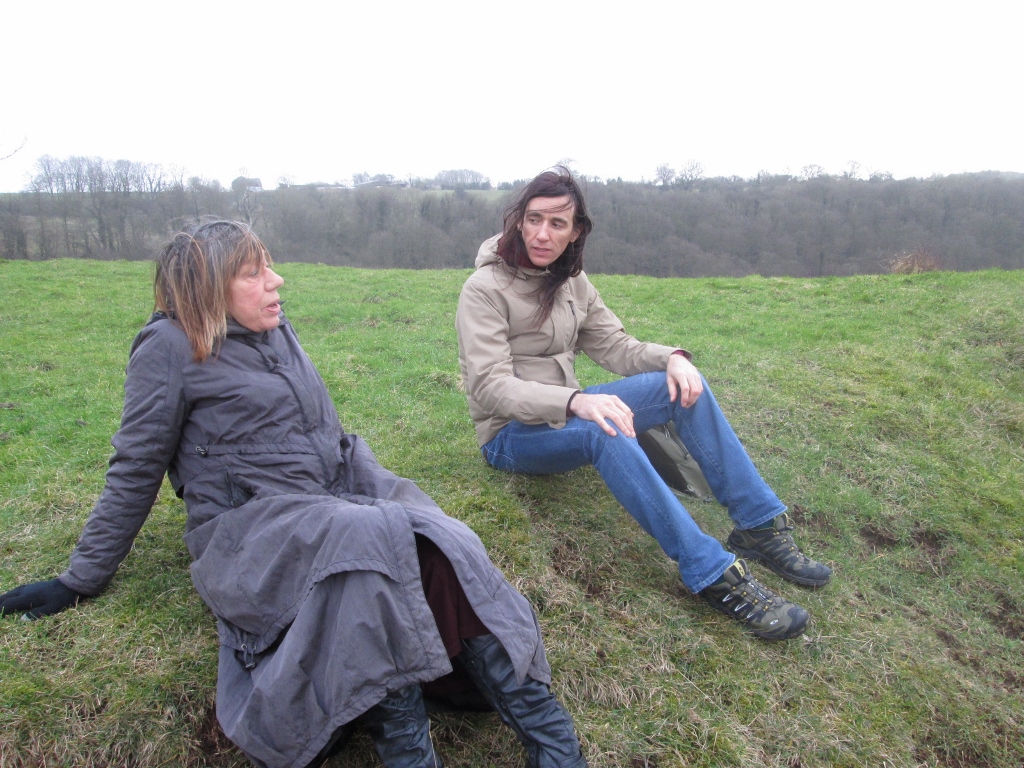
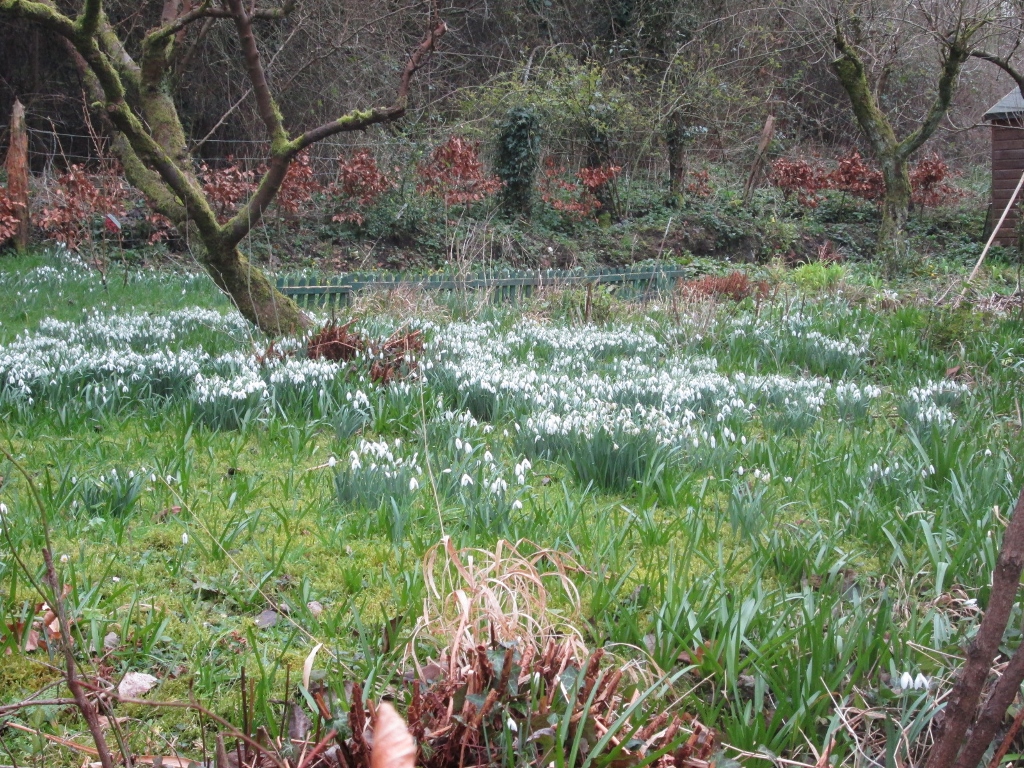
Mum and Misha sitting at the top of Swift hill (just before Misha pulled out some energy bars to share). The snowdrops were all out – couldn’t help trying to catch a photo on the way down (above right).

25-blacksheep

Here I’m trying to take a selfie with the black sheep. Who isn’t a black sheep in some way?

24-blackSheep

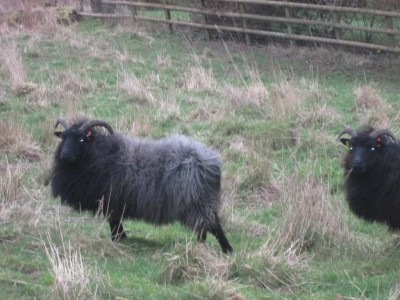
The flash made their eyes glow. Kinda creepy?

23-selfies22-longwalk

21-hobbitDoor

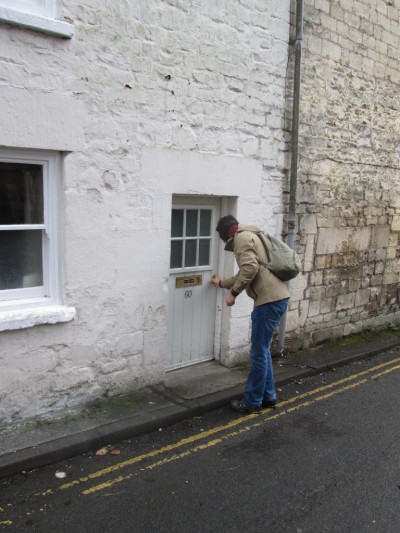
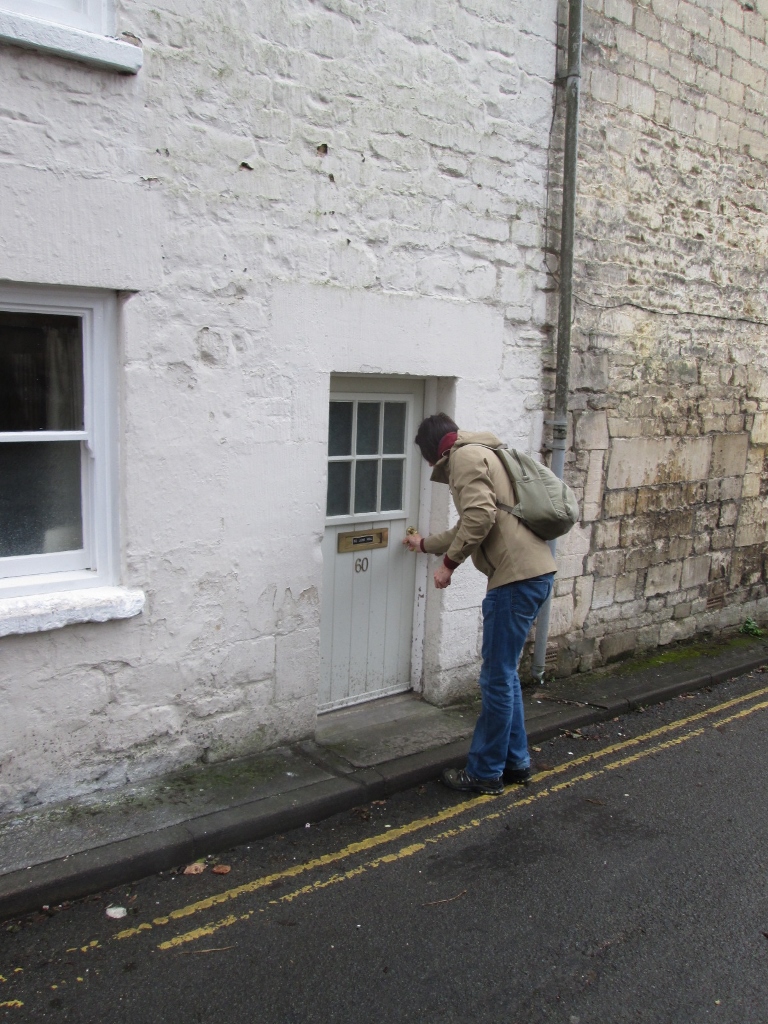
We rented a very little house in Stroud to stay in for the week. Here’s Misha locking the front door. Yes, we did have to duck to walk in. Fortunately, the ceilings were a little higher!

20-yummyBreakfast 19-oldphoto

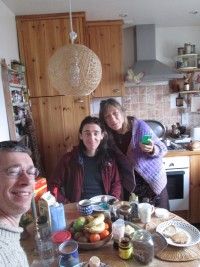
Above left: breakfast! Above right, a photo of Misha, Mia and me from about fifteen years ago. Maybe more.

IMG_3508 (1024x768)

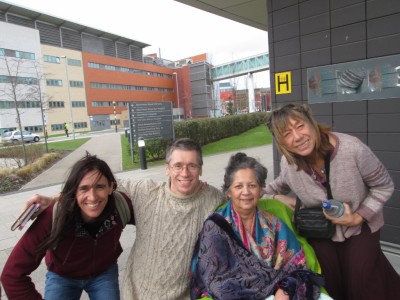
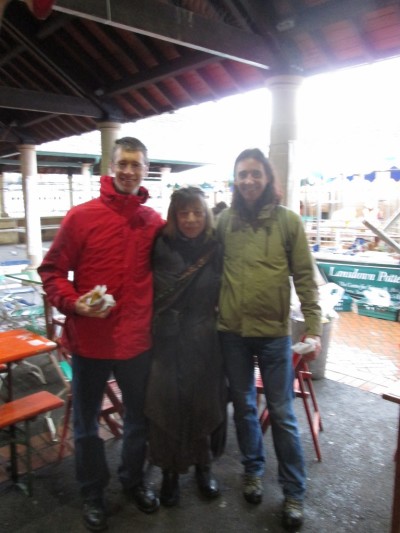
We also took a trip up to Manchester to visit a family friend (our second mum Jaya, from when we lived in a house filled with eleven children and three single mums). I’d not seen her for over ten years – Misha probably more than 20!

36-gardening 35-trimming

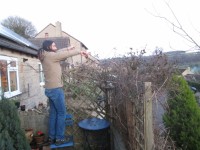
Mum wanted us to break down a brick wall and do some hedge trimming while we were visiting. I refused to climb up a ladder on the sloping driveway to trim branches – so Misha did it!

34-MumHouse 33-gooAppetizing

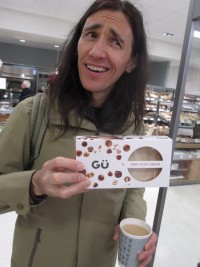
Above left is a photo outside mum’s house. Above right: Does this product name look appetizing to you (Gü)?

38-lastDay

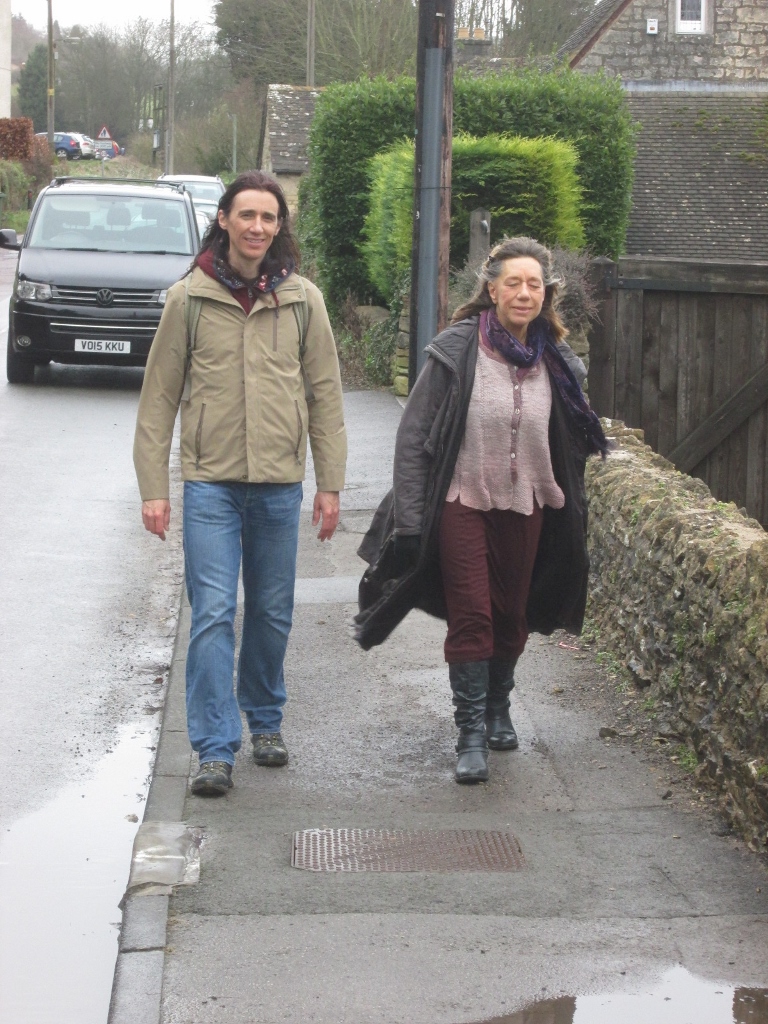
One last photo before we took a train back to London.

04-startingTile_2016031305-centerStar_20160313

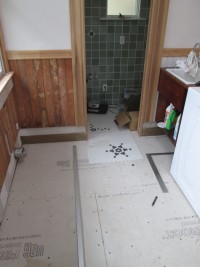
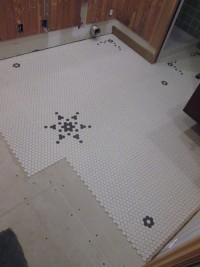
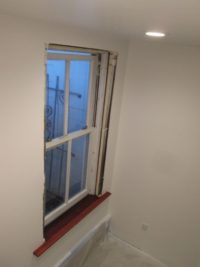
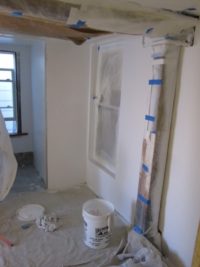
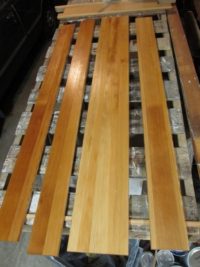
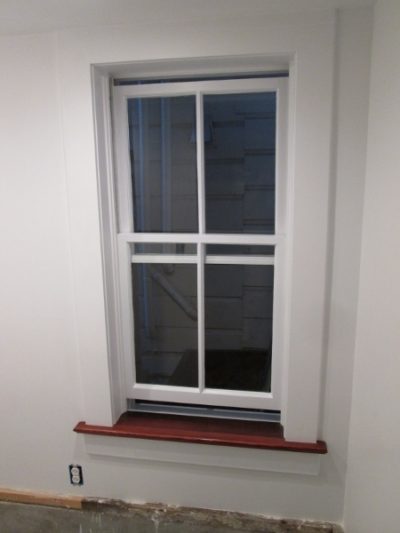
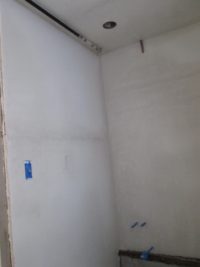
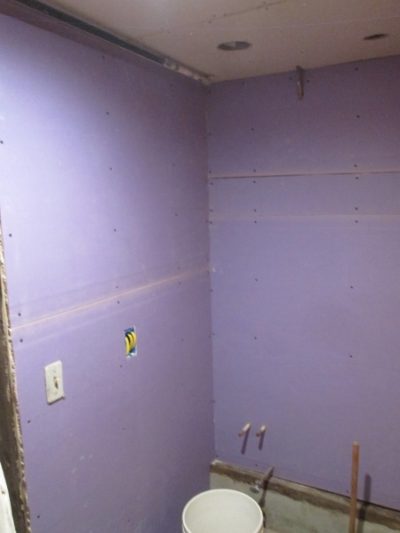
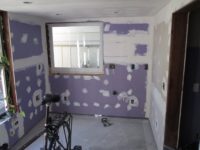
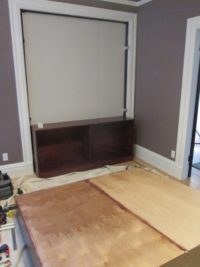
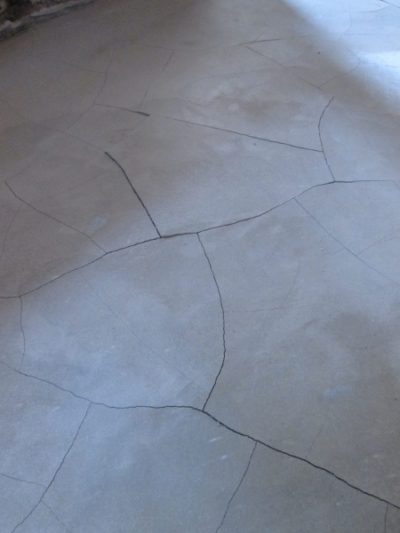
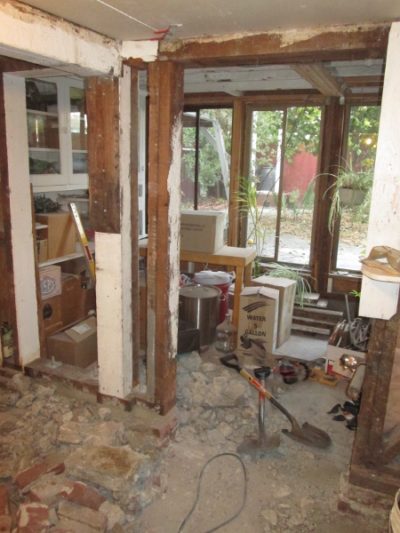
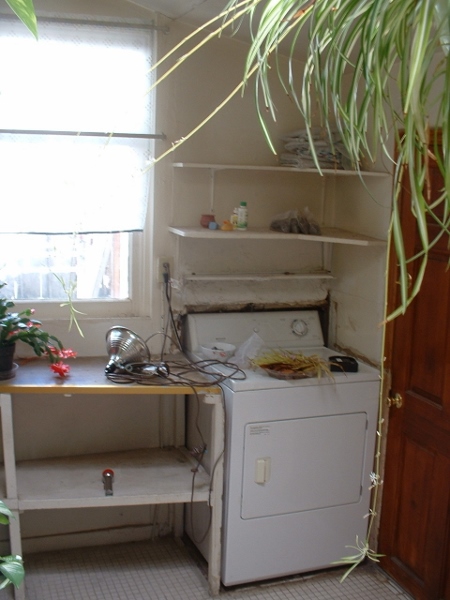
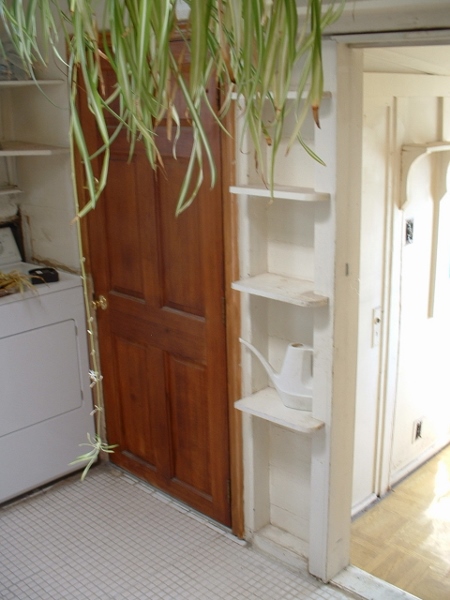
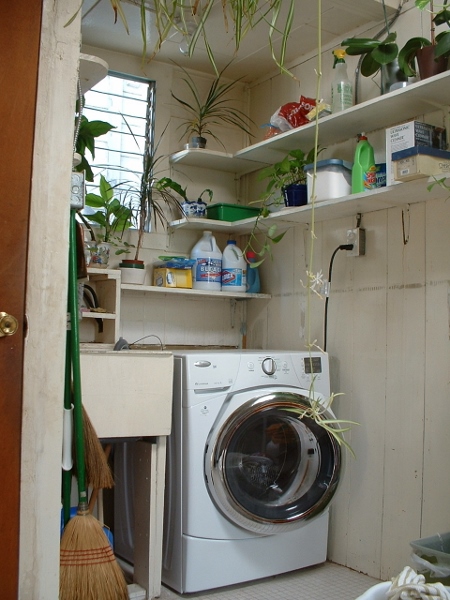
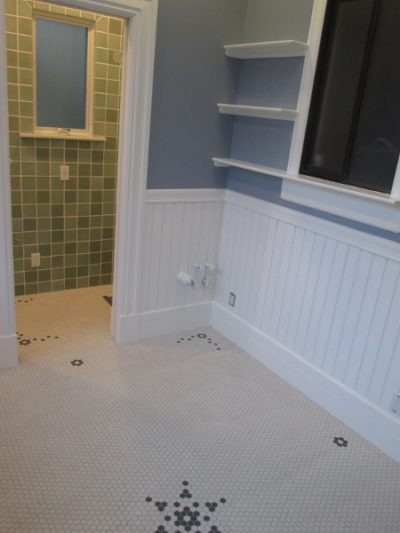
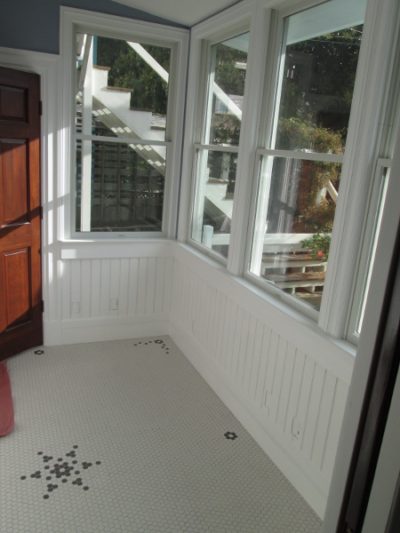
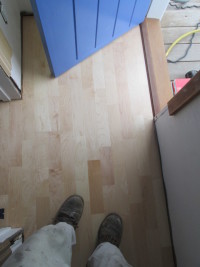
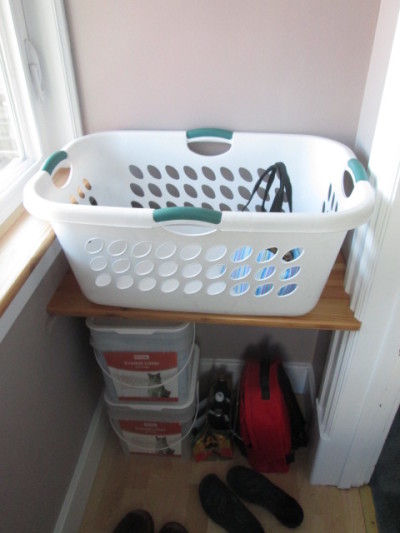
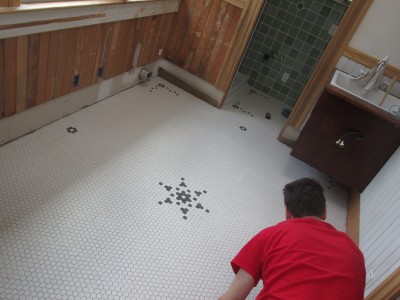
Hmm, so I also did some tile work. Actually, I finally finished the tile on the floor in the laundry room. This is the hexagon tile, with some black tiles used to create patterns. Initially, I was planning to do a border in this room. Then we decided to just do the same patterns as the bathroom, and also something in the middle. And then I added an extra little circle at the center of each wall line. And then (see later)…

06-centerStarDetail_2016031308-tileEdge_20160313

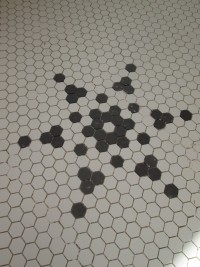
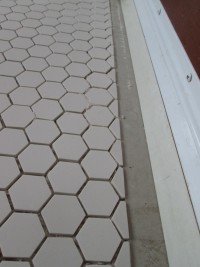
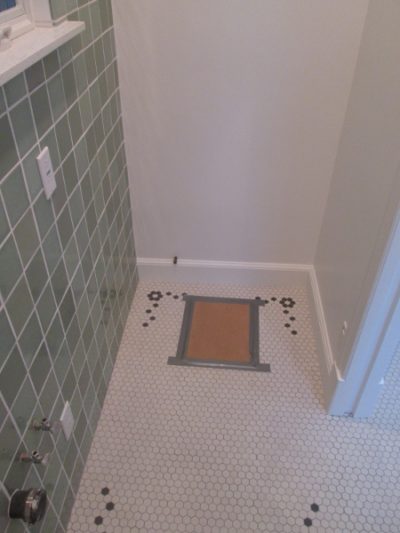
Above left, a detail of the pattern in the middle, and above right is one of the only cut edges (at the door).

07-turleOnKnees_20160313

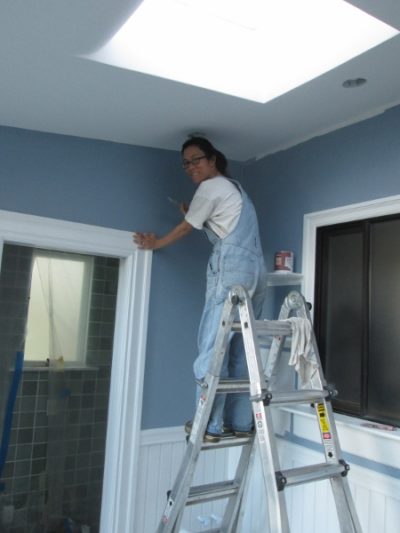
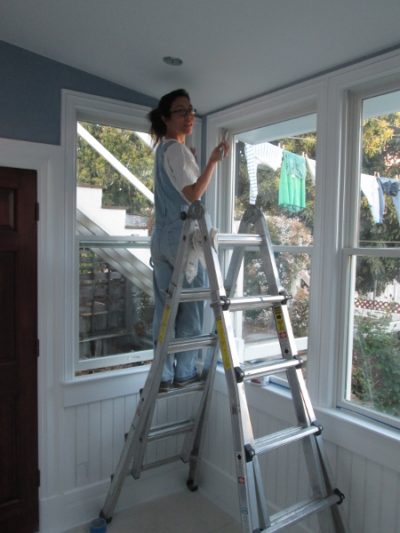
Above is how I looked all day. My knees hurt.

12-baseBoards_2016031313-baseBoards_20160313

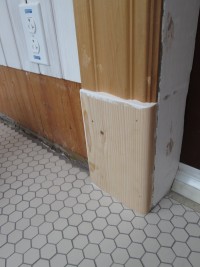
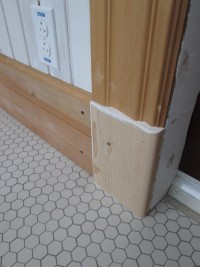
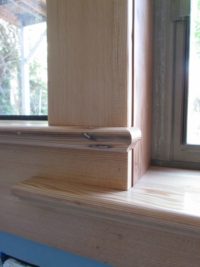
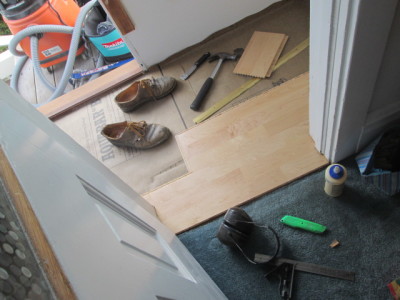
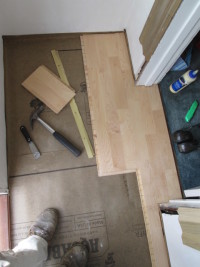
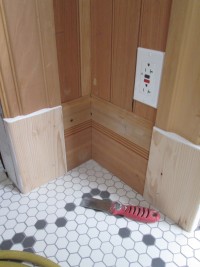
Above left you can see why there was very little tile cutting. I could just continue the tile under the base boards, and didn’t need to finish them tight against the wall (actually, it’s much better not to, so there’s some expansion room).

14-tightCorner_2016031315-tightCorner_20160313

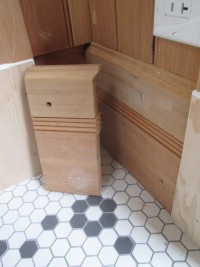
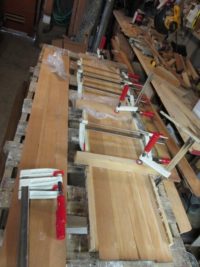
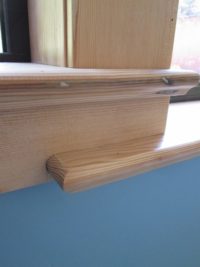
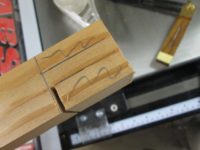
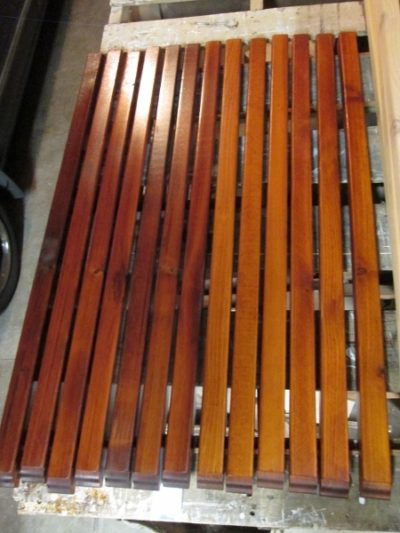
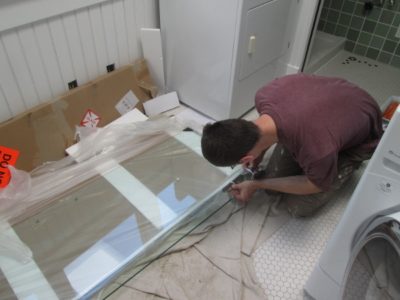
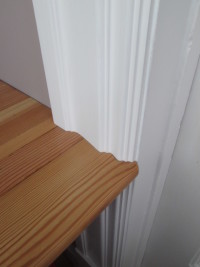
It’s hard to see in the photo, but instead of cutting the baseboards both at 45 degrees at the corner, I have butted them together, and hand-cut one of them so that the piece on the left fits into the grooves on the piece on the right. This is the way it was always done before power saws, and actually results in a joint that is less likely to open as the wood expands and contracts. It’s much more work (of course).

10-afterGrout_20160313

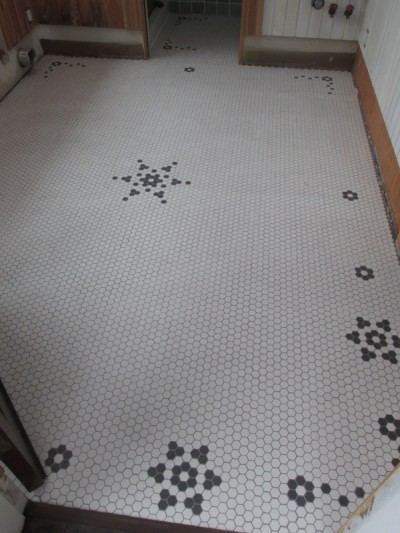
Here’s the tile all in, and grouted. When I was installing the tile, I ran out of white tile (about half a square foot short), so tried adding even more patterns at the doorways with black tiles, so that I could stretch the remaining number of white tiles. In the end, I just had to buy more tile. Now it reminds me a bit of how some people’s tattoos look: Lots of different patterns strewn around. I think it’s about as permanent, too, because I can’t see myself wanting to do this again!

17-floorDone_20160313 16-floorDone_20160313

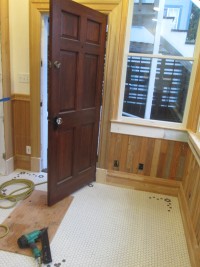
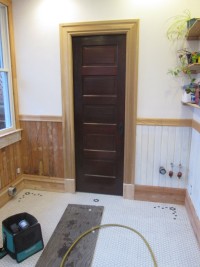
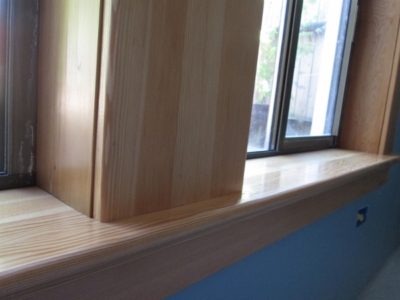
Now the baseboards are all in, the floor is done. While I was putting the baseboards in, I stood on pieces of plywood because it’s a bit early to be walking on the tile (needs a week to cure). I’ll start painting next week.

00-2garden_20160313 00-1garden_20160313

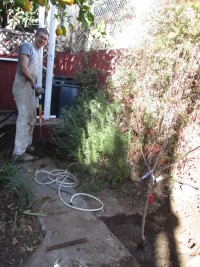
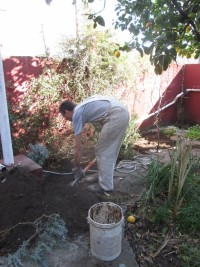
We had a few weeks of reprieve from the El Nino rains, so I rented a jack hammer and broke out more of the concrete in the back yard. Last year, the pear tree did very poorly in the location I’d put it (even though it did gallantly give us some fruit). The poor tree had almost no leaves, and was being crowded out by some aggressively drought tolerant plants. So I decided to move it. Hopefully the move doesn’t kill it, although the previous location would have anyway.

02-garden_20160313 01-garden_20160313

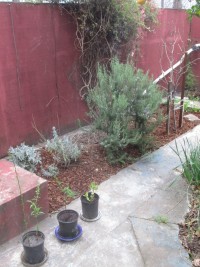
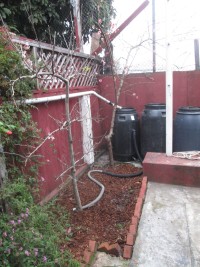
Here’s after the concrete is all out, and I’ve added mulch. The pear tree used to be on the far left of the upper left photo. Now its at the far right of the same photo. More sun and space. Fingers crossed. Above right, you can see what remains of our peach tree after the tree-jumper incident. It blossomed this spring, and is looking very healthy right now, so I think it will recover.

04-debris_20160313

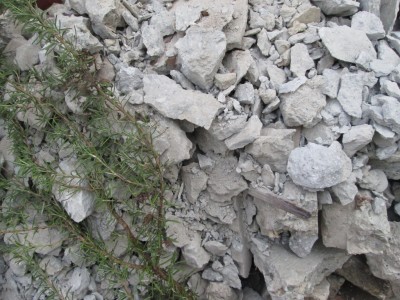
Mole was taking photos, so I think the texture of the pile of broken concrete appealed to her…

03-nasturtiums

Our garden grows nasturtiums!

03-gardenRmWall_20160313 03-gardenRm_20160313

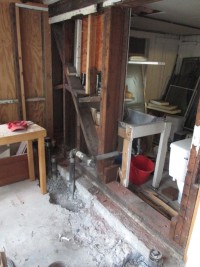
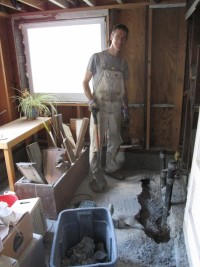
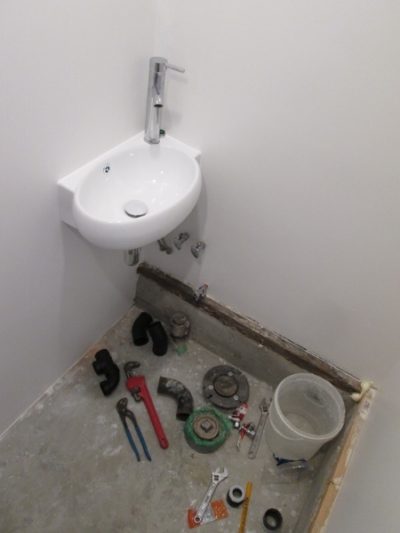
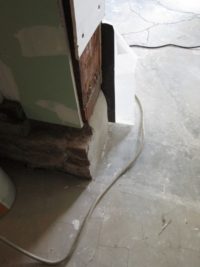
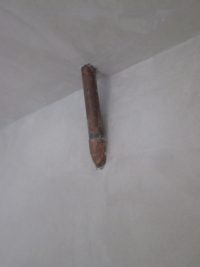
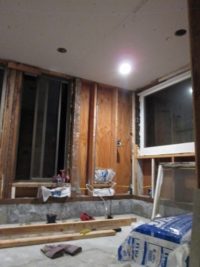
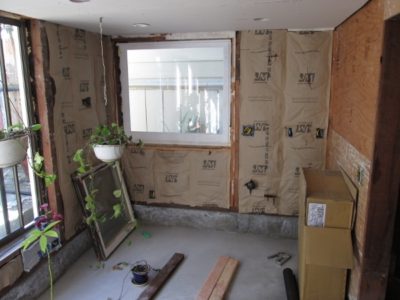
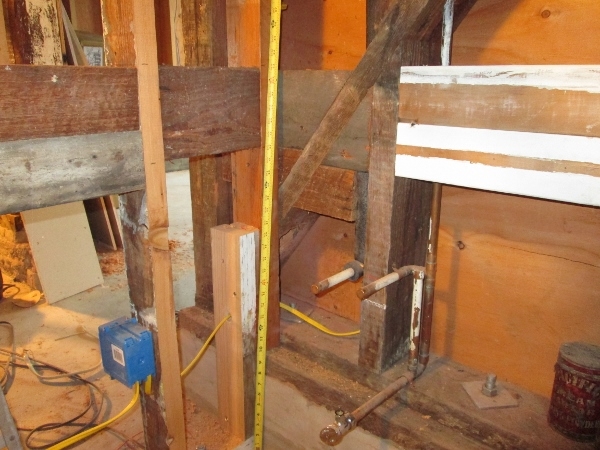
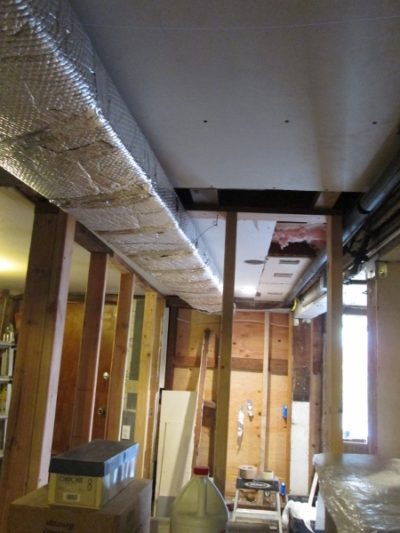
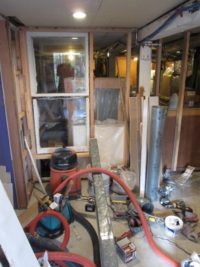
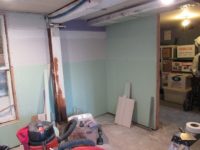
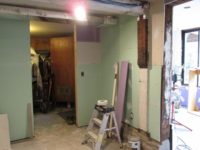
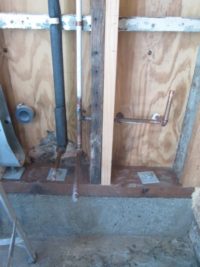
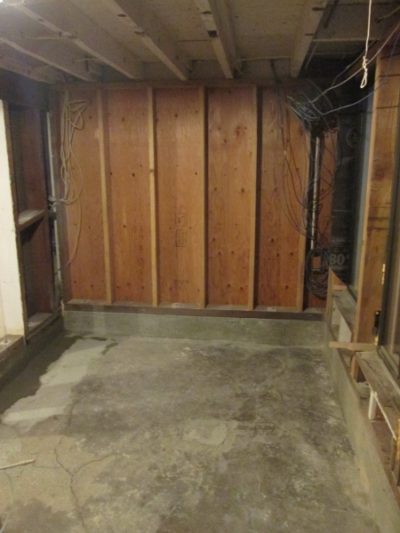
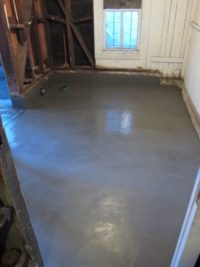
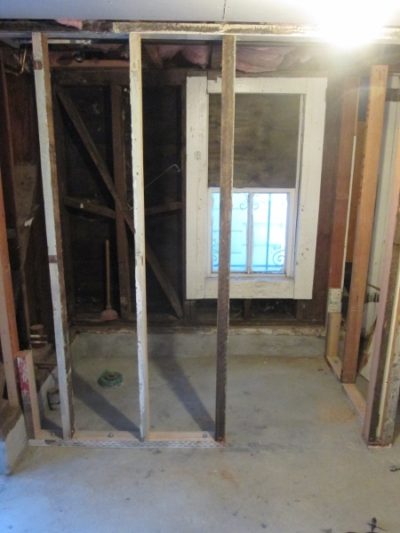
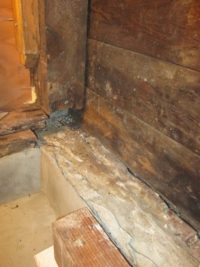
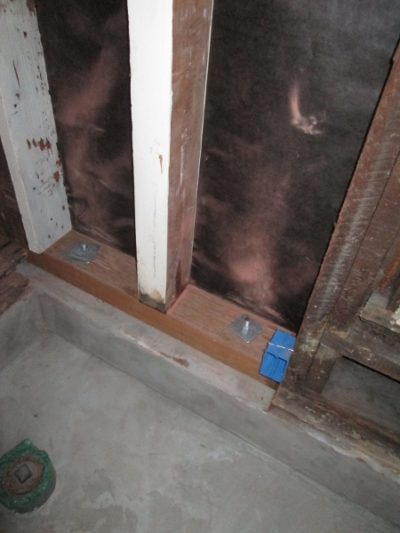
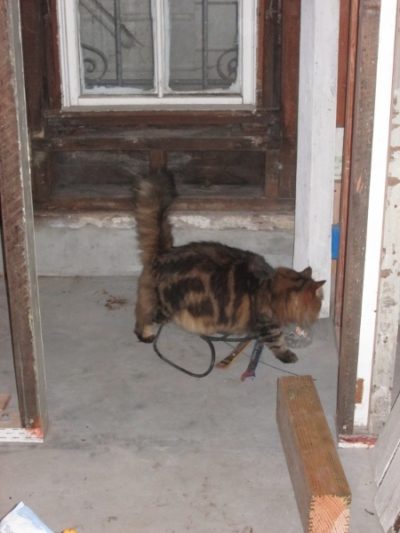
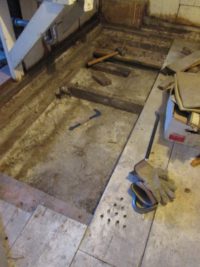
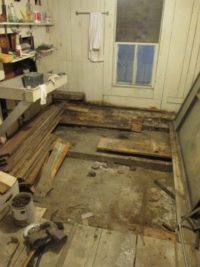
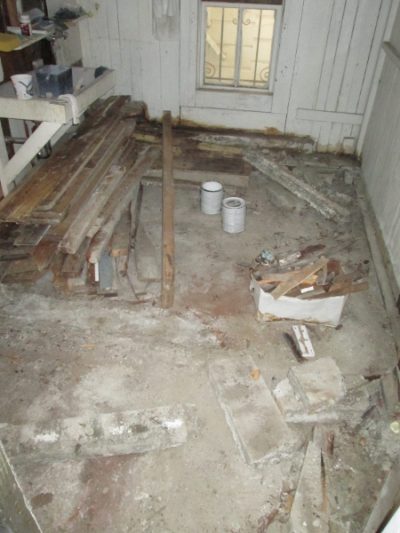
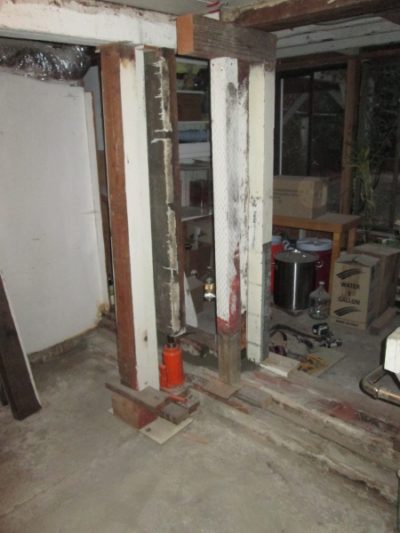
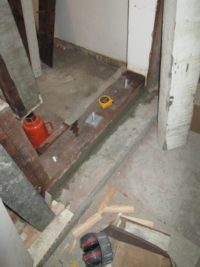
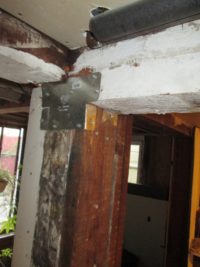
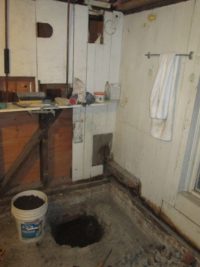
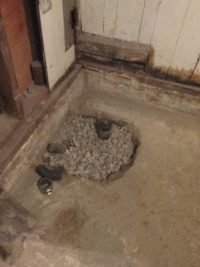
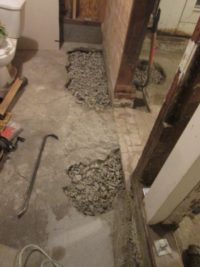
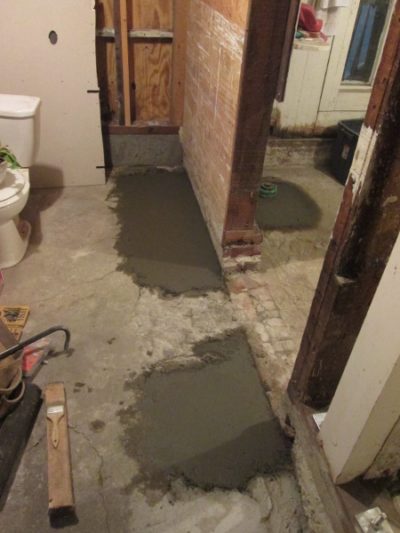
While I had the jack hammer, I also broke out some of the concrete in the room underneath the laundry room. We’re calling that room the ‘garden room’. I plan to make it into a place to brew beer 😉 But there’s a bunch of plumbing sticking out of the concrete that I need to remove.

01-crocus_20160313

We didn’t get many crocuses this year – but here’s one!

10-bellaNap_20160313

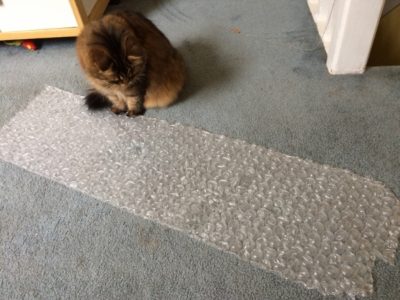
Bella sometimes likes to climb inside my shirts (when they are clean)…

11-bellaNap

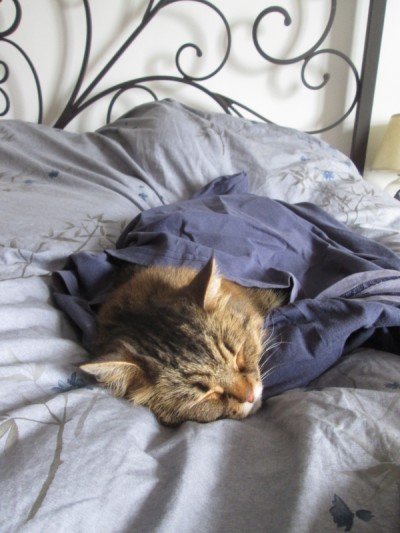
This time she fell asleep in it!

11-happyArwen_20160313

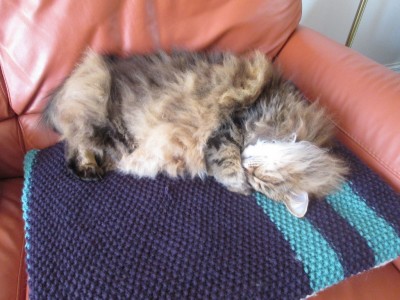
Here’s Arwen looking blissful on a blanket that Mole knitted specially for her!

Finishing up the porch

Sooo, winter feels like it is over here in SF. We are getting our false February spring – temperatures are in the upper 60’s (Fahrenheit). And what has turtle been up to all winter? Finishing touches:

02-basecoat_2016021203-basecoat_20160212

Here’s the porch with the base coat of plaster on it. It went quite well once I remembered how to do it.

01-plasterer_2016021206-installingTrim

Here’s the best photo that could be taken of me doing the plastering in such a tiny space. The view is through the door into our bedroom. I really like the patterned film that we put onto the glass: it casts rainbows when the sun shines in. Above right is how it looked after the plastering, and while I was installing the trim around the window.

04-brokenHelmet_20160212

OK, so this winter, we actually got some rain. Great. Except none of us are used to it. I managed to crash on a slippery piece of “safety” plastic on the crosswalk. Broke my (brand new!) helmet, tore some holes in my clothes, but otherwise, just scratches.

05-jaFancyJersey08-floor

Above left, mole in her new long sleeved wool winter cycling jersey. Above right, I’m starting to install the flooring in the porch.

09-floor

10-floor11-floor

Here are some pics of the process… Looks a lot better!

14-paint13-paint

15-fancyEdge16-shelf

Painted and with a shelf installed. I made the shelf out of reclaimed wood, then shaped the edge so that it fit around the door moulding. A fancy cut. The shelf works perfectly so that while we have laundry hanging out, we can put the laundry basket on this shelf and there’s space to walk through. I also set it up high enough so that the spare cat litter and our emergency earthquake backpack fit below it.

17-shelfUse

I added some hooks on the under side of the shelf, so that we can hang the clothes pins and the emergency backpack, so the shoes can go under them on the floor. And (!) there’s also a pole to hang clothes when we need to bring them in if it starts raining. A very space efficient 3ftx5ft space.

Paint!

The best part: Paint! After all the work rebuilding and doing prep, painting goes very quickly.

02-trimDone_2015112204-trimDone_20151122

Here’s the porch with all the trim on. It turns various shades of pink as the redwood turns the color of the primer. Hopefully the paint companies are honest (that two coats of primer will cover it), because California has banned the oil-based primers that really covered the redwood tannins well (air pollution, apparently).

06-insulation_2015112208-insulation_20151122

05-insulation_2015112207-insulation_20151122

So, we did actually get some rain. On that weekend, I worked on putting insulation in the walls, and putting up gypsum board on the walls.

12-Gypsumed_2015112211-Gypsumed_20151122

10-Gypsumed_2015112203-beadBd_20151122

The strange triangular bit is where the porch sticks up above the roof outside. The wall is really thin there – just the thickness of a piece of plywood – so I couldn’t screw the board on: I used glue. Hopefully it will hold.

Also, it’s rather tricky working in such a small space with sheets of gyp board. Sometimes I’d get the board in, also go in there to screw it on, and close the door to get at the wall, but depending on angles and the size of the board, could only manage two of the three. I got it done, though, and the sun came out. Above right is a closeup of the eave with all the bead-board installed, and the nail holes filled.

13-doublecat_20151122

Arwen is still more adventurous than Bella. Arwen will go sit on the porch, and Bella will wait just inside, watching Arwen. What’s she thinking?

“I’ll just wait here, so if something scary happens, it will happen to Arwen first.”

or

“‘Curiosity killed the cat.’ Good thing I’m more cautious than curious.”

or

“I’m gonna jump her when she comes back through the door.”

15-primed_2015112214-primed_20151122

Here’s the porch will a second coat of primer on everything. All holes filled. Ready for paint.

16-jaPainter_20151122

Janeen helped with the painting. Actually, she did most of it.

17-paintingDone_20151122

Done. Difficult to see in this photo, but we painted the eave the same pale blue that we used on the laundry room (apparently it discourages wasps from nesting).

18-todo_2015112219-blueDoor_20151122

Above right: The blue door has grown on me; I really like it now.

Above left: Next I’ve got to deal with the rest of this back wall…

Starting to come together

The siding is all on, and now the trim is going on. It’s all starting to look much better.

01-DoorStripped_2015101802-DoorHandles_20151018

The old back door was a peeling mess. It was also too short, and wasn’t square. Oh, and it was starting to come apart, too. So why did I save it? Not sure – but I did. Above left after I’d stripped off all the paint, and added pieces of wood at the side, top and bottom to make the door the correct size. I also glued it back together. This door was actually a home-made door by one of the previous owners, probably. Above right, I had to fill in the old holes for the door handle and lock, and re-drill because the door changed size.

03-DoorBevels_20151018

They made the door by building a frame, attaching a veneer plywood on the inside, and vertical redwood v-groove siding on the exterior. When I extended the top and bottom of the door, I used a solid piece of wood the full thickness of the door. To match the old v-grooves, I added a horizontal groove at the joint: If you can’t hide it, make a feature out of it!

05-LunarEclipse_20151018

Here’s an 8 second photo of the lunar eclipse from our back porch…

04-DoorPrimed_2015101806-BrokenTree_20151018

Above left, here’s the door after priming. Above right: Someone climbed over our fence and landed on our peach tree. It got completely broken. There is a small limb left, but it was the one that grew towards the fence, so it’s not looking promising for this tree. The main trunk got broken off by the clumsy oaf. This happened in the middle of the morning, yet we didn’t see anyone, and because there’s construction across the street, we didn’t hear anything either. Sad.

07-BellaALC_20151018

We got our welcome packets for AIDS/Lifecycle 2016! Bella loves the boxes.

08-PaintedDoor_2015101809-FinishingSiding_20151018

Here’s the door painted. Janeen picked out the paint color, but the paint store didn’t mix it quite right (she picked a slightly greyer blue). Above right, finishing up the siding. The old pieces on the left are just serving as spacers – they will be covered by the trim that goes around the window.

10-Siding1_2015101811-Siding2_20151018

I ran out of the original siding. The lumber yard sells v-groove siding, but it’s thinner, and doesn’t have quite the same vertical dimension as the siding on the house. So I had to make some more (or buy some custom-milled). Besides, I have loads of wood sitting around that I need to use up.

Above left, first I glued pieces of redwood or cedar together to make boards of the right width. Then I beveled one edge on the table saw (above right).

12-Siding3_20151018 13-Siding4_20151018

Then I have to make the tongue side, with the bevel, so first I cut the bevel (above left). Then I stand the board up on end, and cut out the wood in front of the tongue (above right).

14-Siding5_2015101816-Siding7_20151018

Above left shows the tongue side done. I used a similar process to make the lap side. Above right I’m test-fitting the newly made v-groove siding.

18-DoorSillClamping_2015101819-DoorSill2_20151018

I made a sill for the door. I used the same Ipe wood that the deck is made from. Above left, I’m not going to drag you through the whole process, but I had to make it a bit wider, so here’s clamping another piece on the front edge. I used polyurethane glue, which bubbles up and makes quite a mess while curing (above right after it’s cured).

19-DoorSillInstall_2015101820-DoorSillInstalled_20151018

Here’s the door sill installed. Starting to look good.

22-SidingGrooves_20151018 23-TrimOn_20151018

Whenever a piece of trim is installed on v-groove siding, there will be holes left that need to be filled with small v-shaped pieces of wood (otherwise insects use them as nesting places).

24-Priming_2015101821-StartingBead_20151018

Ahh, finally I have the siding finished at this location. Primed, and ready for the final coat. Above right, I’m starting to put the bead-board on the eve. More on that later!

Finishing the Weatherproofing

With stories of an ‘El Niño’ year abounding (maybe it’s wishful thinking), I’ve been working on finishing the weatherproofing at the back of the house. The back porch has always been a problem: It was built in stages, in the most expeditious way possible at the time. First, I think it was an open porch, with a roof covering. Then it got closed in, maybe windows added at that time. Then the roof was extended out a bit to provide cover over the new back door. But none of it was actually built with any type of water resistant membrane. It was initially just a semi-outdoor porch that became closed in. The wood framing, with lots of caulk, was directly exposed to the weather. So it leaked, paint pealed, rotted.
01-oldSiding_2015092402-noWall_20150924

Above left is the opposite side that I’d started working on in my last post. The corner where the porch wall meets the building back wall is where the main problem is. Water gets in there, and rots even the redwood. Then it gets down into the roof below. So off with the wall! (above right)

03-bareStuds_2015092404-flashing_20150924

I took off all the siding at the side of the window, and cut the siding below the window back from the edge of the porch wall. Above right, I’ve put in a bent piece of metal that laps behind the siding, and will go over my new tar paper.

05-plywood_2015092407-cornerPostExtension_20150924

I’ve put plywood on the part of the wall that will be inside the porch. Above right: Not sure why, but the corner posts holding up this roof are all about 3 inches short – so I had to fashion some extensions that I glued and screwed in place.
06-newWall_2015092410-morePlywood_20150924

Then it’s back on with the wall, and new plywood.

09-electrical_2015092408-electrical_20150924

Meanwhile, I also put the wiring in for the light in the porch. It’s not working yet (needs to be connected to power), but it’s easier to pull the wires before all the wall finishes are back on.

12-deRoof_2015092412-overhang_20150924

The roof extension that had been added was strange, because it stepped down from the other roof – a bit like an eyebrow. It was pretty badly rotten, so off with it! Above right I’m starting to add back in the framing, this time flush with the roof. I saved the roofing, so it was flopping around while I was working. In retrospect, I think I should have just torn the roof off completely. Faster, and the end result would have been better.

14-overhang_2015092415-kitchenView_20150924

Above left is the view from the other side, and above right is the view from the kitchen, while I’m working on it!

16-arwen_2015092417-arwen_20150924

Arwen came outside to check up on me, but decided something down in the garden was much more interesting.

18-bella_2015092420-fascia_20150924

Above left: Bella wondering why I’d left the drill there. Above right, I made new fascia boards, and routed a quarter round at the bottom edge, but still need to finish the corner (by hand so that the patterns match around the corner).

22-fascia_2015092423-roofDone_20150924

This is how the new roof looks.

24-roofRepairs_2015092421-ventilation_20150924

Above left: the reason I was saying I should have just replaced the roofing. You can see it ended up being a lot of joins and patches, so it won’t be as reliable as if I’d just replaced it. Oh well – I can never predict if I should just keep what’s there, or tear it all apart and rebuild. Sometimes the latter feels like a massively expanded project, but I often regret not doing it. Above right, the white pieces of wood with the two half-round cut-outs is blocking that goes between the rafters. The cutouts are to allow ventilation above the insulation. Because the rafters are so small, I’ll use rigid insulation. You can also see the back door: it was fit in with a whole bunch of pieces of tapered wood, so that I always had to duck to go through this door.

31-whatHappened_2015092432-wheresArwen_20150924

So of course, I tore it all out. Mole: “What happened to the wall?” Above right: Where’s Arwen?

27-waterproofing_2015092428-oldRot_20150924

Here I’m starting to put the tar paper on. Above right, this is the rotten area that we ran into the first year we had the house. The orange is the expanding spray foam that I used to fill in where I’d cut out rotten wood. I’ll have to get back to this one day…

29-rainReady_2015092430-oldRotCover_20150924

Above left: All tar papered in. We had our first rain forecast for half a year, so I had to get it water tight. Above right, I covered the rotted area with sheet metal, and flashed over it with self adhesive window flashing.

25-sidingFactory_2015092426-sidingFactory_20150924

Back to the siding factory: I had lots of pieces of wood siding, but much of it was damaged, or the pattern did not match the house. I stripped the pealing paint off it all, then joined all the short pieces to make longer pieces. I also cut and shaped the profile of it all to match the siding on the rest of the house (it’s an unusual size that I’d have to get custom made).

33-sidingFactory_2015092434-finallySiding_20150924

It doesn’t look like much, but those few boards are a huge amount of work.

36-sidingOn_2015092437-newWindow_20150924

Oh, and while I was at it, I got some new windows to replace the aluminum single pane windows.

Brewing, Tiling, Riding, Waterproofing, Siding…

Wow time goes by quickly. Well, I’ve actually done something in the last few months. And here’s some of it:

01-cider_2015082002-FloorTile_20150820

03-FloorTile_2015082003-FloorTileDone_20150820

I bought a jug of apple juice at the farmer’s market, added some yeast & a bubbler: Cider! Much easier than brewing beer. I finished laying the tile in the laundry room bathroom, but am going to wait on grouting it until I’ve also tiled the laundry room.

05-JJJ_20150820

And of course, we rode AIDS/Lifecycle together this year. Here’s a picture from the opening ceremony.

06-JJJ_20150820

Here’s me trying to capture the party atmosphere in the Cow Palace…

07-withAlex

A photo with our friend Alex who rode one day, but work stopped him from doing the whole week.

08-frontStepsBefore_20150820

Well, these front steps have been an ongoing project. Seems I have to fix them every year. The temporary fixes from past years finally gave out. The photo shows how the front of two steps broke off completely. There is also another problem with these steps: The height between steps varies too much for code compliance, so it was high time I did something about it.

10-cuttingBoards_2015082011-glueingBoards_20150820

The reason the step heights vary so much is originally they were built with thick boards. Then (before we got the house), some repairs were done with thinner wood. To fix this, I had to make new steps out of thicker wood. I re-used some old wood that I still have in the garage. Lots of planing, gluing and clamping to make boards that are wide enough for the steps.

09-frontSteps_2015082013-frontStepsDone_20150820

I forgot to take photos while I was working on it. There’s one photo where I’ve replaced part of one step. I also replaced the step below it. The one below that was concrete, but it had a piece of wood glued on top. This made the step heights very uneven, so I took the wood off: The reason they’d glued the wood on top was the concrete underneath was cracked and uneven. So I had to repair the concrete, also. Above right is after I’ve repaired the bottom five steps. Looking further up, you can see that some of the upper steps are also uneven and need to be fixed: Next year!

12-sleepingKitties_20150820

OK, to head off the ‘no cat photos’ complaint: I think Bella was sleeping under the table, and Arwen (love-bug) decided she needed some cuddling. They were actually sleeping like this for a while.

14-BackWallbefore_2015082015-demolition_20150820

One other project that I got partially finished with, but stopped because of ALC and life, was the siding and waterproofing on the back. In the photo above left, you can see where I left things for the past two years. The building paper is exposed (getting damaged by the sun), and I’ve “sealed” the top with some blue tape. Above right, I’ve taken out the wall of the back porch, so that I can take out the siding boards and re-use them. Clearly the rear porch was not part of the original building construction.

16-wallOpen_2015082017-wallOpen_20150820

Here’s all the siding removed. The wiring for the porch lights is hanging loose, and you can see in under the roof.

18-plywoodStarted_2015082019-plywoodStarted_20150820

Here I’m getting plywood on. It’s a bit complicated because the drain for the kitchen sink goes through this wall. Luckily (for the house) we’ve had very little rain for the past few years. But there’s predictions of ‘el niño’ this year: hopefully lots of rain. But I have to get this properly waterproofed and finished first.

20-wallIn_2015082021-wallIn_20150820

Here I’ve added the porch wall back in. Wiring is now much neater.

23-oldBoards_2015082024-oldBoards_20150820

The siding was is very poor shape. Lots of holes cut for various plumbing iterations over the life of the house. But the wood, once the peeling paint is removed, is still good. Thousand-year-old redwood is too good to waste. So I carefully repaired all the boards.

25-repairingBoards_2015082026-readyForPrimer_20150820

Here are the same two boards after I’ve glued in pieces to repair them, and sanded ready for primer.

One Weekend of Work22-startWP_20150820

The photo above left is titled “One Weekend of Work”: Repairing and re-using the old siding takes masses of time. Six boards in two days: Not the sort of thing a contractor would do. Above right, I’m getting the building paper on, and waterproofing around the drain pipes. I also got a new wall vent for the attic space.

28-partWay_2015082029-halfWayUp_20150820

Here are photos of the process of putting the siding back on. Cutting around the pipe penetrations is tricky.

34-moreSiding_2015082030-underPorch_20150820

And here’s where I’ve got to. I’ve ordered new windows for the porch, so can’t go much further here until they arrive. Above right is a view under the porch.

31-underPorchInsul_2015082032-underPorchBoards_20150820

Here I’ve added insulation, and installed wood to cover it. This is re-used wood left over from the laundry room wainscot. It still needs some trim around the edges and paint, but looks much better – and the porch will be more insulated now.

cats! cats!! cats!!!

there was some mild outrage 😉 at the lack of cat photos in the last post. i understand. and you don’t have to ask me twice, i have so many cat photos that never get shown!

image4

mathew’s most recent catification. he took this cradle off the cat tree he made when the cats were babies. the cradle was at a lower level and never got used. now it’s up near the ceiling and they love it.

image5image6

arwen enjoying the new perch. bella wondering how she can steal it from arwen.

image1image3

it’s hard to know when they’re done loving a box. bella trying on my ALC sweatshirt.

image7

a low-light photo of arwen. this is the face she gives when she wants something. usually food. sometimes she wants outside time. or a cuddle.

image9

nap time.

image8

arwen my cuddlebug. she is more cuddly when it’s cold. i call winter: cuddle season.

image10image12

bella investigating my birthday donut. she decided it was disgusting. (plus chocolate is toxic to cats.) bella relaxing on her hand rail.

image11image20

arwen “helping” with cutting out the pattern for my ALC red dress. bella in the sun. probably right after she kicked arwen out of this spot.

image14

this is what it looks like right before a fight breaks out. bella is always trying to exert her dominance over arwen. plus bella eventually owns everything. she is the queen and we all live in bella-land.

image15image21

more nap time. arwen on the left, bella on the right.

image16

this is bella’s smelling face. 🙂 she just sniffed the table. bella also tells us when things need cleaning.

image17

arwen was very sweetly looking out the window with her paws on the windowsill. she often leans in when i take photos, so this is the shot i got. 🙂

image18image19

bella giving mathew a massage. or maybe just exerting her dominance. it’s hard to tell.