Yet again, I didn’t plan on this being a permanent change, but once I get into it, I can’t help myself: I built in a bench, shelves, cabinets, electrical…
But before all that, I ran a really tough half marathon in September – “Bear Creek Half”.
Bear Creek Half
At the beginning of the race, I noticed that nobody else seems to wear bright colors. So it’s pretty easy to spot me in photographs. After the first climb, the view at the top was incredible – and there were cows everywhere. I started wondering if it was really true that red makes cows angry? Or is that bulls? Either way, they didn’t seem to care. It was an incredibly strenuous race, and the 80+ degree weather didn’t help. But I finished in the top ten overall (6th) – and my fancy new Garmin watch suggested I rest for 66 hours. The girls were quite happy to rest with me.
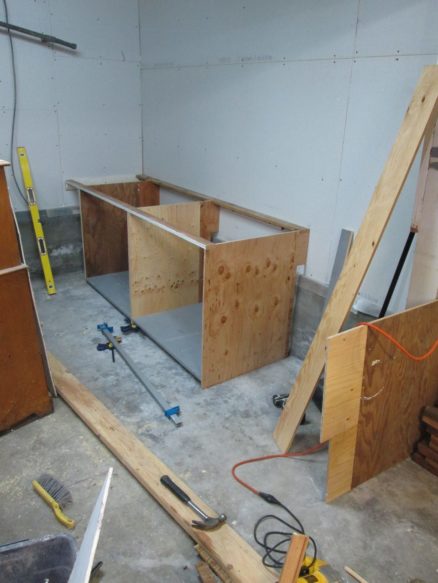
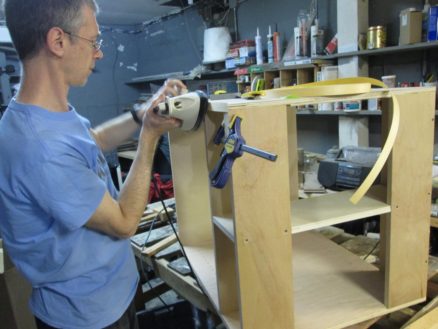
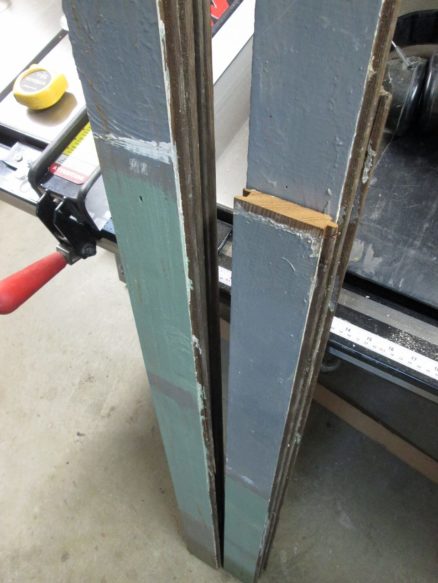
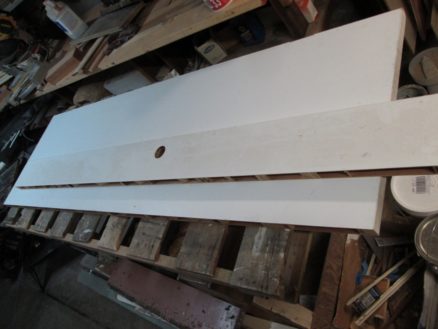
So back to the point of the post. I’m still trying to reuse wood, so just to start making the cabinets I had to glue a lot of smaller pieces together. Then I used the special cabinet jigs Misha gave me years ago to drill all the holes for adjustable shelving.
OK first base cabinets going in – because the floor slopes in every direction, and the wall isn’t square, it took a while to get this all lined up.
These cabinets we’ve had in the garage for a long time. Finally they are in a good place – I’ll fill them up with things that don’t do well getting dusty.
Now I need some shelves…
I decided to make the work top stepped down so that I can use my miter saw here. The height of the step is exactly the same as the height of the miter saw base, so that wood can be supported on the bench top at the left side. But first the old bench top is too short, and has a piece cut out of it. Need to fix that.
A bit hard to see here, but this is how it works. I still need to use spacers to support the wood on the right side of the saw.
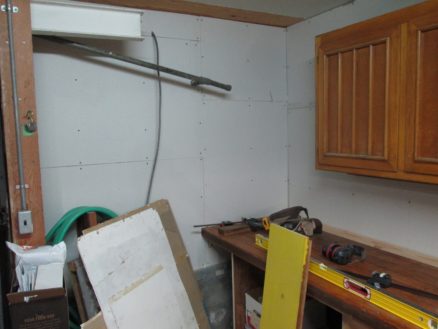
Oh, and there was a lot of wiring to do – it all got pulled out when I was putting the plywood up.
Shelves for all the paint cans I’ve accumulated.
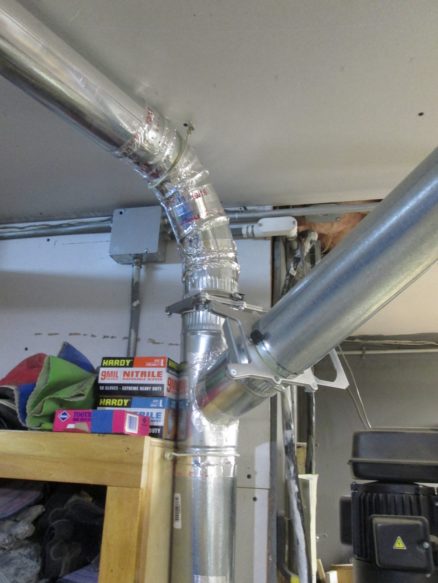
On the right of the photo below is where I plan to put my dust collector. When I re-wired, I added a three-way switch so I can turn the dust collector on or off from different places in the garage…
… and dust collection means I have to put together all the ducting for it. This is turning into a major project.
So here’s the problem with doing all this:
The electrical panel is currently partially hidden behind that wood post. I had some electricians come over to look at moving it (because it’s not to code here). One of the electricians said “why don’t you just get the post moved?” Exactly.
These stupid wood posts are at best a temporary structural solution that I should fix, and I have been planning to (for years). They support beams that are undersized and sag, and they are not properly braced for earthquakes. But to fix them – which I absolutely should – I need to get the foundations replaced here… Which would involve tearing out all the work I just wrote about.
Dad always joked that the cobbler’s children go without shoes. This house has been a bit like that: We’ve been here for almost fifteen years, and I’ve barely done any seismic strengthening on the house. So I finally decided to pick the most vulnerable wall, and make it a bit better.
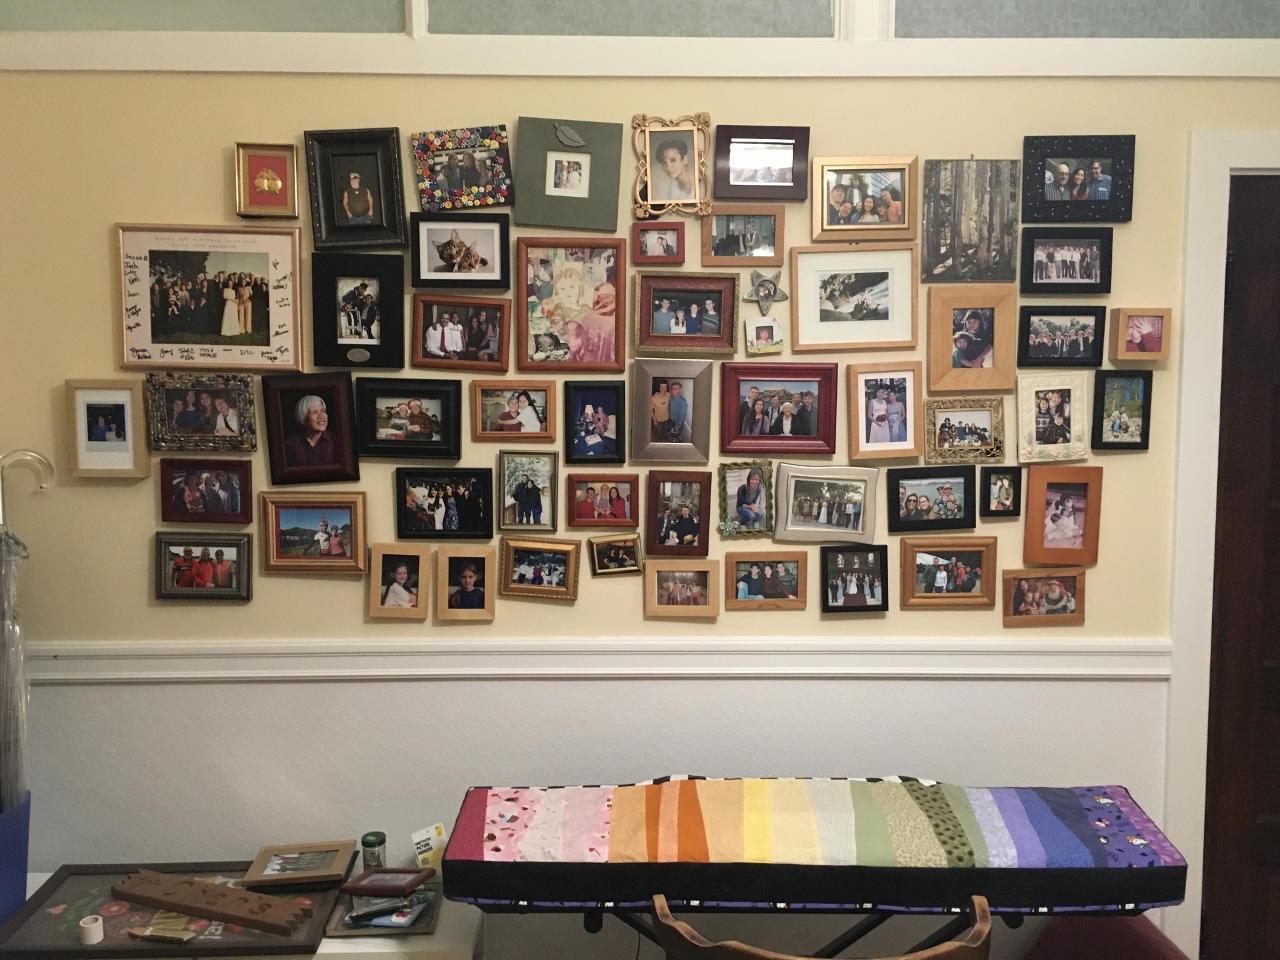
But first: Mole almost finished the photo wall… and did I mention she made a rainbow cover for her keyboard?
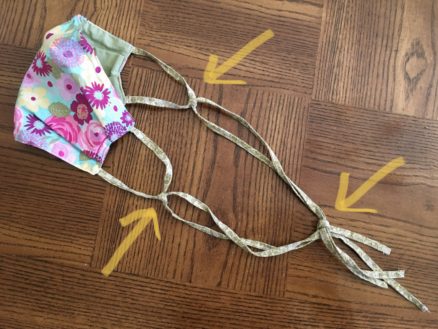
Oh, and with all the masks, mole perfected her mask strap technique: This allows her to hang it around her neck, or loop behind ears. Super easy on-and-off without the mask-beard that seems to be the vogue right now.
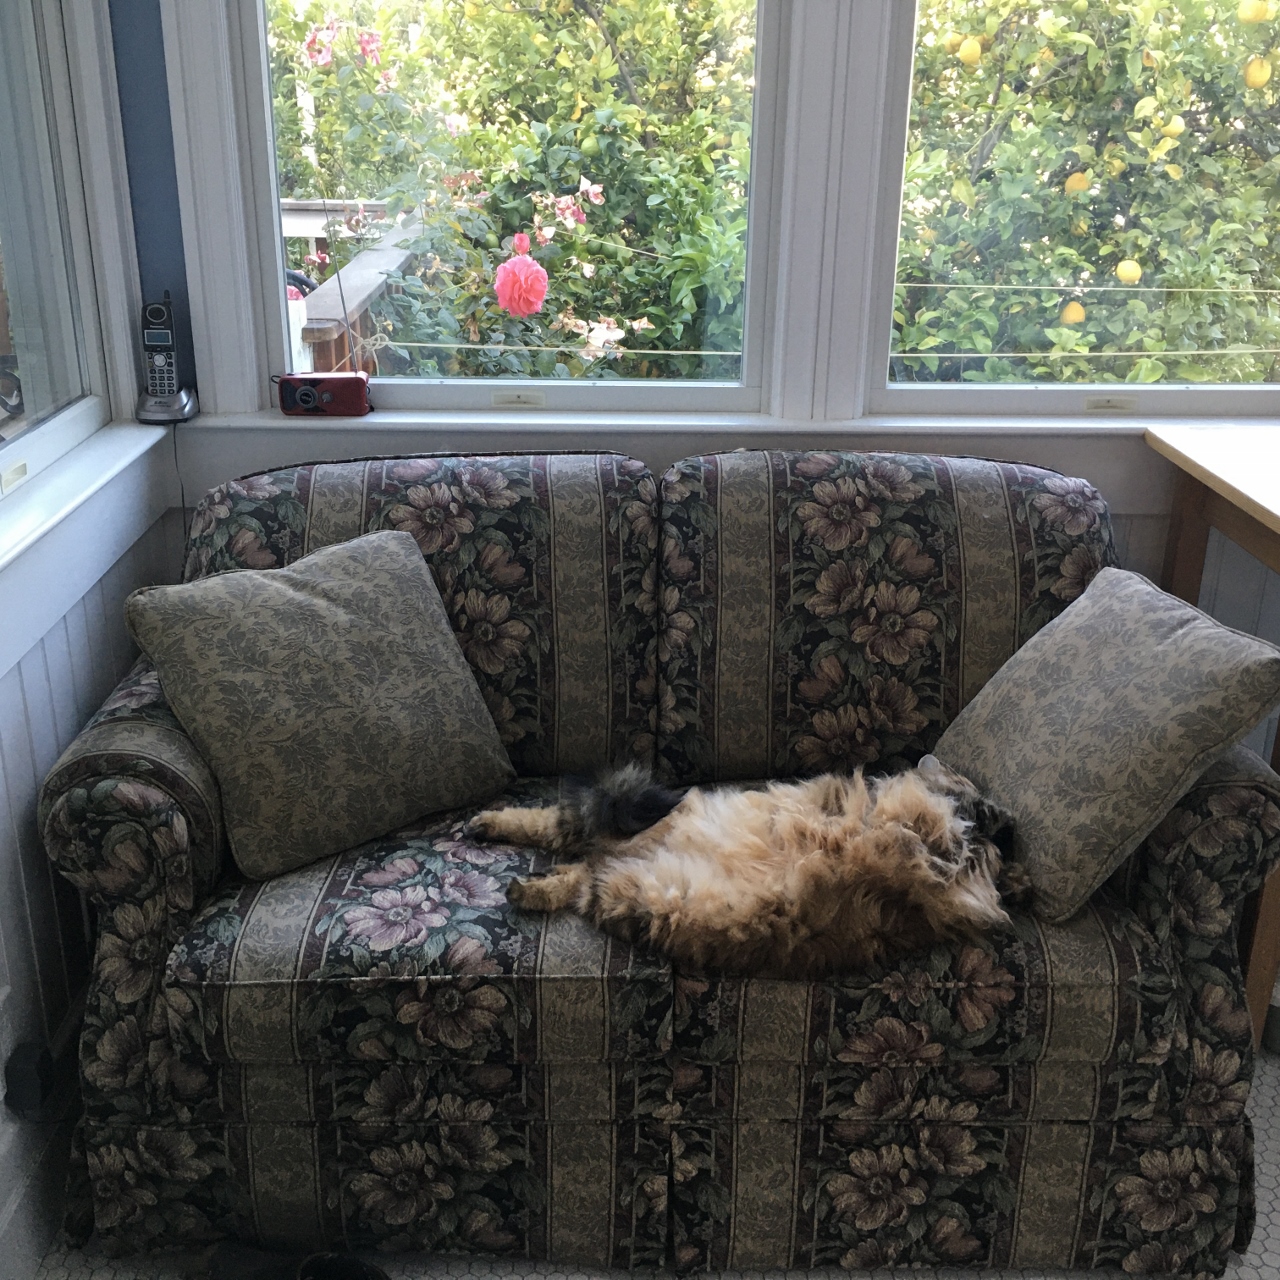
When Arwen isn’t relaxing on the couch…
… she’s decided that oatmeal is one of her favorite treats.
Bella found the new power position in the bedroom…
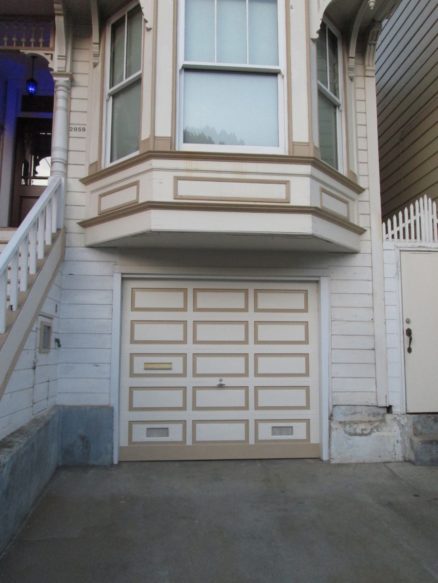
OK, the garage door: It’s been begging for some attention for decades, and I’d just been ignoring it. Too many other pressing things, and besides: Who looks at the front of our house??? (not me, obviously).
It took about a day to get the door sanded and prepared for painting. I decided to paint it, instead of staining it. Stain and polyurethane may be nice, but they don’t last as long as paint. And it’s a garage door. I’d rather not be doing this again soon.
It took a couple of coats of primer (the door is made of redwood).
I tried to match the rest of the house somewhat. Still need to paint the walls on the sides of the door (I also want to put a couple of lights up)…
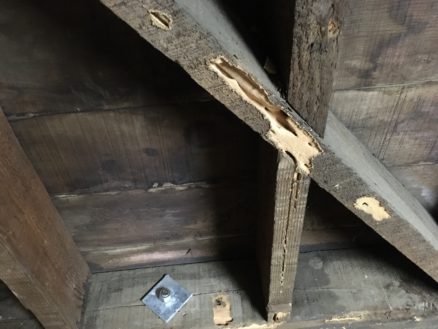
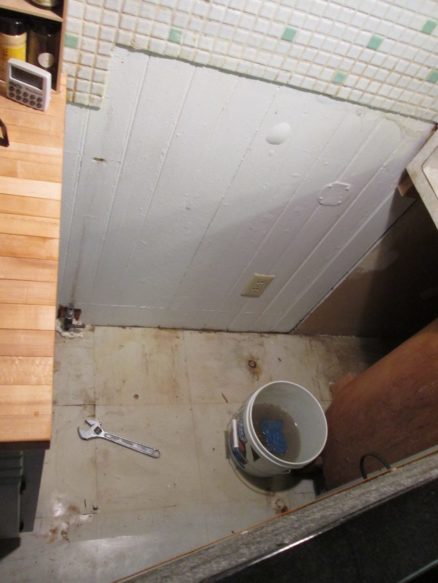
Now to the project at hand: I took off the old random pieces of wood, shelves, etc to get down to the studs on this front wall. And I found some rather nasty surprise: Looks like some termites have been living here.
I drilled and installed all the anchor bolts, but had to pause on putting up the plywood until I could get a pest inspector to look at it.
He said it was old damage. But I soaked it all in wood preservative all the same (made the garage stink).
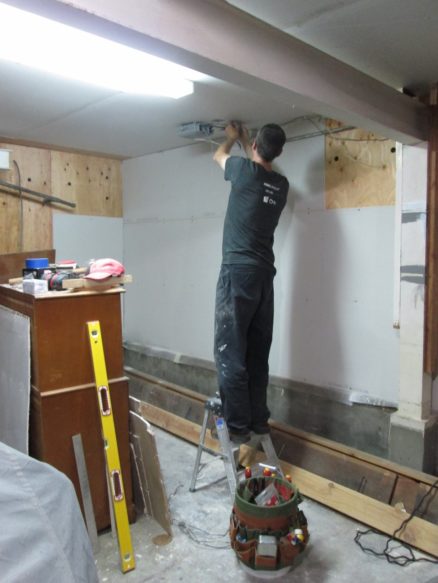
Hmm, it didn’t happen this quickly, but here I am putting up the last of the drywall.
The amount of electrical wiring in the ceiling is quite mind boggling. And I added to it by putting in an additional four way light switch so we can turn off the garage lights as we leave with bikes.
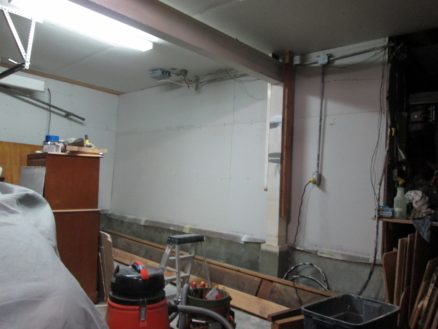
Don’t hire me to be your electrician, OK?
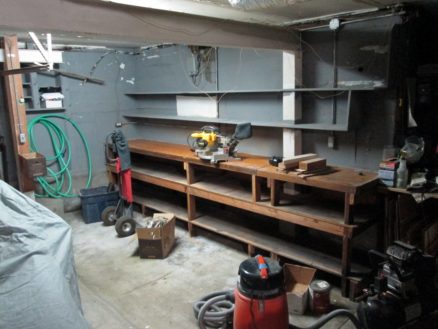
OK, now almost ready to start putting shelves and cabinets back in. Got to make them first, though.
Arwen has been really enjoying the overgrown back yard. The area she’s sitting in gets watered by our shower and bathroom sink, so it stays lush and green.
Bella prefers her cat tree – like everything, originally it belonged to everyone, but now it’s exclusively Bella’s: She rules the house like a despot.
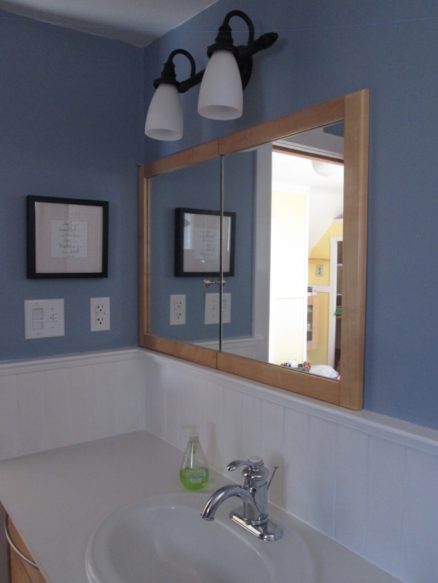
Oh, and instead of the wire shelves, we now have a beautiful fancy wood cabinet with a full height mirror. The first time we’ve had a full height mirror since we lived at Rousseau St!
July fourth weekend this year we took a trip to Tahoe to escape the war zone fireworks on our street. The girls still hate the ride, even with their thunder shirts on.
You didn’t think this was going to be a vacation, did you? What’s that?
After we finished putting in a new water heater and fixing a pipe broken by freezing last winter, we were up scaffolding installing sheet metal over holes that woodpeckers had drilled into the house. Lesson learned: Get enough scaffolding to cover the whole wall. Then you only have to assemble and disassemble it all once (instead of four times).
We didn’t realize what we were making…
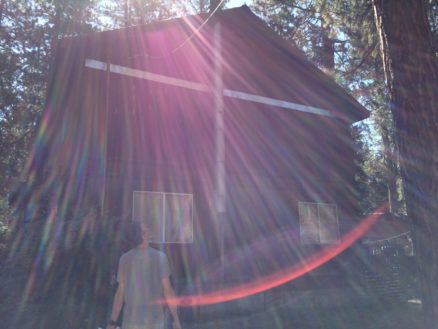
The girls really like the rock cabin – particularly the spiral stairs. They even got to go outside for some walks in the rocks.
I also managed to get a run up to the ridge trail in. This is lake Tahoe on the morning of July 4th (click on the image for a larger picture)
On the way home, Bella got a bit better at traveling, but it was still traumatic. I can’t decide if the fireworks, or four hours in the car, are worse for them: Might be a wash.
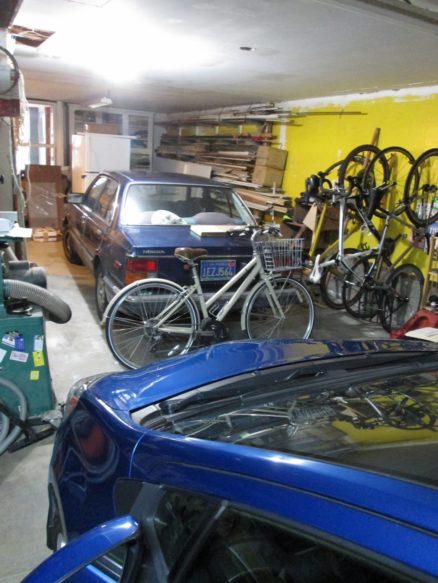
Nothing lasts forever, but she almost has. For twenty years, I’ve been thinking Mole’s 1982 Honda Civic would not last another year. And there were things we had to fix, but then she’d just keep on going. At the end of last year, the car had been getting progressively harder to start, and would sputter and hesitate for the first few blocks when first started, but still she kept going. As the year turned the corner, suddenly she started overheating, and would issue clouds of white smoke when started: Blown head gasket. Time for a new car…
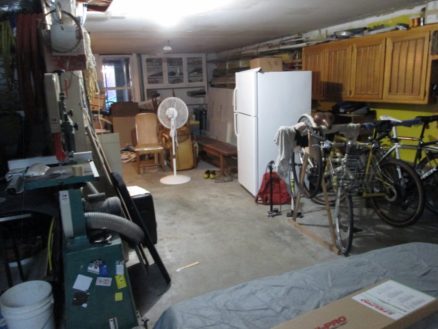
But I couldn’t let this wonderful little car just be towed to a junk yard and get torn to pieces; or be crushed for scrap metal. So I bought a head gasket kit and had to clear out some space in the garage to work on it. The bike rack I’d made a few years ago jutted too far out into the garage to fit a car next to it.
I put some hooks in the wall, and hung the bikes up on hooks. Mole’s city bike is just too heavy to lift up, though, so it will need to be wheeled around…
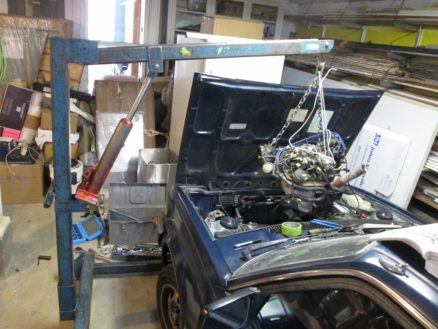
Plenty of room! Now, to rent an engine lift, and get out the ’82 Civic shop manual.
The most difficult part is keeping track of all the vacuum hoses: A car of this age does not have a computer – or fuel injection. It has a carburetor, and the emissions are controlled mechanically through miles of vacuum hoses. I think there are about fifty hoses to label and keep track of before the head of the engine can be lifted out.
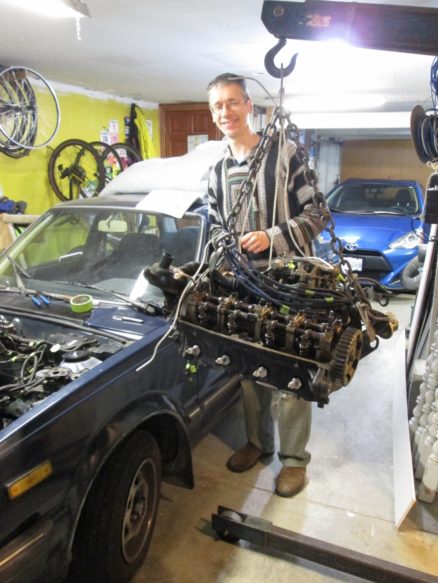
This is the “head”: I left the carburetor and intake manifold attached, so there’s less to reattach later.
No mystery here about what the problem is! One cylinder is completely filled with coolant that has leaked through the broken head gasket. In the few weeks the car’s been sitting in the garage, some rust has formed, too. The oil was an emulsified gloopy mess: Mayonnaise!
This absolutely felt like open heart surgery. Poor little car was hoping I knew what I was doing (first time).
The photo below shows the old head gasket. To contain the forces inside the cylinders, they embed a metal circle in the gasket around each cylinder. The second from the front one had rusted through – should have been more careful changing the coolant!
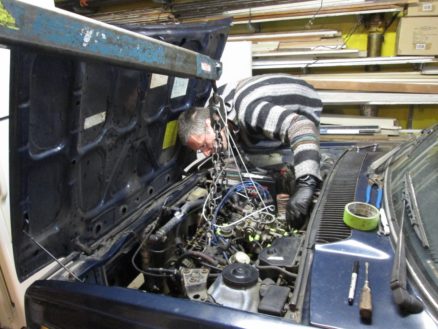
Mole caught a picture of me slowly lowering the head back in. Then the time consuming part: reconnecting all those hoses. If I were planning to keep the car, I would have replaced all those rubber hoses at this time. A tiny leak in any of them makes the engine run poorly.
When reconnecting the timing belt, I discovered that the mechanic who had replaced the timing belt (not me!) had set the valve timing off slightly. At first I didn’t believe it, but true enough, it had been wrong for years! This engine is so magnificent it can even compensate for the valve timing being one notch off! With the correct valve timing the engine now started even easier, and had more power, than before I replaced the head gasket.
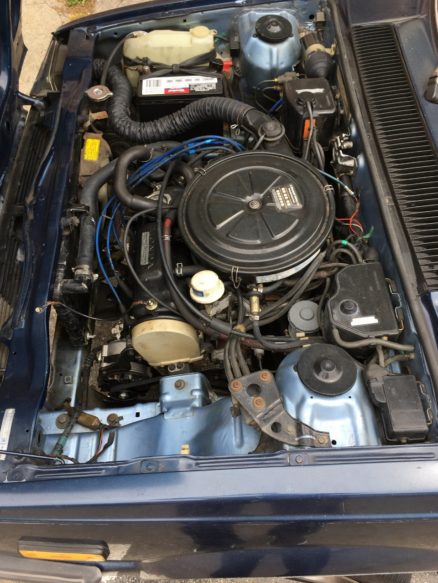
So she’s back alive, and I was using her to get plywood, gyp board, and as a general SF runaround car. While going to American Ace to buy electrical parts for the garage, I ran into someone who wanted to buy her. He was so excited about the car, he was willing to buy it right outside the store (how would I get home??) He came over later that afternoon, and gave us cash: Years ago, he says, he had one. He loves the car.
So long! It’s been 32 years since mole learned to drive in this car. We’ve traveled to Canada multiple times, to Colorado, Tahoe, Arizona, and countless times up and down the coast of California in this car. Take care of her, Charles, and she’ll last forever!
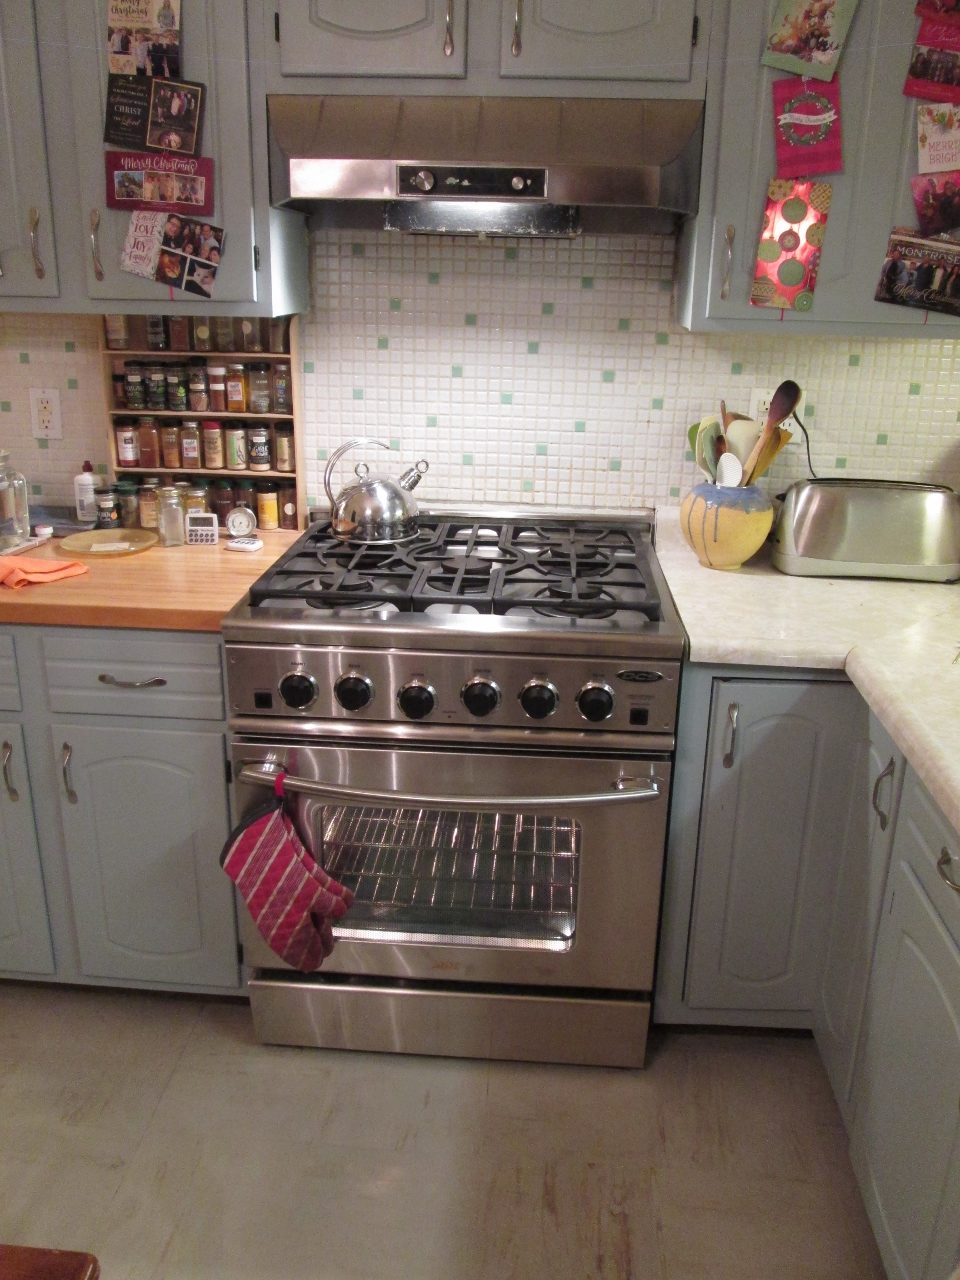
A friend of mine was remodeling his house, and planned to replace all the appliances, too. He offered them to me – stainless steel commercial grade stove, refrigerator and dishwasher. Considering one burner on our stove never lit without a match, I think it was time for the stove to go…
Still usable, but not great. It’s done it’s part. Of course, nothing goes perfectly smoothly: The old gas line interfered with the new stove, so I had to move it.
But wow, this thing is fancy.
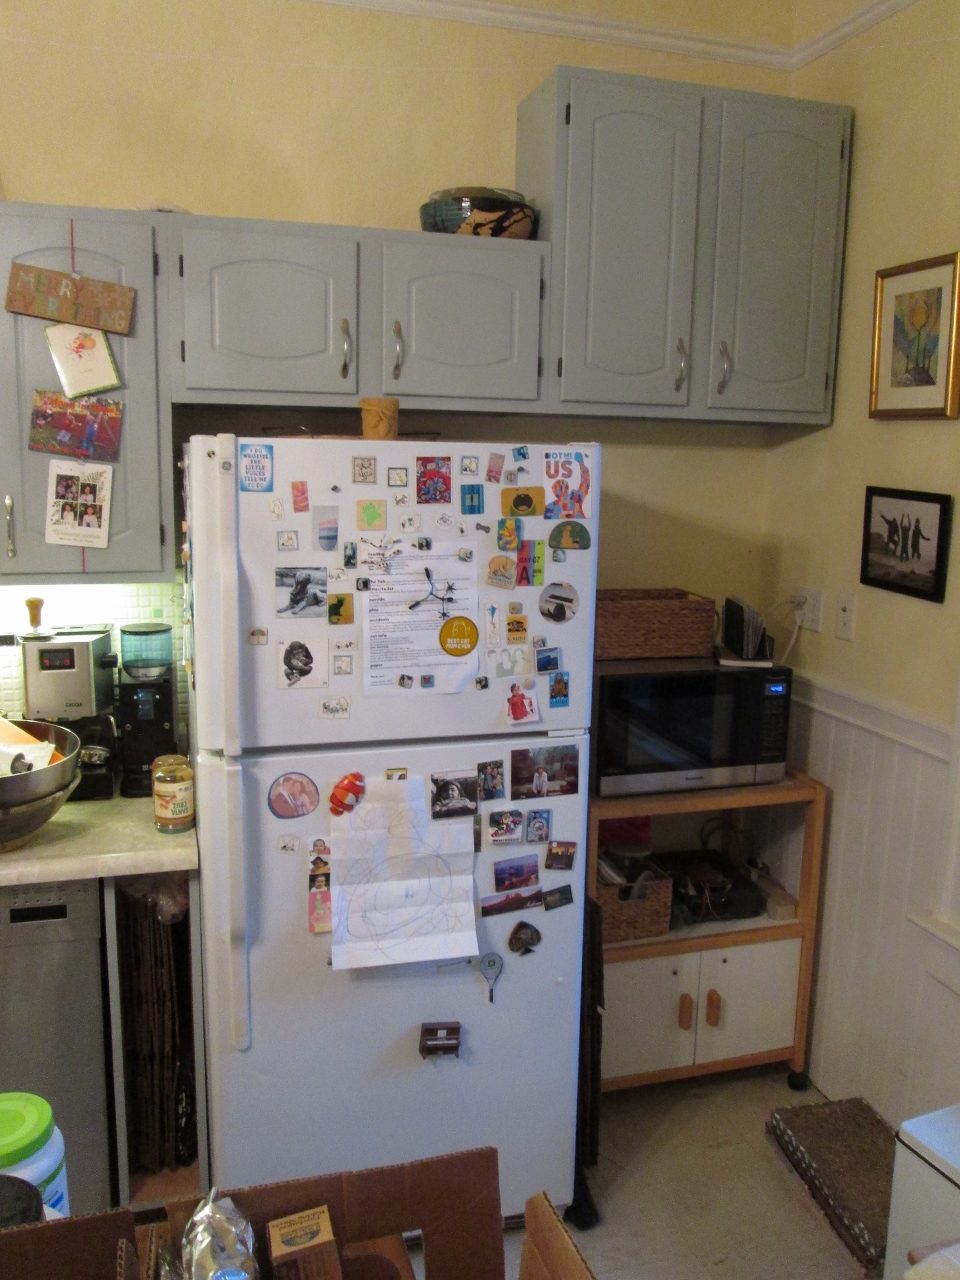
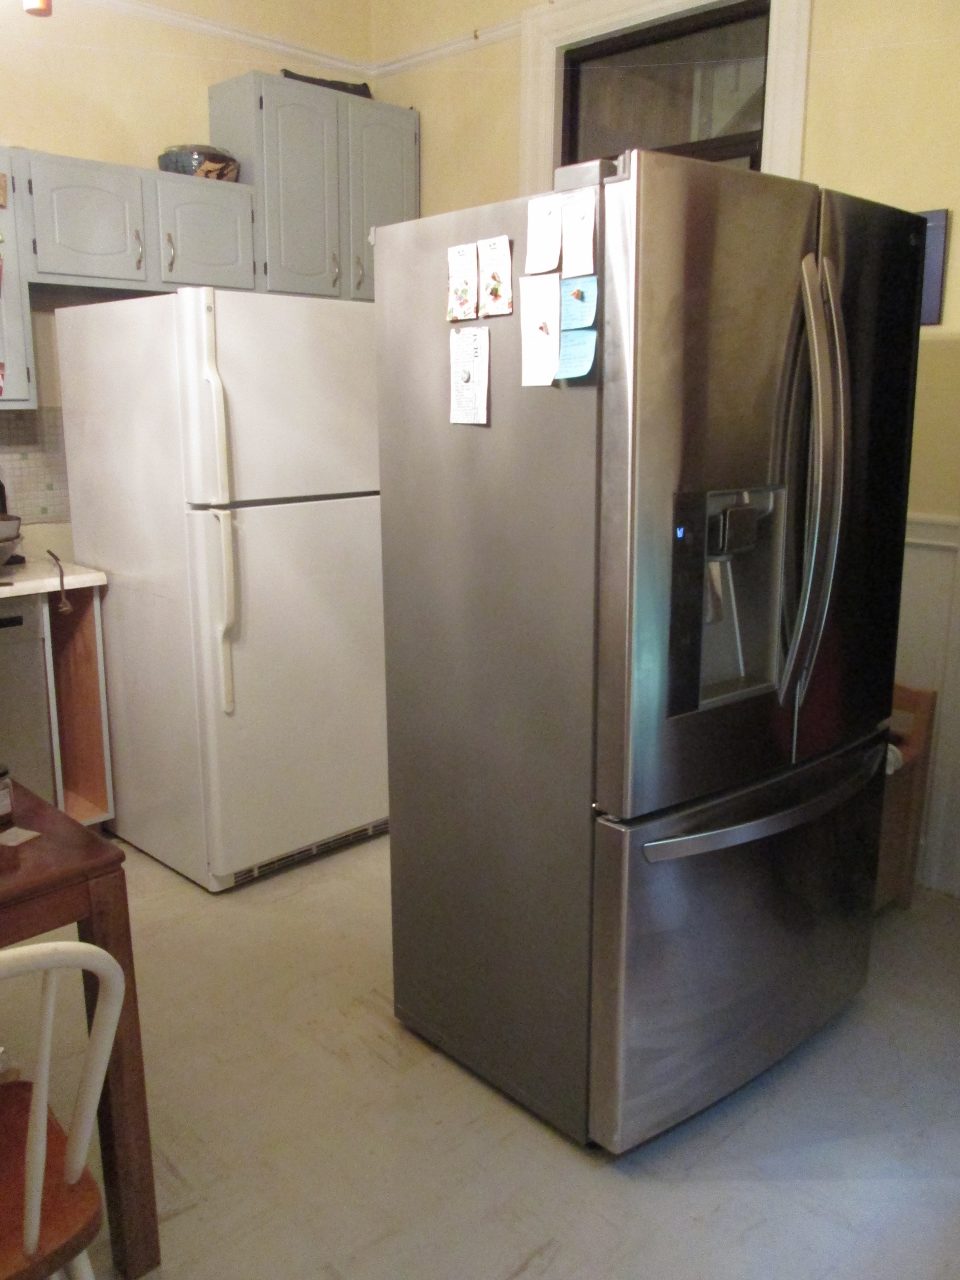
And the ‘fridge: It’s been making some funny noises, but still works fine. But a free new stainless steel fridge, with the freezer on the bottom…
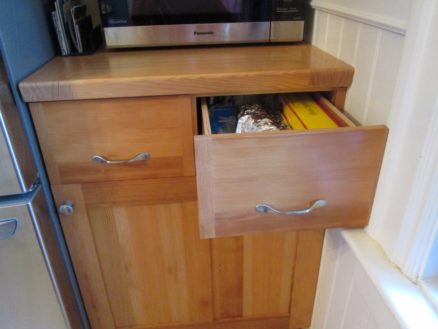
This one wasn’t as easy: The new fridge is not as deep as the old fridge, so that will fit better next to the table, but it’s six inches wider, and has an ice maker (needs a water hookup). We barely use ice, so really don’t have a use for an ice maker, but I still plumbed it into our water filter. I moved the cabinet on the right side of the fridge up, so that the bottom aligns with the cabinet next to it. Things are starting to look spiffy down here.
And I made a new cabinet to fit on the right side of the new fridge. Actually, I made two cabinets: a smaller one above, and a new one below.
Oh, and I got a great new addition to my workshop (Christmas present). It may not look like much at first, but on the right is my dust collector with a new high efficiency air filter. It used to be a fabric bag that allowed fine dust to get into the air: Effectively it was only collecting the large dust, and blowing the most harmful fine dust particles into the air. It should have been called a “dust circulator.” I had to work with a respirator on if that thing was running, and eventually everything would get covered in dust. Mole bought a cover for the car, because she got tired of the dust coating. Oh, and the new filter is so much more efficient than a bag, so it picks up the dust at the tools better. I attach a plastic bag to the bottom, and the bag fills up with all the dust – none in the air. Thank you John and Judy.
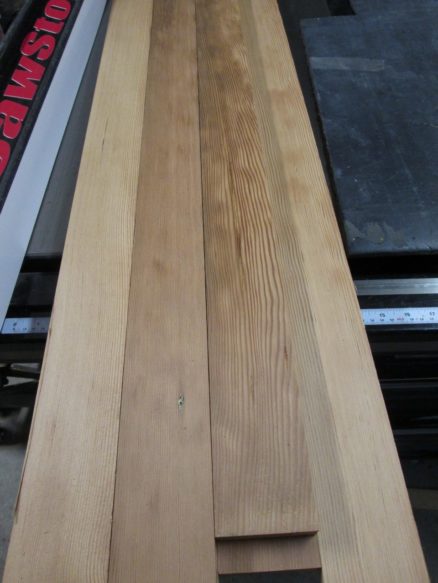
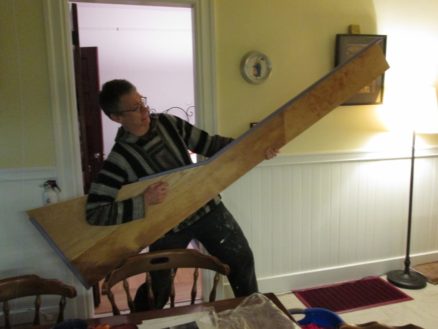
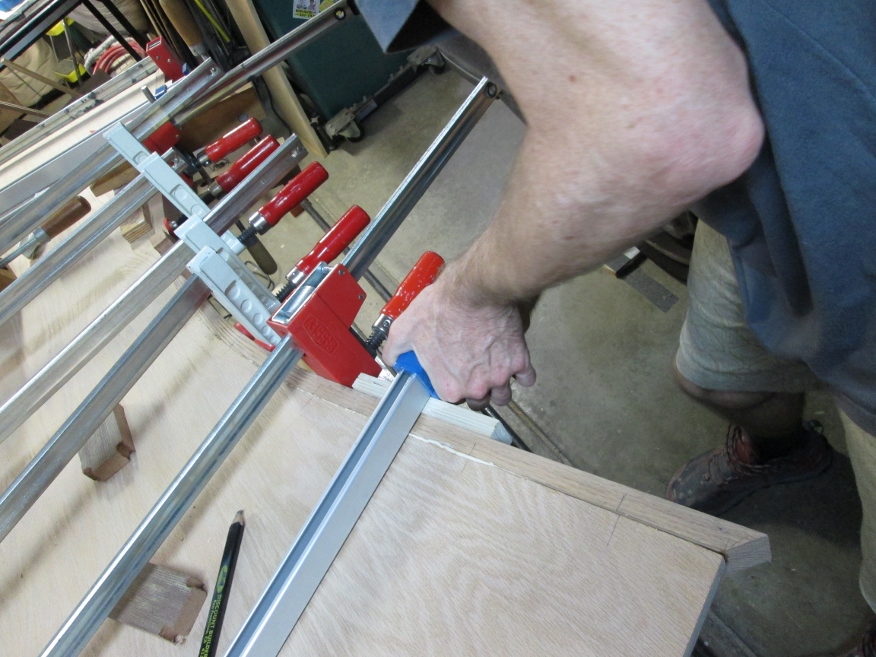
Here I’m clamping together reclaimed wood to make a butcher block top for the top of the new cabinet. Beautiful fine vertical grain douglas fir saved from the dump.
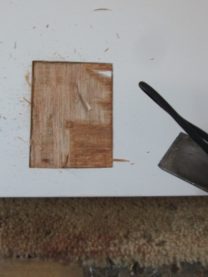
Sometimes there were nail holes in the wood: I filled them with wood plugs. The picture above is before I’ve drilled out the hole and added the plug.
More reclaimed wood for the cabinets. This is before it’s gone through the planer.
Comes out beautiful afterwards.
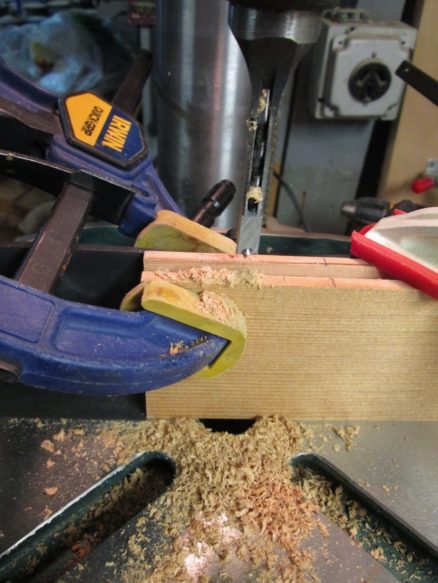
Here are some of the pieces for the cabinet doors. I made them with mortise and tenon joinery. You can see all the tenons cut above on the left. The pieces on the right will be the panels for the doors.
Here’s a close up of the mortise cutter: It’s an attachment for my drill press. It’s a square chisel with a drill bit in the middle. The drill bit drills out most of the wood, and the chisel squares up the hole. You cut a longer hole by joining the holes up next to one another. Much faster than by hand, but still it takes a while. The fastest way to do it is with a floating tenon machine, but I don’t have one of those.
Here are the doors after the first coat of polyurethane.
This is the new lower cabinet in place, next to the new fancy fridge. At last this corner is not an afterthought.
And sad news: My neighbor’s son Nick died. He helped me many times working on the house when we first moved in. His mental illness got a lot worse over the years, so he no longer was able to help, but I have some blog posts in this blog about the work he did. He was one of the strongest people I’ve ever known; single handed he picked up and put my 200+lb drill press on my workbench, carried thousands of pounds of concrete into the back yard to make the footings for the back stairs. I made some picture frames from two thousand year old redwood for some pictures of him working on the house. This piece of wood came out of our house; the density of the grain cannot be matched by any redwood you can buy now. The picture below is him working on our front steps. I feel the imperfection of this piece of irreplaceable wood represents Nick well.
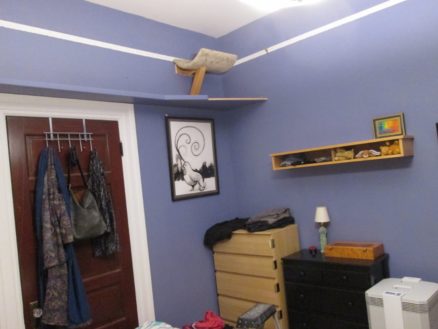
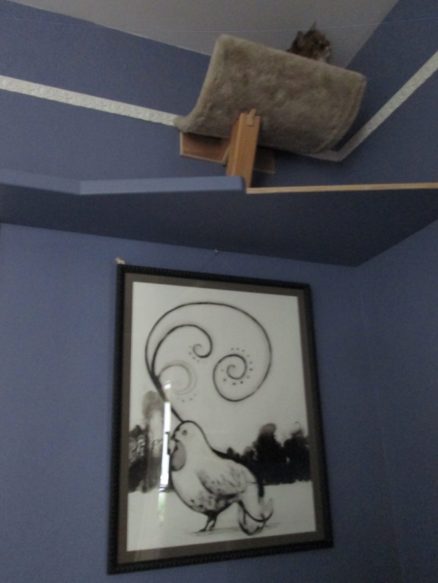
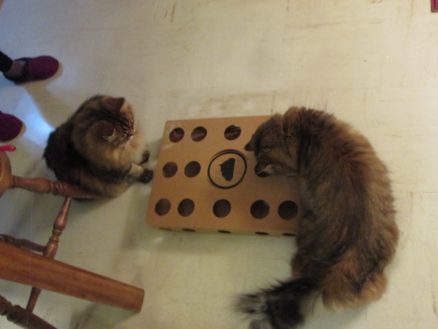
If you haven’t heard the term: “catification” is the process of making a house designed with only humans in mind into a more three dimensional space that allows cats to feel comfortable.
Ever since we moved downstairs, the girls have not been getting along very well. The space downstairs is comfortable from a human perspective, but for cats, being stuck on floor level is not optimal. Ideally, they need to be able to traverse around a room without even touching the floor: Hot lava!
So of course, I had to play them some rock music on my massive electric guitar:
No, that’s a shelf. The triangular piece is an offcut from my desk. Perfect to make the corners into better hangout spots. I painted it to match the walls, and put up a shelf I made about twenty years ago at Rousseau street.
Well, it’s a start. They can go from the air filter, up to the shelf, along the wall, and down the cat tree. The bedroom is slightly more catified.
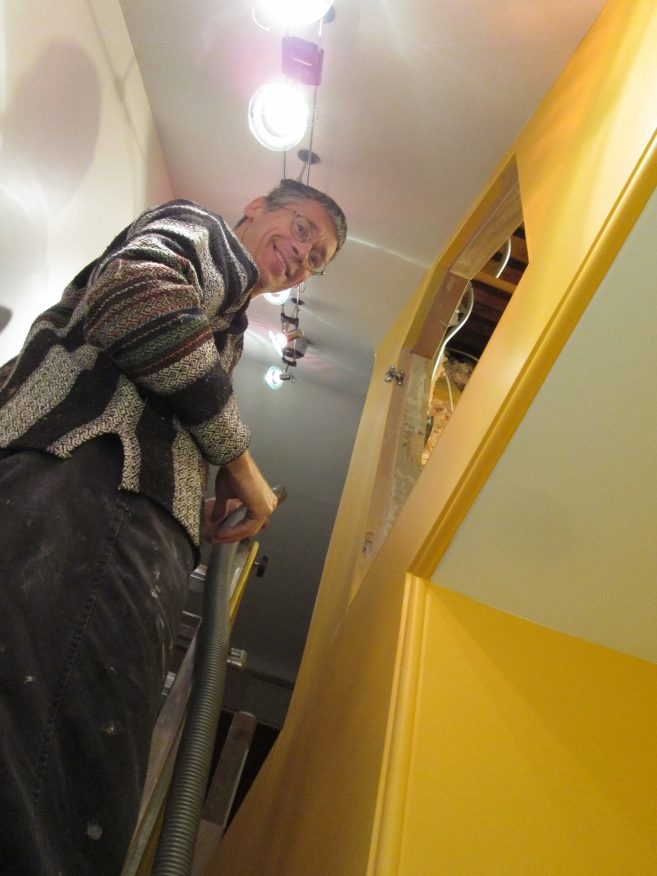
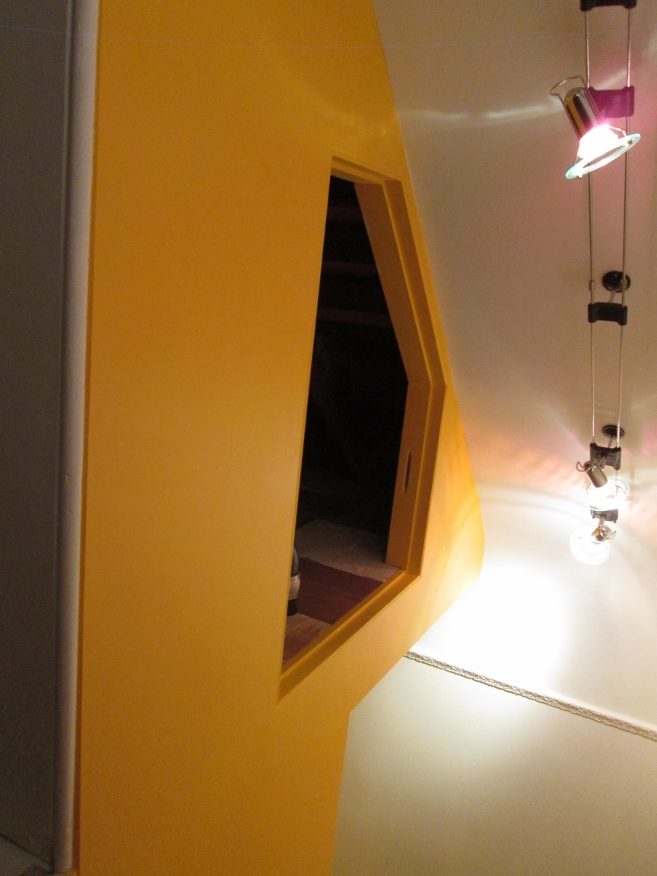
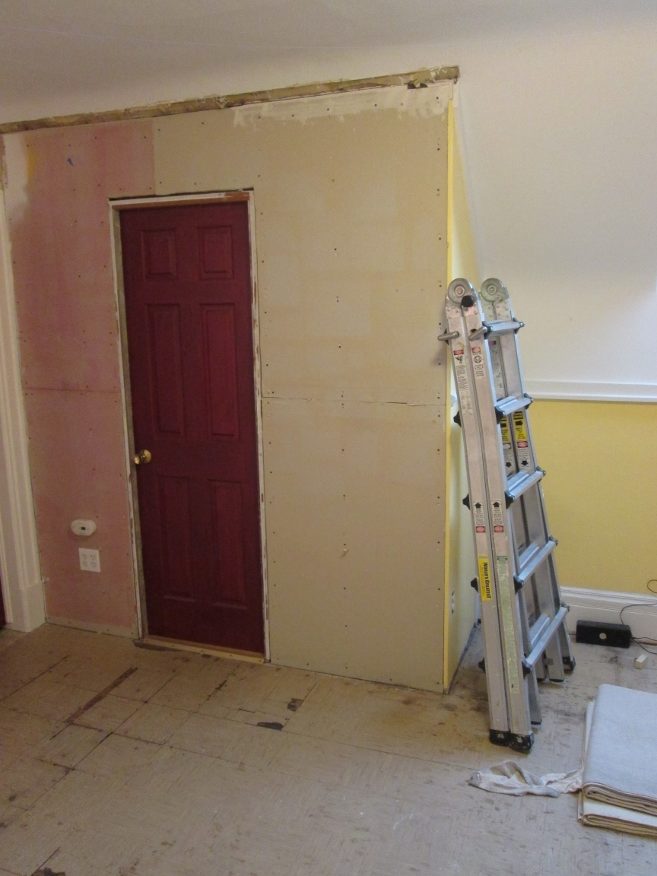
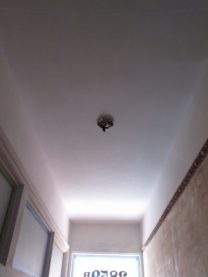
When I raised the ceiling in the hallway upstairs, I created a small closet to access plumbing and electrical stuff. This space used to be accessed by climbing through the attic space.
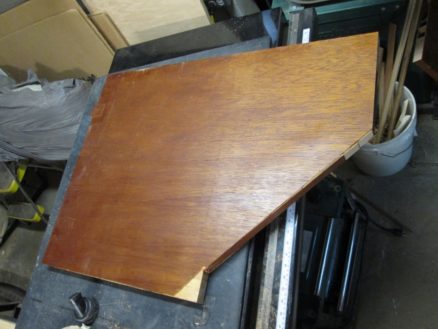
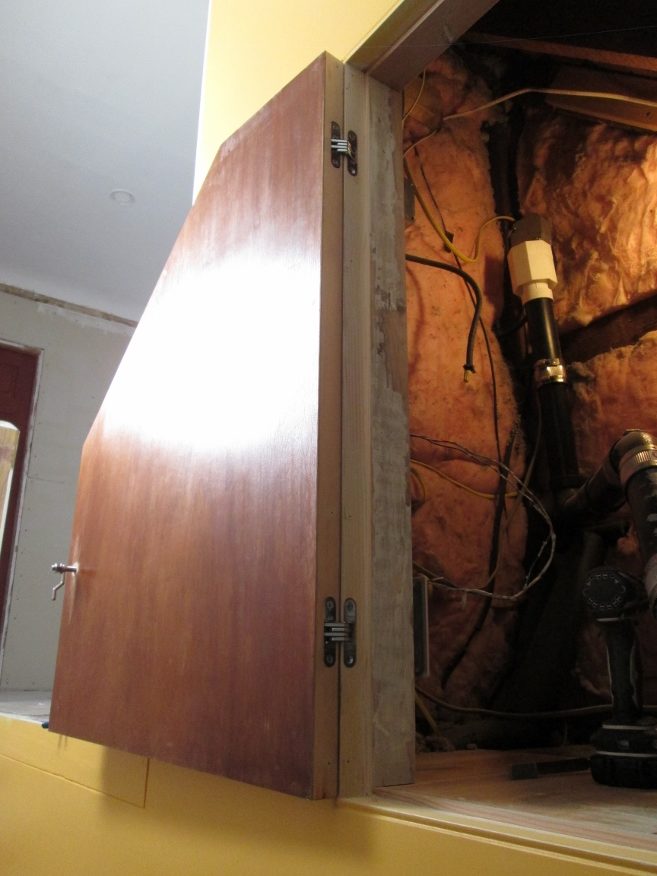
I made a custom little door to fit the opening (out of an old door).
Because it’s me doing this, I have to make it a bit more complicated. So I was trying to figure out how to make the door as flush as possible. I found something called “hidden hinges”. They fit into routed slots on the door, and because of some very clever mechanism, they allow the door to open 180 degrees, and the hinges fold up into themselves when the door closes. My mistake: I chose not to pay the $20 to buy the pre-made jig (I figured I could just make my own). There goes a weekend!
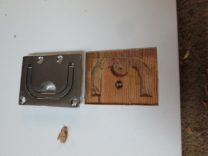
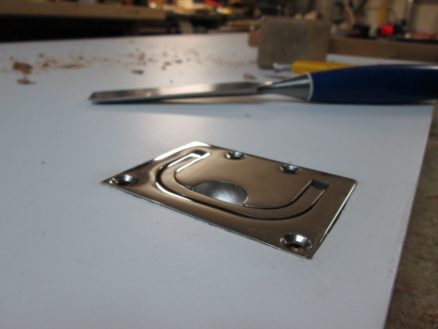
I bought a marine door latch that sits flush with the door. It’s not completely invisible, but I’m quite happy with how it came out.
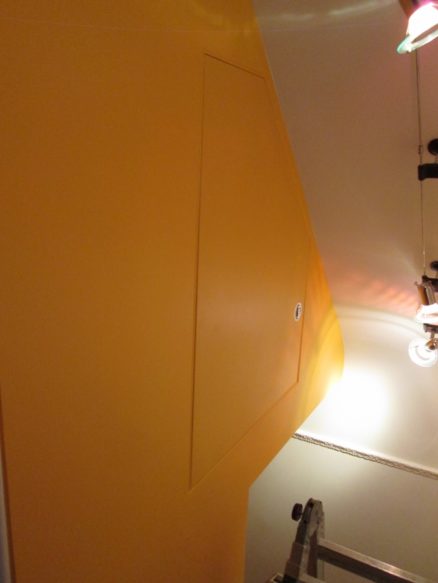
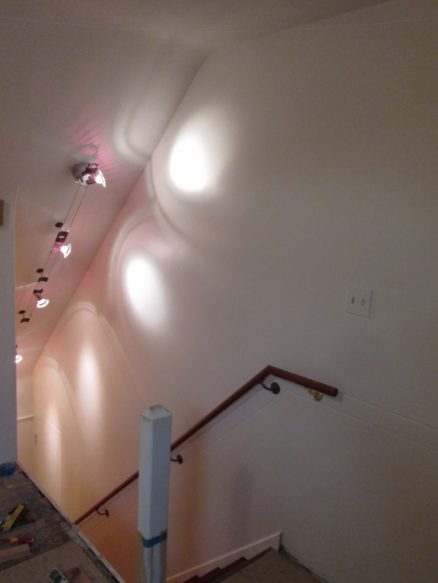
oh, and I love the patterns the lights make on the other wall…
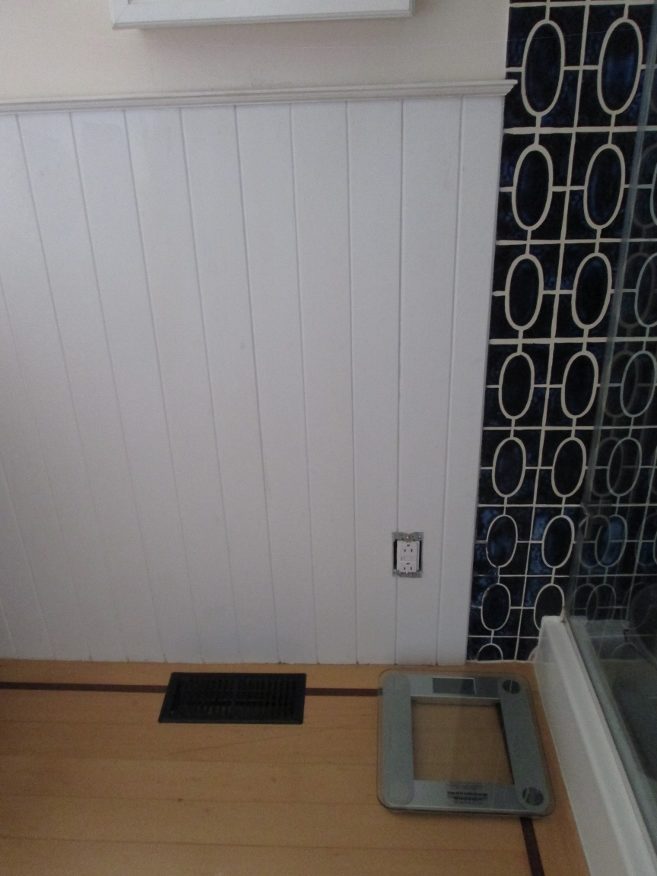
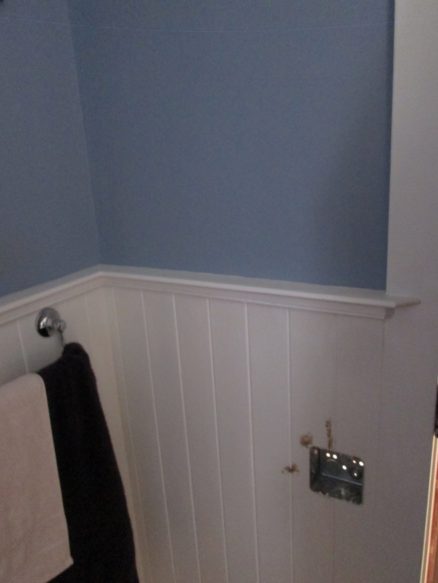
I never thought about them before, but I’ve come to really like towel warmers. They sound like such a luxury: Warm towels! But they are also quite useful because they help to dry wet towels faster, so they don’t go moldy smelling. The only difficulty: They need a plug.
Originally, I had put just a regular towel rail here, and a towel warmer in another corner of the bathroom. Even though I went to architecture school, I’m still surprised by how I really need to live in a space to know how it will work. I had assumed air from the heating vent would dry things. Didn’t really work, and the towel warmer was in an awkward place. So I decided to move it.
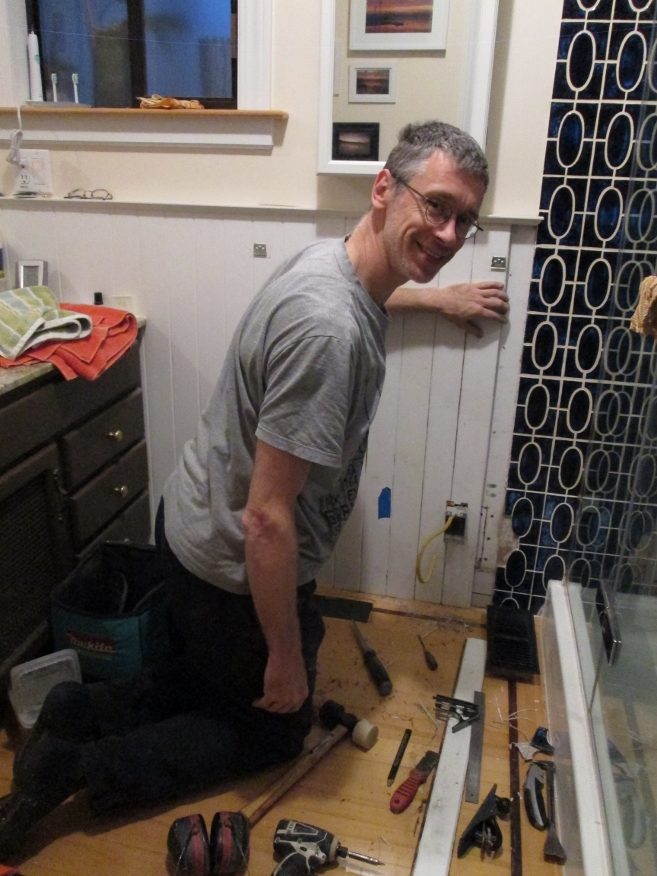
Mole caught a photo of me as I was closing the wall back up. I often forget to take photos.
We bought a new litter box for the girls with higher sides: Arwen! Modcat are value added: They include a game for the cats with the litter box packaging.
oh, and upstairs: I also put that towel warmer in. There’s no heating upstairs (yet?) so I got a larger one, hoping it will help to warm up the bathroom a bit in the winter. Same process: I need a plug.
This time, instead of tearing off the finishes inside the bathroom, I took off the drywall outside. I’d been planning this (ten+ years ago), so never plastered the walls.
Here it is installed. It was a bit tricky because the thickness of the wood wainscot below meant I had to add little spacers where it attaches at the top. I think eventually I’m just going to remove that wainscot below: Too fiddly for such a small bathroom.
when we went into lockdown (the first time) I thought: “I’ll just spend a lot of time working on upstairs and get it all finished.” Hahahha
Well, in spite of (or possibly because of?) the debacle of 2020, a few good things happened. Most notably, the majority of Americans were able to spot incompetence after four years of having it rubbed in our faces. And I got to vote for the first time in my life.
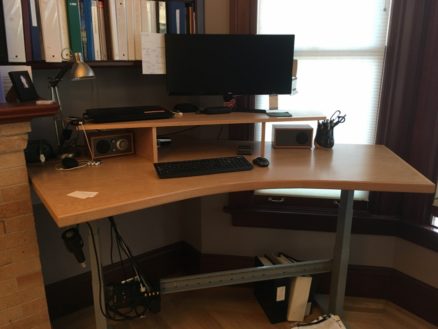
I ordered the mechanism for an adjustable height standing desk about.. three years ago.. and it’s been sitting in boxes in the garage since. I finally got enough prodding to stop delaying, and built the top for it. Of course, because it’s me, it was a little complicated.
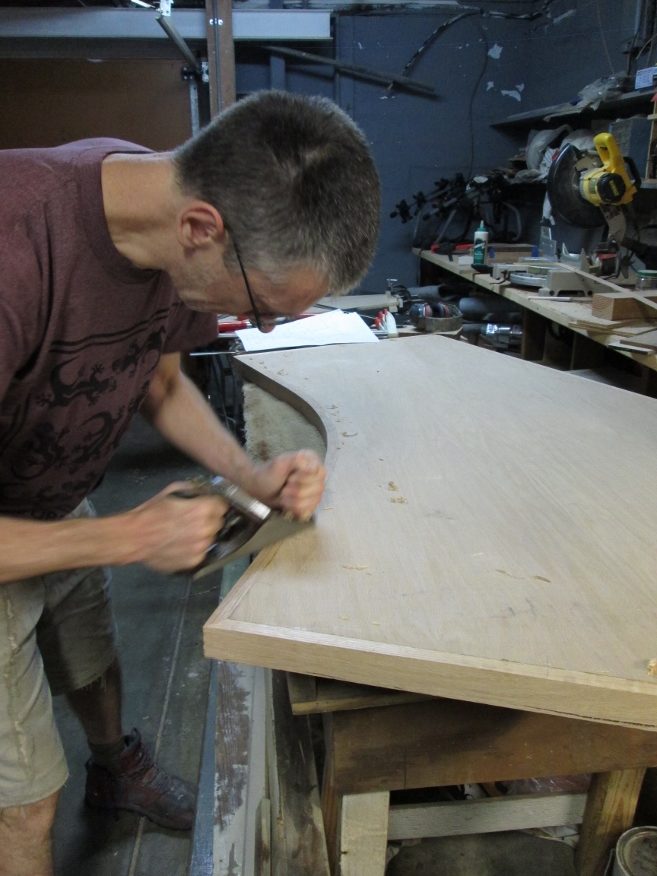
I wanted it to fit into a corner in our office that’s next to the bay windows, so it has a 45 degree back. But the complicated part is the front: it curves. I used a piece of wood and some clamps to draw the curve, and cut a template out of a scrap piece of wood.
I found that putting a piece of masking tape on the top of the plywood makes the veneer on the top of the plywood splinter less.
The tricky part: I’m using oak veneer plywood, so I need to finish the edges with a piece of solid wood… and it needs to curve.
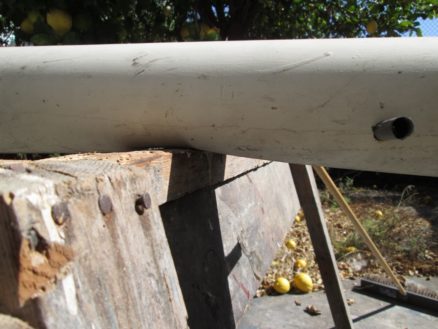
I’ve never steamed wood before, so after a bit of youtube research, I found a video with some guy making a steamer out of plastic piping. Looked quite simple: I had some old ABS pipe lying around, I figured I could make a simple wood top for the large kettle I use to brew beer, and channel the steam through another piece of flexible plastic hose from my shop vac. I put the piece of wood I wanted to steam inside the ABS pipe, and started up the steam. Just like the video.
Don’t believe what you see on youtube: The steam melted the pipes!
First the flexible plastic pipe became very flexible (similar to warm bubble gum). I quickly disconnected that – didn’t want to ruin it. I then connected to the ABS pipe with some pieces of metal pipe. Then the ABS pipe started melting!
I couldn’t get enough steam to properly bend the wood, so it split when I bent it. I don’t know how that youtuber made it work… I ended up with a bunch of Salvador Dali inspired pipes, but the wood didn’t bend.
Second try: This time all in metal. I bought a piece of metal heating duct to steam the wood in. Once the water started boiling in the kettle, steam was hissing out of all the cracks. I left the wood in there for almost an hour: My neighbors were very curious! It worked.
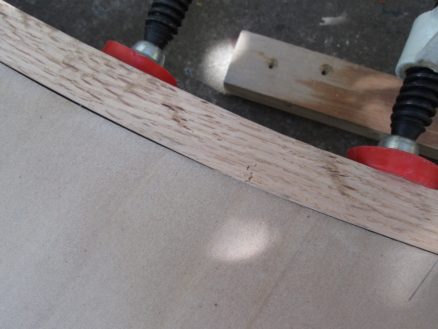
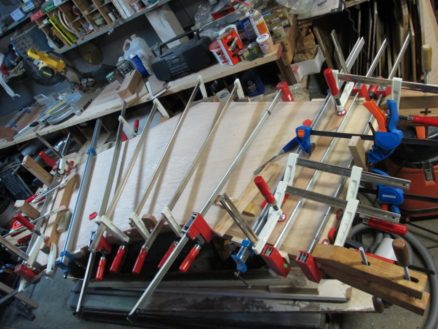
Here I’m gluing the curved wood edge onto the plywood. You can never have too many clamps…
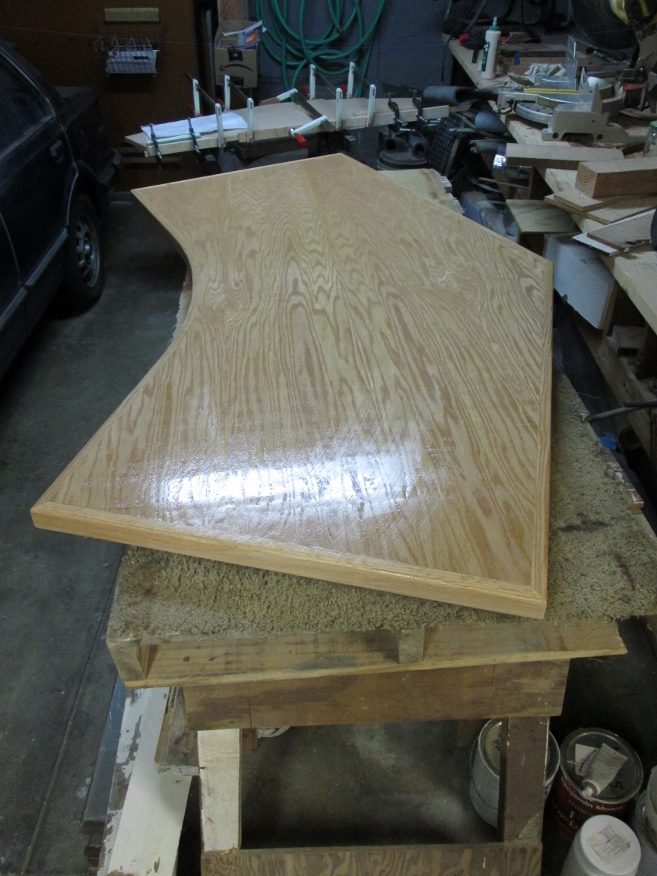
The curved edge came out quite well.
My star trek command center.
It will never look this neat again, so I’d better post a photo:
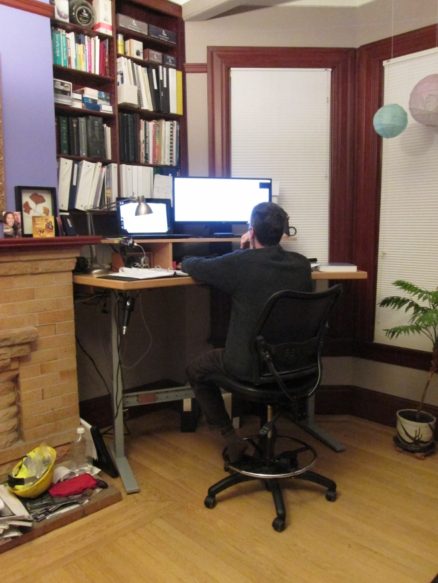
… not that getting a fully adjustable desk is guaranteed to make my ergonomics any better, though…
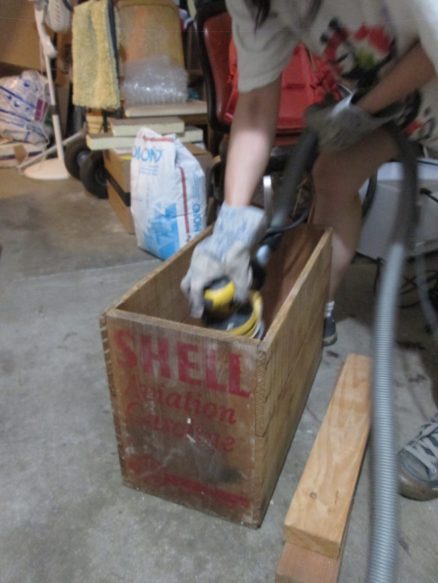
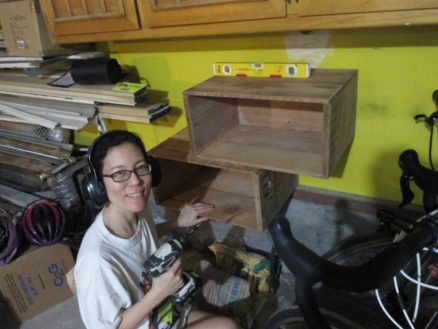
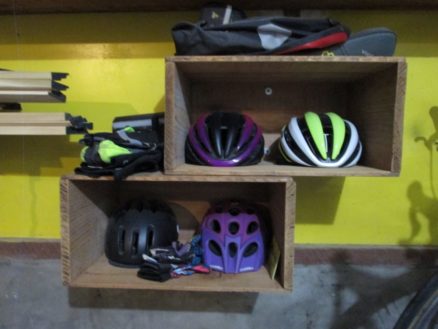
Meanwhile…. We’ve never had anywhere decent to put our bike helmets. They were always balanced precariously on boxes and bags of building materials. So mole decided to make some shelves from a couple of old boxes that we found in the attic of the house.
Shell aviation fuel(?)
So neat!
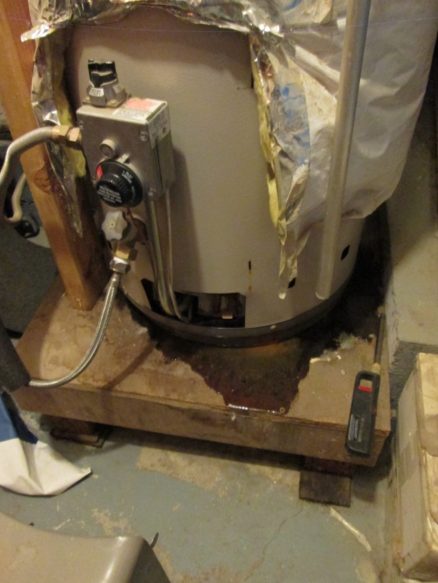
I was wondering when this would happen: Hot water tanks must be one of the most wasteful inventions that are still part of houses. They are planned obsolescence incarnate. This large heavy contraption is in every house in the country, wastes energy all day long every day, and in the best cases may last fifteen years: you can even buy water heaters that are only expected to last five years!
The previous owners bought a good quality one that lasted about fifteen years, but it finally started leaking. 2020.
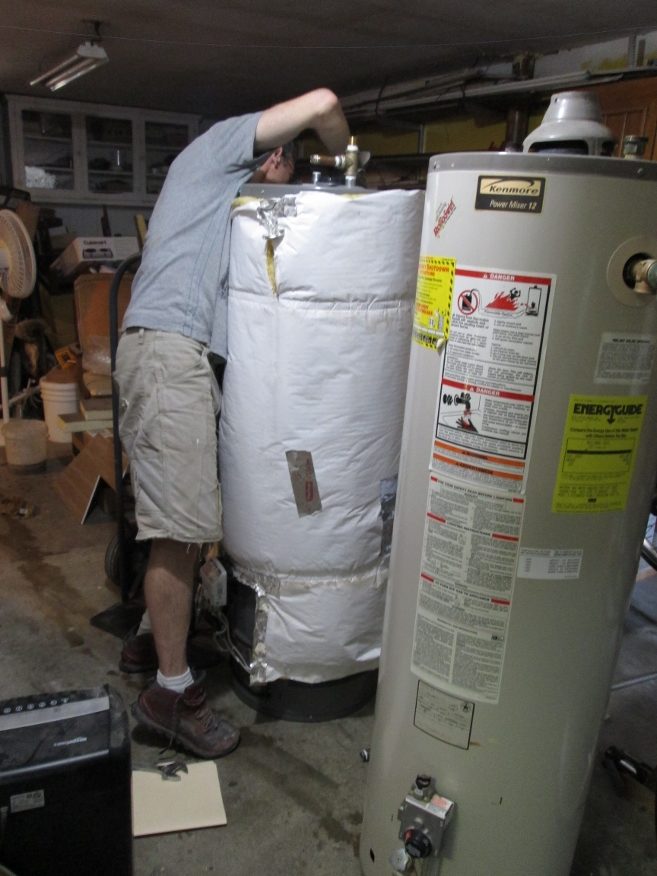
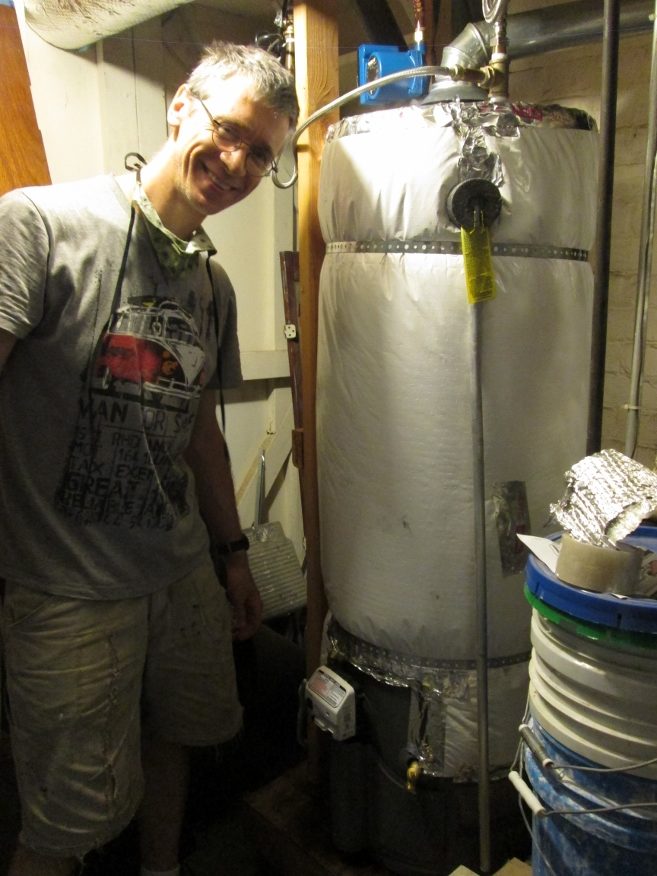
Luckily we can get anything delivered, including water heaters! I transferred the insulation blanket from the old one – I figure any extra insulation on a tank of hot water is a good thing.
Oh, and if 2020 didn’t have enough going on, it was also my fiftieth. Friends of mine threw big parties on theirs. For years I’d been thinking about the party I wanted to throw. I guess 51 is the new fifty?
Not all was lost, though: mole made me this incredible vegan chocolate torte. You all missed out.
I did get to see some people for my birthday, though. Friends put together a great bike ride up mount tam. It was incredibly foggy, cold and wet, but I was a very happy fifty-year-old. And I also went to visit my dad.
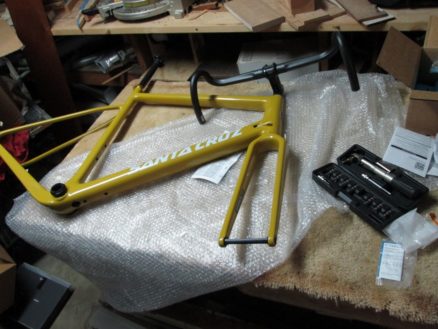
As a fiftieth birthday present to myself I decided to get a(nother) bike: This time, a gravel bike.
Actually buying a bike in 2020 turned out to be rather difficult. So I bought a frame, and all the parts, and put it together myself. And even that wasn’t without many hiccups. The first frame I received was the wrong color. Then it was missing many of the parts I needed to put it together, the most annoyingly difficult of which was one tiny bolt that holds the derailleur on the frame. Oh, and this is the first time I’ve done this. And none of the parts come with instructions.
After a few months of false starts, I finally got it together. Here’s a pic from my first ride: I really have nothing to complain about. Riding on a dirt trail looking out to the Pacific Ocean, with San Francisco in the background on a sunny day in winter, all I could think was “How truly lucky I am.”
What a month. 2020 is the year that keeps on taking. Well, we’ve tried to push on with the upstairs work, and almost finished the front hallway and stairs.
And of course, there’s mask making. Janeen’s figured out how to make a mask that fits my very three dimensional face. All other masks squash my nose down, so I have to breathe through my mouth.
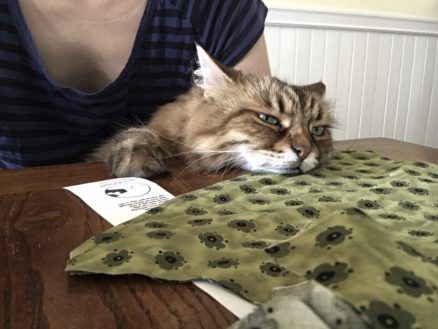
Arwen loves helping.
Oh, and as if it wasn’t enough that a selfish minority of people in USA insist on not wearing masks (thus keeping the spread of Covid at high numbers and voiding all the sacrifices in March, April and May) the fire season started early and with a vengeance this year. We were having a 100F+ heatwave in California, and one night a thunderstorm came. It has been a long time since I remember that much thunder and lightning. In SF, it started raining during the storm, and the temperature dropped. At the time, it felt like a welcome break to the heat.
But most places just got lightning which started forest fires all over the state. Within a few days, the smoke was choking everyone: Maybe this would get the anti-maskers to finally put them on?
This Covid pandemic has now been going on so long that we are all exhausted. At first, there was talk of baking bread, cooking, and finding ways to be creative. Then we started protesting about police brutality and BLM. And when things got bad, the president-in-name-only just made things worse. Now I just feel beaten down.
The air quality forces us to keep the windows closed, and we can’t even go outside for a walk in the fresh air. For me, my work is going full blast, but meetings and all coordination has to happen remotely. So I feel lucky that I have work. At the same time, it’s exhausting to try to keep pushing on. Many people seem to be just at 25% at work, so nothing is going smoothly – parents are probably distracted trying to look after their kids at the same time.
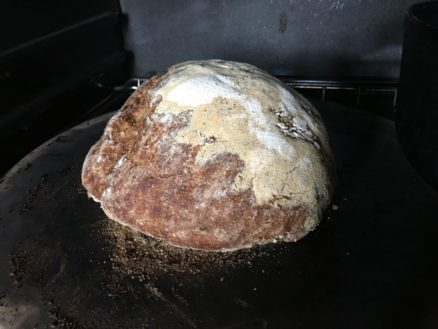
So I decided I had to at least try to keep baking sourdough.
I have even been baking almost wheat-free sourdough loaves for mole. The starter has wheat flour in it, so out of a 500 gram loaf, about 20 grams is wheat flour.
The apple tree gave us a lot of really good Fuji apples this year. We got a couple of boxes of peaches, too. They were tasty, but not as plentiful as other years.
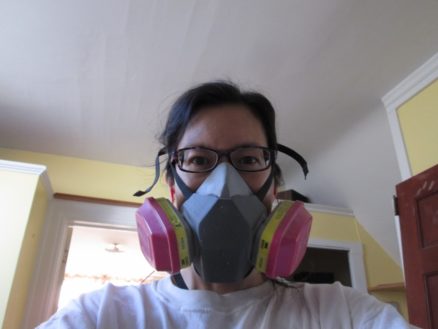
We happened to be working on the house during those really unpleasantly hot days this summer. We masked off the hallway, and I used the sprayer to paint. Once the masking is done, the spraying goes very fast. But I have to wear my full crazy outfit:
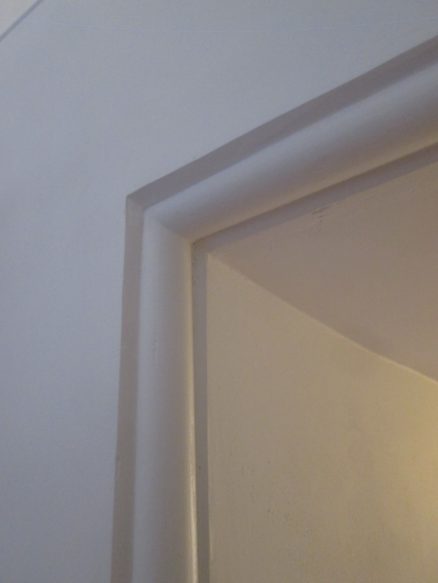
Back to the hallway, here’s the detail at the Victorian corner moulding. Because I didn’t tear out the plaster on the wall, the additional layer of veneer plaster makes it a bit proud of the dowel. But I still like the detail (instead of a sharp corner using a metal bead).
Here’s the hallway with primer on.
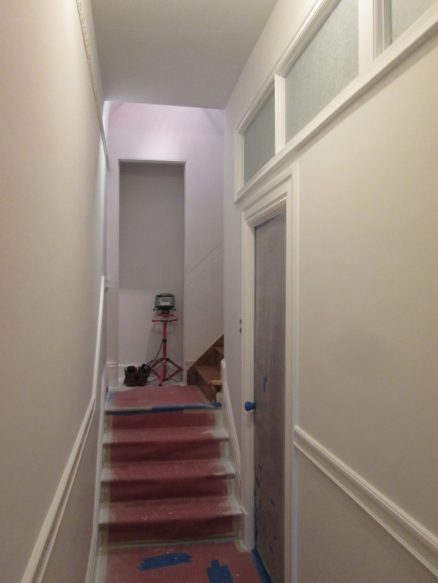
Here’s the hallway after painting. Initially I also painted the far wall that yellow, but it was too much. The yellow color continues around the corner, so it reflects on the white wall.
This is how the light switch came out. I accidentally installed it too close to the door, so the moulding didn’t fit. So Mole suggested I build the light switch into the moulding!
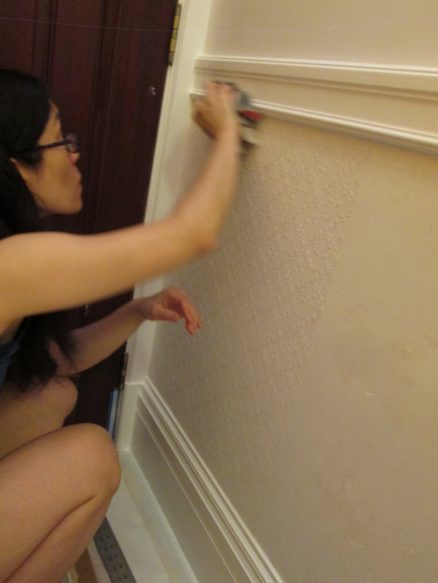
Next step is to put the Anaglypta on the walls below the chair rails. It’s the same as we used at the front of the downstairs.
The textured pattern hides any unevenness in the wall, and adds a subtle decorative finish. I like it.
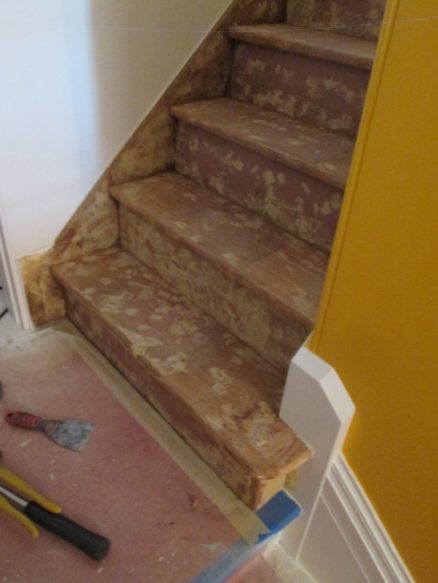
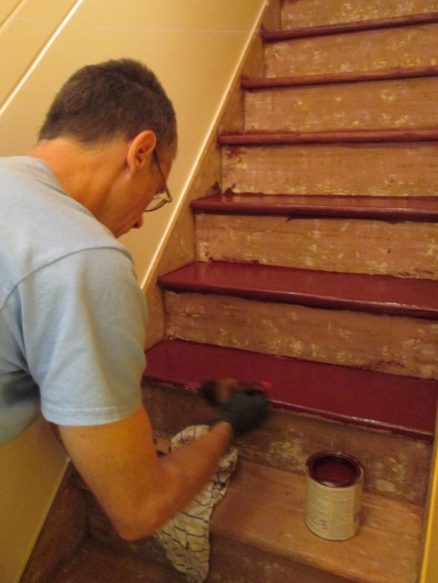
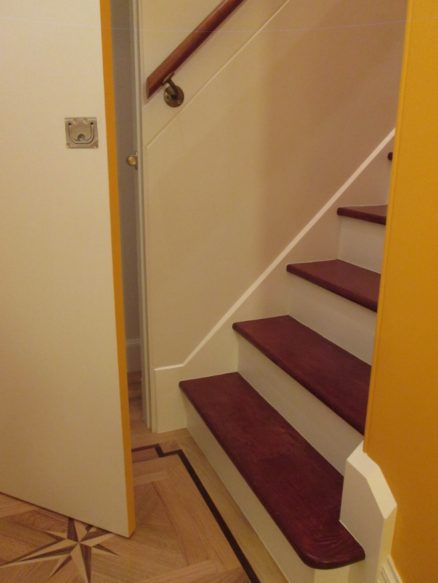
Now the carpet is off the stairs, and the paint stripped, there’s a LOT of filler needed. I also had to take off and glue a couple of the treads together. All the nails and staples from the carpet of the last hundred years left a lot of holes.
I stained the stair treads with the same stain I used on all the doors downstairs. We plan to put a runner down the center of the stairs so it’s a bit more grippy and padded than plain wood stairs.
It’s coming together. Here’s mole at the bottom of the stairs…
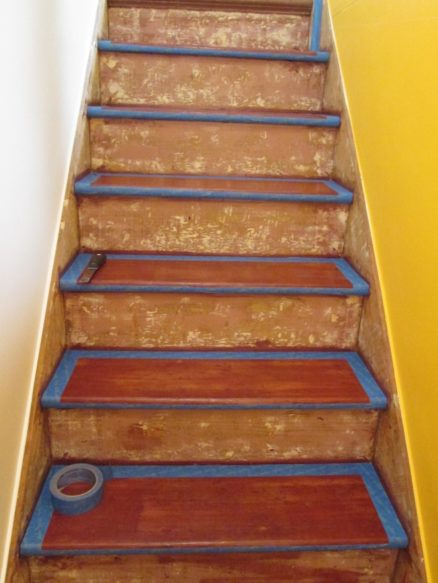
Once the stair treads were stained, and sealed with polyurethane, I painted the risers and the sides white…
Meanwhile: During the heat, I had the windows wide open in the front office. Arwen decided to climb out of them, and jumped across to the front stairs. But then she couldn’t figure out how to get back, so she started scratching on the front door. She also tried climbing up the front door, and tried to jump in the window.
Bella alerted Janeen by calmly sitting inside the front door, staring at it. Luckily Arwen made it home safely. But the door did not fare well. There were scratches all up the front where she grabbed on below the window and tried to get hold with her back claws.
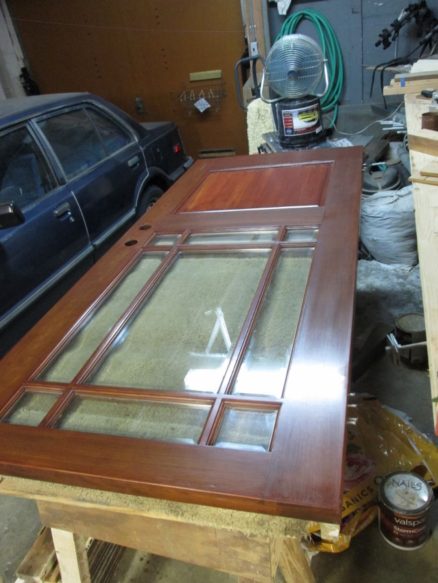
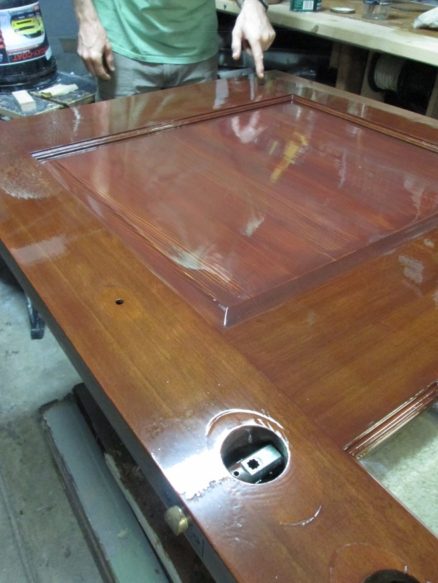
So I took the front door off, sanded and re-stained where it was scratched, and gave it a few coats of spar urethane.
That took a about a week. So I had to make a temporary front door.
And then we had the brown day. It was so dark, we couldn’t see where we were walking without turning turning the lights on. Mole tried to take a photo, but the camera couldn’t do it justice:
Looking out the front, in the middle of the morning, it looked like night time.
The new hallway closet needs a door, and I had one in the garage left over from (I think) the bedroom door. The previous owners had used this beauty in place of one of the original paneled redwood doors.
I had to cut the width down, and rebuild it because it’s a hollow door. Here I’m mortising the door pull into the door.
I bought replica cast steel hinges from houseofantiquehardware.com and painted them white. Initially I was thinking of using blind hinges that completely disappear when the door is closed, but they are $75 each, and this door really won’t be invisible anyway.
Here’s the door painted and installed. We painted the edges the same yellow as the wall across, and the rest of the door to match its surrounding wall.
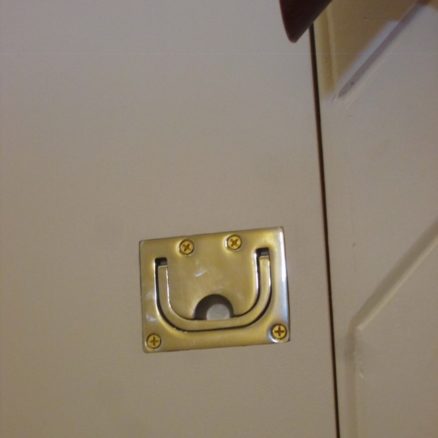
I used a magnetic catch to hold the door closed, similar to a cabinet. i wanted to make a flush door handle so it’s not sticking out as you walk down the stairs. I really like the smiling face on this stainless steel handle (it’s boat hardware).
And yet, there’s more: Mole did the graphic design for Misha’s new CD. It was released purely digitally, so mole put together a few actual physical copies. You can listen to the whole CD here: https://eighttwo.bandcamp.com/album/truth-and-fun
Mole made some door stops. We’ve been using my slippers to hold open/closed the bedroom door. These are much more friendly: They remind me of Totoro.
AND Bella got a new ball. This one is a foam ball that’s bouncy and soft. She’s been playing soccer with it, and also bringing it to us so we’ll throw it to play fetch.
Here’s Bella when mole first gave her a knitted ball as a kitten. She still loves the knitted balls.
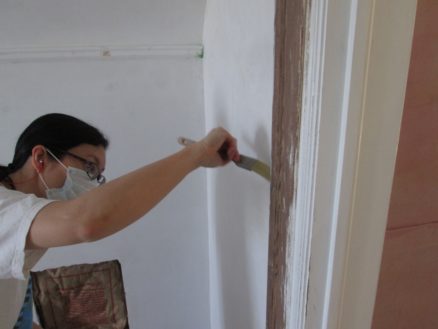
A friend texted me asking if I knew of a place that a UCSF student could rent for the rest of the year. Hmm. I guess if she doesn’t mind ongoing construction outside her room, she could get low rent… “I just need a couple of weeks to get the room ready.” Gulp.
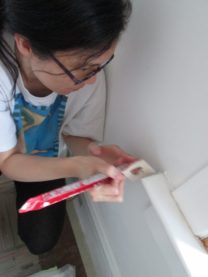
Here’s mole painting the trim in the room. Need to get the baseboards on, the whole room painted, and the floor tile fixed. Plus get some furniture together. Not to mention the bathroom…
Oh, and I also added plugs. There used to be no outlets on this side of the room. When we first got the house, I really didn’t like the plugs in the baseboards, so downstairs I moved them all to the walls. But I’ve grown to really appreciate this old detail. It fits better with the character of a house built in 1902. So now I always put them in the baseboards.
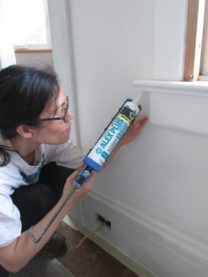
Mole is super good with the AlexPlus. I love the caulking tool: it makes perfect caulked joints possible. Before I got that tool, I’d try to get the caulk line just right when first applying it. But any stops or bumps and there’s a dimple… then your fingers get involved, and the whole thing turns into a mess. This tool makes it so clean.
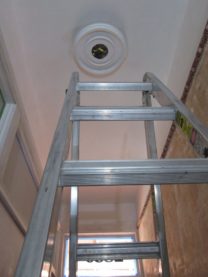
For the ceiling, we ordered a small medallion to go around the junction box. Mole says the hardest part of this project was getting the ladder downstairs by herself without killing herself and the walls.
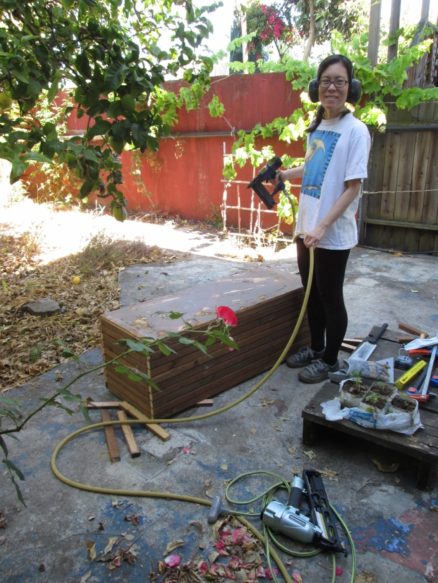
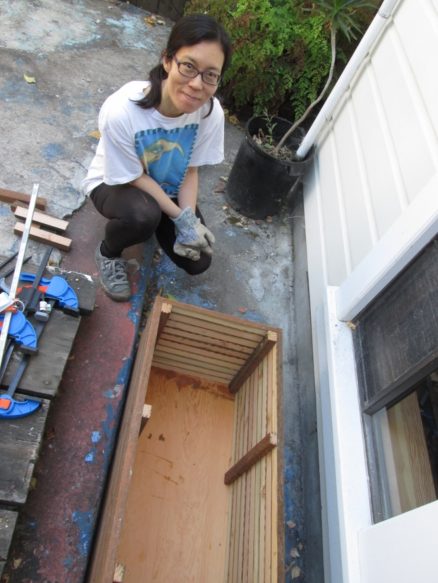
Meeeeanwhile…. Mole decided to build a planter.
All scrap wood left over from making the fence. The most expensive part was the potting soil.
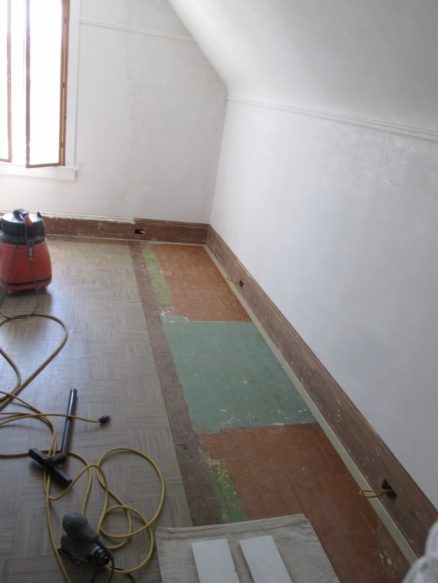
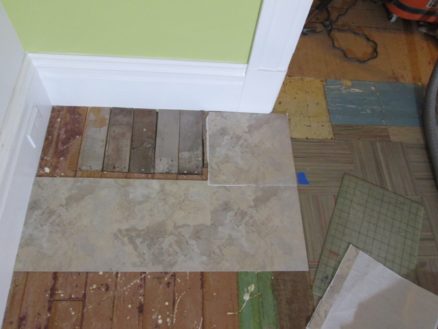
Where the old closets had been, there was no floor tile. The eventual plan is to put some type of nice flooring in like bamboo or hardwood. But we have a deadline! So I got some self-adhesive vinyl tile at home depot.
I didn’t take this photo. You probably guessed that.
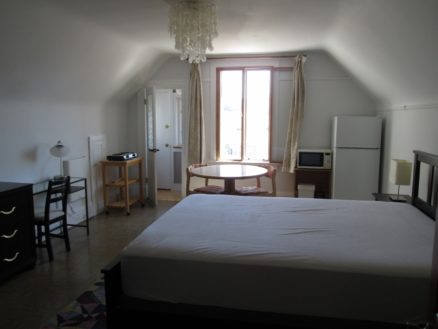
I’m still planning to work on the kitchen and living room, so this is an almost studio. The room is quite big, so it fits the table, fridge, microwave and a hot plate. They need to use the bathroom sink for dishes though.
Phew. Room ready. We couldn’t find a tall armoir (wardrobe) that would arrive in time — everywhere seemed to be out of stock, or shipping was weeks out. Mole found the wardrobe on the right above (an Ikea) on Craigslist. Damn it was heavy. We brought it home strapped on the roof of the trusty Civic. But I couldn’t face hauling it upstairs, so we took it all apart first, and reassembled upstairs.
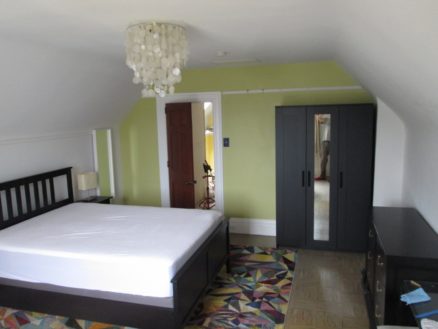
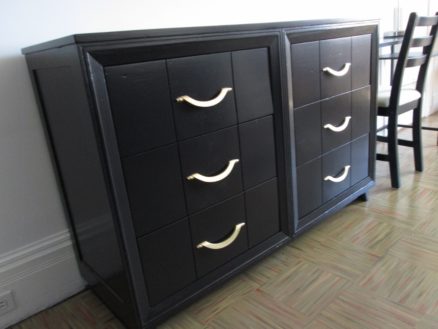
I often forget to take “before” photos. The dresser above was left in the garage when we got the house. It was a really sad looking thing. It had a corner missing from one of the drawers, holes where it looked like someone had attached a padlock (!), cigarette burns and scratches on the top, all in a fetching greenish-brown. But it’s a quality piece of furniture made out of solid wood. I filled the damaged wood, painted it with black paint, and then put a couple of coats of polyurethane over the paint. The brass handles are original, I just polished them, and gave them a few coats of lacquer.
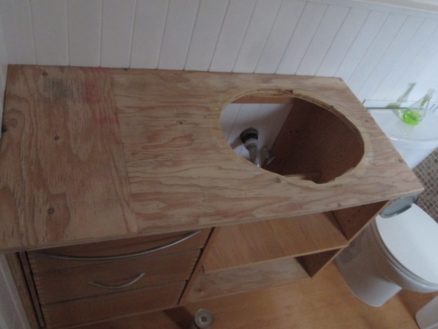
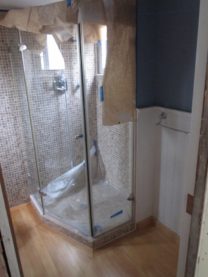
Which brings me to the bathroom: This was our counter top in the bathroom for ten years. It was a left-over piece of plywood that wasn’t even wide enough, so I’d added a piece on the left. Even with a coat of polyurethane, it was never durable or attractive.
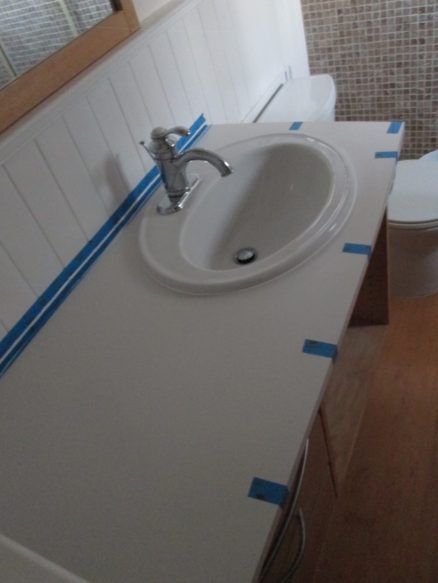
Given the time constraints, I decided to just order some Formica to stick on the plywood. The web bit me a bit, because I thought it was a darker cream color. Never done Formica before and wow the contact adhesive is smelly, but it’s a fast process. I have a flush trim bit for my router, so it was very easy to trim to size.
If you’ve ever tried to use silicone caulk, you know that getting a good result is one of the most difficult things in the world. When I combine blue tape with the caulk tool, I think I have a recipe for perfect silicone caulk. I lay out the blue tape so it is just slightly clear of the finished edge of the caulk. Then I caulk the gap and use the tool to smooth it and walk away. The blue tape prevents the caulk getting onto the neighboring surfaces, so there’s no cleanup or fiddling around that may mess up the caulk. Wait a couple of hours for the caulk to skin over before removing the tape. Voila!
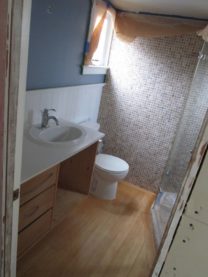
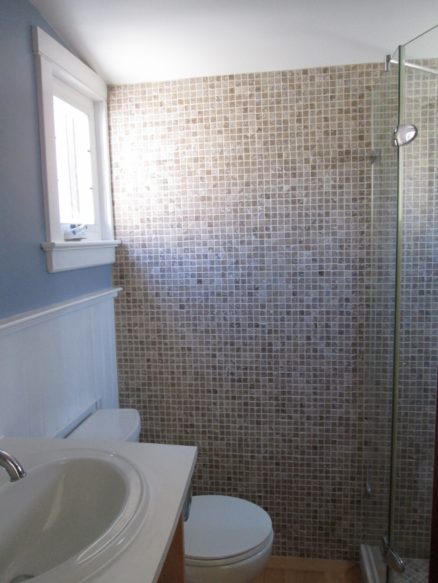
I also sanded and varnished the floor because the girls had scratched it up so much. They may look soft and furry, but that’s just to hide the claws. This floor is Alaska Yellow Cedar – very resistant to rot and quite soft, but I’ll not put wood on a floor in a bathroom again: A lot of people leave a bath mat outside their showers (our tenants downstairs did). Any dampness in this mat will rot the floor quite quickly. Even the cedar.
And then the really hard work (truly): I sanded the ceiling. When we originally did this bathroom, I plastered the walls and ceilings and was so in love with the subtlety of the bare plaster that I varnished it. Problem was, the varnish started peeling – maybe some incompatibility with very alkaline plaster (?) But to re-paint, now I had to get all the varnish off the plaster.
It looks so much nicer than when we lived there! I like the paint (same color we used in the laundry room). And a white ceiling is much nicer than the peeling varnish. I still know it’s my plaster under there…
Even though covid-time-warp has us (yes I am baking sourdough bread every week) we have been moving forward a little on the hallway.
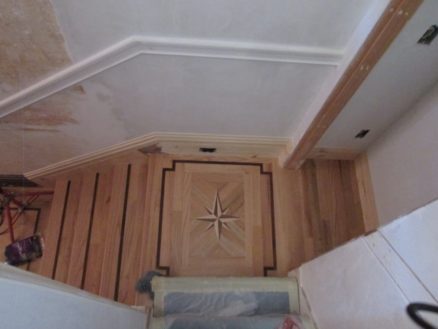
When I was buying the wood for the stairs, the salesperson knew my dad from twenty years ago – he recognized the last name! Above right, I left a space for the new medallion. Dad would sometimes try to talk customers into putting medallions in – and when he did get to do one, he’d be super proud of the result. I’m sure his “beauuutiful, beauuutiful” song was sung while doing those floors.
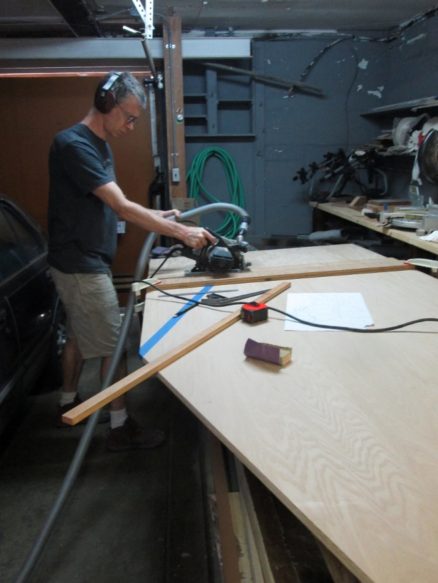
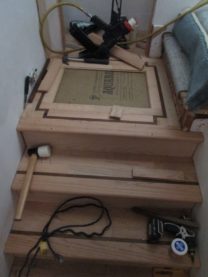
For our little hallway, I looked online for pre-made medallions, but they were all too big and too fancy. So I did the sensible (?) thing: I decided to make one.
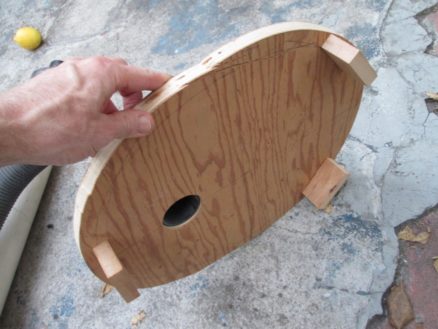
It’s a compass rose – North has a very slight emphasis. It will be set into the floor pointing to magnetic north.
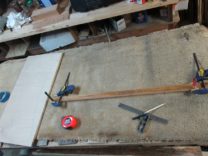
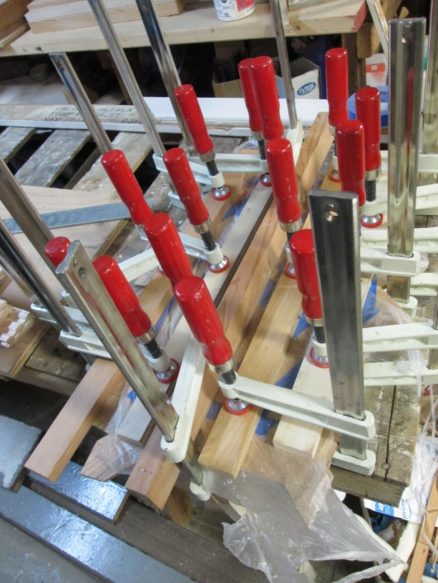
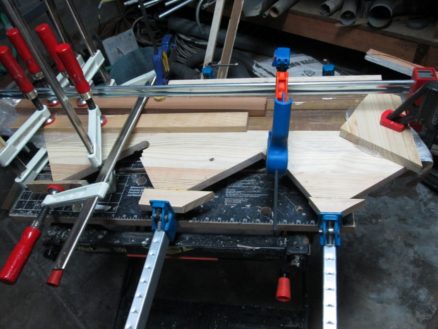
“You can never have too many clamps.” Here I’m clamping the cut-out pieces while they glue to a base of baltic birch plywood.
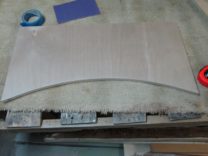
This is before sanding and polyurethane. Baseboards not in yet…
I’d never thought about it before: Usually you put baseboards on top of the floor, to cover the expansion gap at the edges of the floor. Doing the same on stairs, though, is very difficult. It has to fit the contour of not just one, but all the steps simultaneously. If you’re just off by 1/16 inch on each step, that quickly adds up a to a 1/4″ gap.
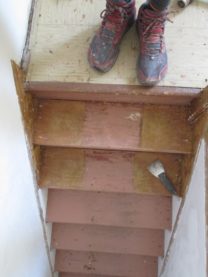
I’ve been trying not to damage the carpet on the stairs for the whole time I’ve been working on the hallway. But we don’t want that blue carpet permanently – so why not just take it out?
Now we can strip the paint off the sides of the stairs without worrying about melting carpet. Just a quick picture that is the disarray at the top of the stairs: