Waterproofing part 2

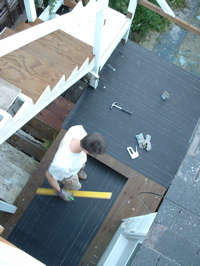
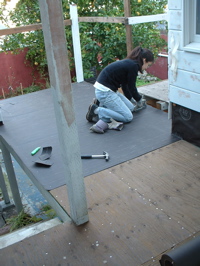
The roofing felt and cement board do not themselves waterproof the deck. On this deck, I’m using the same material that we used in the showers: Kerdi. It’s a polyethylene sheeting that has a fibrous material bonded to both sides so that it sticks to thinset mortar.

01-kerdi_20130203 02-kerdi_20130203

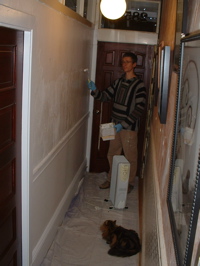
Here I’m sticking down the Kerdi over the cement board. Arwen is watching from the stairs.

04-troweling_20130203 05-bellaWatching_20130203

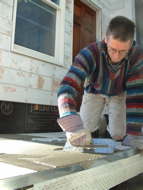
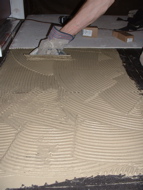
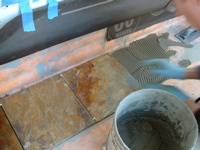
To stick it down, I use the same cement-based thinset mortar that’s used under the cement board, and also will be used under the tile. I spread it out with a notched trowel, and then lay the Kerdi onto it. Then I smooth the Kerdi down with a flat trowel. The problem we were having is the cement board was dry, so it was drying out the thinset mortar before I could spread the sheet down. We had to wet down the cement board with a water sprayer so that we had enough time to stick the Kerdi down properly.

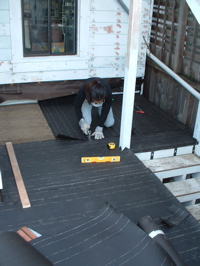
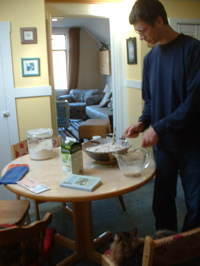
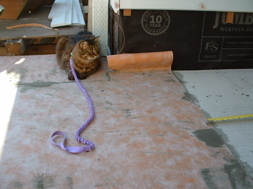
Above right Bella is watching the progress.

06-twoCatInspectors_20130203 07-difficultPart_20130203

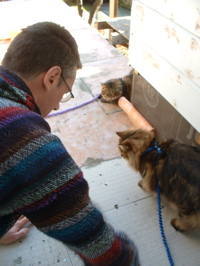
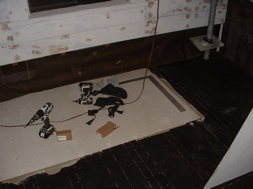
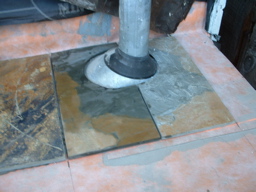
They both really like tiling, I think. Almost as much as plumbing (they love to sit in the shower and watch the water go down the drain.) Janeen got all the difficult parts of the waterproofing – like fitting it around a pipe penetration.

08-almostDone_20130203 09-layout_20130203

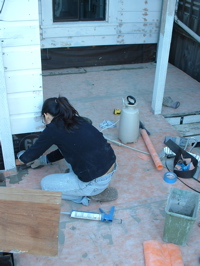
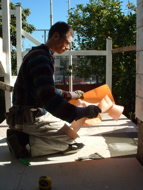
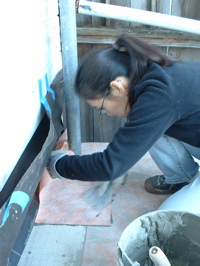
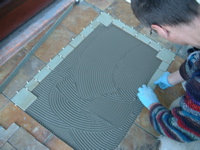
See, another difficult spot: Mole attaching the waterproofing to the side of the building. Above right we are starting to lay out the tile grid. I drew a grid on the Kerdi before starting the actual tile.

10-startingTile_20130203 11-halfwayDone_20130203

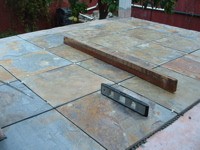
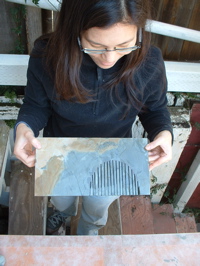
Here are the first tiles. Actually, it’s not tile; we’re using a very colorful slate. We really liked the variety of colors in the slate. Each piece is like a little work of art.

Unfortunately we learned, after buying it all, that this slate has a flaw: The color is made by thin layers of impurities in layers within the slate, so it tends to delaminate. We tried to pick through carefully to avoid the tiles with bad layers in them. Hopefully we caught them all.

12-tileCutter_20130203 13-fancyCuts_20130203

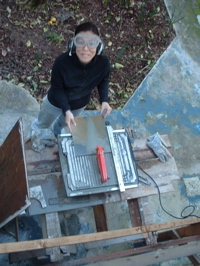
Mole did almost all the cutting. She became the tile-saw queen. Even got into some really complicated cuts to fit the slate tiles around pipes.

14-fancyCuts_20130203 15-tileSet_20130203

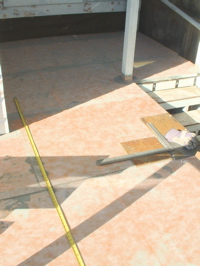
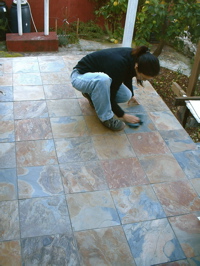
Once all the slate was done, we let it dry for a week. Because the slate has such a rough surface, I used a pre-grouting sealer on the slate before grouting. Hopefully it will make it easier to clean the grout off the surface.

17-crocus_2013020316-tileSet_20130203

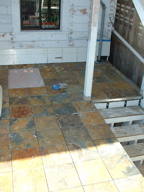
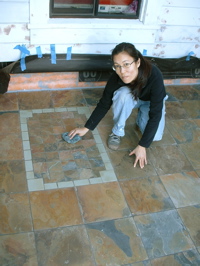
The crocuses are already up! The bulbs we planted under the lemon tree last year have come back this year. So nice. Above right, you can see a rectangle that we left unfinished. I wanted to make a virtual doormat in front of the door, by changing the tile pattern.

18-doormat_20130203 19-doormat_20130203

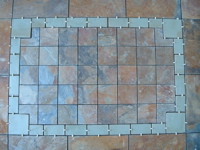
We used some ceramic tile that a friend gave me for the border (the same tile I used on the front porch as an accent tile). In the field, we just cut the same tile as on the rest of the deck to about 1/3 the size.

20-readyGrout_20130203 21-grouting_20130203

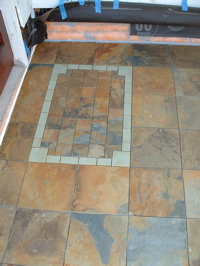
Above left, this is the ‘door mat’ ready to be grouted. Because the tile is so colorful, we chose a grey grout. I had to get mole to pick out colors, because I’ve learned: I wanted to get a really colorful grout… The grey looks really good.

22-grouting_20130203 23-finishGrouting_20130203

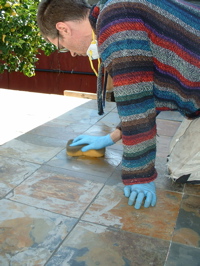
Above left mole is wiping off the grout from the tile surface. Above right, after the grout dries for a couple of hours, we came back with a dry cloth and polished off the haze on the surface of the tiles.

24-doormat_2013020325-Bella-Arwen_20130203

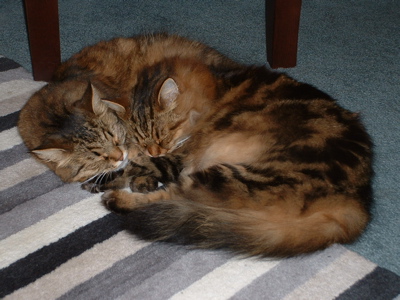
Mole is polishing up the ‘door mat.’ Now we can get back to finishing up the siding! Here’s a pic of Arwen and Bella looking out the window from their cat tree.


Deck Waterproofing and Christmas Eve

Well, a lot happens, and I’ve failed to post any of it. Here’s part one..

01-lampshade_20130203 02-lampshade_20130203

Before we moved into this house, mole found a lampshade made out of shells that she really loved. Unfortunately when she ordered it, it was out of stock, and no longer available. Just recently, the store got some more, so she bought it. We put it up in the bedroom.

03-lampshade-bella_2013020304-deckWaterproofing_20130203

Bella and Arwen really like it too. So, back to house projects: almost a year ago, I stopped working on the back stairs, because I started working on the laundry room. It sounds a bit as if I got distracted and went off to another project. But there’s a reason: After dealing with all the rot in this area I had decided that the deck would be waterproofed. The waterproofing needs to attach to the side of the house, but since the laundry room was so strangely built (there was no waterproofing membrane, just vertical boards) I had to rebuild the wall to add a waterproofing membrane.

One thing led to another, and we started jacking the whole thing up to level it… OK, so it did become a bigger project than I planned. The deck at the first floor sat out in the sun and rain for a year, unfinished, while we basically rebuilt the whole laundry room. I don’t want the deck to endure another winter unprotected, so it’s back to the stairs. Above right, I’m putting down heavy weight roofing felt.

05-janeenStapler_20130203 06-finishingUp_20130203

We stapled it down and lapped it, starting at the lowest side of the deck. Here’s mole just finishing up.

07-lateWork_20130203 08-cementBoard_20130203

The felt is just the first layer. This deck is going to have tile on it, so we put down cement board. To make sure there is a uniform surface under the cement board, we put down thinset mortar first, and set the cement board into that. We then screwed it down to the plywood.

09-cementBoard_20130203 10-cementBoard_20130203

It got pretty late working on this. I think I finished about 10pm. I wanted to get the cement board on before the rain, which was due in the next couple of days.

11-cuties_20130203

They are so sweet when they sleep together. We just can’t help taking photos.

12-paintingHallway_20130203 13-bakingBread_20130203

About four years ago, when we were doing the wallpaper stripping in the lower unit, we started stripping the wallpaper in our front hallway too. We stopped, because it smelled moldy, and we figured we’d need to replace the plaster. Well, it sat with the wallpaper partly stripped for all those years. Talk about bad Feng Shui in our entry! So I decided to just paint white over it. At least it will look better until I get around to the replacement work. Because there’s still no heating, the paint wasn’t drying: I had to bring an electric radiator down there. Arwen came down to watch the progress.

My family came over for Christmas Eve again this year. One of my Christmas traditions now is baking bread. Above right I’m just starting to mix.

14-christmas_20130203

Here’s a pic of everyone who came over. Dad got a picture of Elijah for Christmas, and wanted to include him in the photo!