Stairs Phase II

After pounding away at nails on the new plywood for a couple of days, I ran out and bought a new nail gun. My hammering of nails managed to crack the plaster over the kitchen window. Need to fix it again. I don’t understand the mechanics of it, but somehow a nail gun can shoot a whole nail in with less noise, and much less rattling of the wall. One less thing to fix if I’d only known.

Do you think this could be part of a superhero Halloween costume? Of course, the cats need to inspect a new tool: Knitted ball or nailgun – decisions, decisions…

For my birthday (41!) I got a dual fluffy-cat-hug. Then I went and put the water resistant paper (“Super Jumbotex”) on the wall with the new plywood. I layer it staggered by half a sheet, so there’s always at least two sheets thick on the wall. Instead of nailing the siding directly to this, I read it’s better to leave a gap behind the siding. The gap allows any moisture that makes it through the siding to run down the wall and not be trapped between the paper and the siding. I’ve used 1/4″ thick strips of redwood stapled over the Jumbotex paper with stainless steel staples. I’ll use stainless steel screws to screw the siding to the wall through these strips.

After hours of sanding the old siding boards, Mole put a couple of coats of primer on both sides.

I’m not sure if it’s a building code requirement, or just one plumber’s interpretation of it, but there used to be three drain pipes running up here: One for the roof drain, one for the vent for the kitchen sink downstairs, and one of the drain of the kitchen sink upstairs. Seems to me it’s less cluttered to just have one pipe with sufficient diameter for both kitchen sinks, and one for the downspout. So I changed that.

Right now it’s quite far from the wall. There’s going to be a stair landing on the right of the top of the window. When that’s in, it will be easier to work on the siding over the window. I’ll also put a proper wall jack for the plumbing penetration. Caulk really does not seal these penetrations properly.

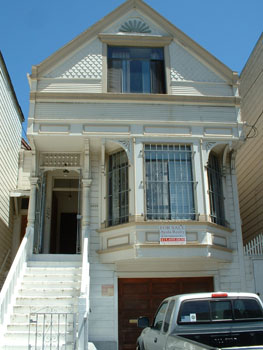
We’ve started on the second phase of the stairs. Last weekend, with Nick’s help, we tore out half of the upper part of the old stair. Ahh, so open! Now we need to build the new stairs. Above right, you can see that I’ve put most of the old siding back on. On the right of the photo is my neighbor’s fence, which I’m planning to cover (once the stairs are in).

Here’s the view out the kitchen window downstairs. You can see the stringer for the new stair lying on the deck. Above right is Arwen using Bella as a pillow. Since we came back from LA they have been more cuddly together.


the kittens turn 1!

for those of you on facebook, this post and the wedding post may seem redundant. but in case you missed it, the kittens had a birthday party!

their evite card.

i hand-knit their favorite balls and bones as favors. most of the guests were cat-people so they went home with toys and tuna. but for the non-cat-people there were other options. 🙂

our first guests were marisa, arthur, their three kids and marisa’s parents, lynn and philip. the kittens are still not good with small children. they both hissed at trevor when he arrived! and sadly this is the only photo i got of marisa’s family! arthur on the lower left, lynn at the upper right and one of the kids on the lower right. my parents are on the other side of the table.

i wasn’t very good at taking photos of the humans at the party. 🙁 i missed some really cute photos of kyle with arwen downstairs, and my dad having a quiet visit upstairs with arwen and bella.

marisa did me a HUGE favor and picked up the cake at prolific oven in palo alto. this is THE BEST cake and kind of the whole reason for throwing a party… originally i was going to have them draw two little cat heads on the cake, but i chickened out when i placed the order.

even though i said “the kittens like paper bags, gifts are not necessary” people brought gifts! here is bella with a lovely bag from uncle larry.

bags!

more bags! and fun gifts!

while bella was loving all the gifts and attention, arwen was upstairs (passed out from too much catnip) completely oblivious that there was a party happening downstairs.

(left) christina and mathew. (right) larry and janeen.

what’s all this?

(left) another bag! (right) bella finally realized it was nap time and took a nap next to uncle larry.

(left) bella loves her uncle justin! (being silly…) (right) arwen and uncle larry!

is this for ME???

after everyone went home we took the girls outside.

i can’t believe how big they’ve gotten. arwen is now over 11 lbs. and bella is just under 10 lbs.

remember how small they used to be?

my birthday present to them: BUBBLES!

they loved the catnip bubbles.

thank you everyone for coming to visit and for bringing all the birthday loot!

the girls have been enjoying all their new toys.

a wedding road trip

mole here! it was a busy summer for us, socially, so there wasn’t a lot of work done on the house. last month we took a road trip to attend mathew’s sister eva’s wedding in los angeles.

(left) jacques the groom with a woman representing the church, followed by mathew and his sister leonora. (right) DaDaniel walking the lovely bride down the aisle.

(right) eva was very happily surprised by the rented, decorated, chauffeured wedding car.

after dinner at hugo’s, we went back to our rented house for cake.

eva’s friend val caught the bouquet.

leo made the cake!

(left) except for the meal at hugo’s, aja shopped for and prepared all of our meals at the house. she made it a delicious and relaxing retreat. (right) and misha surprised us with his first concert ever! he sang one song in italian (which made me cry!), one in german and an original eight two song in english. it was all very exciting and moving. i felt very privileged.

(left) mathew saying good bye to his brother. (right) the hollywood couple and their new car.

on the way home jim, reirin, mathew and i stopped at the beach for lunch.

and we stopped in san luis obispo for coffee. everything felt exactly as we’d left it many years ago. linnea’s was still there, downtown looked great, and the creek was still a nice place to stop and sit. we feel really lucky to have called this town home while we attended cal poly.

(left) my self portrait in front of the creek. (right) arwen sitting in mathew’s bag, happy to have us home. or maybe she’s saying, “next time i’m going with you.”

i promise to include more kittens in the blog… soon!

Plywood

Engineers in California love plywood. I’m no exception; this house really needs some seismic retrofitting, and I’ve expanded the stair replacement project to include a shear wall (plywood!). Once I got the first level of the deck stable, and the upper stairs shored up, I took the siding off the back of the house and added plywood.

On a rainy Monday, I went out to the back and tore out the old steps.

I’ve got most of the first level framed. The pile on the right is all that’s left of the old steps.

Above left is the view out the kitchen window downstairs. The deck is starting to form. Above right is the laundry room. The new back door will be where this window is, leading out onto the deck and stairs.

The old back door had been chopped down to be just over six feet tall. To make the door back into a standard height, I added wood at the bottom and top of the door. Then I stained it with the same wood stain we’ve been using on all the wood work here. Above right – look at our garden spiders! They are getting big. Can anyone identify it?

Oh, and in my ADD style, I also decided to tear out the ductwork for the heating furnace, and add backdraft dampers and fancy iris dampers. We’re planning to get the furnace replaced, so I wanted to get the ducts in a row. ahem. Well, the purpose of the backdraft dampers is to try to stop wind blowing through the house through the heating ducts.

So, after putting the second to last coat of polyurethane on the door, our neighbor’s cat got into the garage. And went walking on my fresh varnish. I think I can get these out with a light sanding, but maybe I should leave them??

Above right, you can see the siding taken off the back of the house, ready for plywood! On the lower left of the photo, you can see how well the blow-in insulation fills the cavities. I’m completely sold on that stuff – it completely fills the whole cavity, unlike batt insulation. I messed with it a bit when I was adding hold-downs to tie this shear wall into the level below.

I’m not a fan of waste. And when it’s 100-year-old redwood siding, I’d be foolish to throw it out. But getting it off the wall without breaking it is a challenge. The technique I came up with is to make a tiny core drill out of a piece of pipe. Using my Dremel tool I sharpen teeth into the end of the pipe. I’ve got a piece of tape on it for the thickness of the siding. Works OK, unless the nail is in at an angle. Then it instantly destroys my core drill, and I’m back to sharpening.

And here’s a before and after. Isn’t plywood nice? The strap just adds the perfect touch, I think.

A friend suggested I paint the hardware before installing it on the deck. His thinking is that the paint would help to stop the metal from rusting. Being a perfectionist myself, I think it’s a great idea. Being an engineer, belt-and-suspenders is always better. And after finding out the price of hardware in stainless steel (almost twenty times the cost), I’m going for the paint. It takes ages to paint all sides, though. I’m wondering if I should do two coats?

Janeen spotted a mushroom in the wood from the old stair (while she was outside pulling nails out of it).

The paint on the back of the house is in seriously bad shape. How can siding get this bad? It will be good to resurrect this wood. Above right, Janeen is priming the backs of the siding boards, after they’ve been sanded.

Well, I’m almost ready to start on the next level. If I don’t get distracted.

M.C.Escheresque

We started to do the framing for the deck this weekend. Instead of doing the whole thing in one go, I’ve decided to split it into two parts: First I shore up the upper stairs, and build the lower landing. Then, when there’s a safe platform to work from, I’ll start on the stairs.

I think there were a few raised eyebrows when I managed to get some 16ft long 4×6 beams onto the Honda Civic! It’s amazing what you can do with some cardboard (padding) and ratchet tie-downs. I’ve not been organized enough to arrange for a delivery, so I’ve been using the trusty old car to bring all the wood. It took three trips. By the third one, I realized how much time I’d have saved to just pay for the delivery. Next time. Above right, we’ve got the first post installed.

Janeen is holding one of the posts in copper green wood preservative. It smells nasty enough that I’m sure it works. We’re using preservative pressure treated wood, but any cut ends need to be treated. Above right, some ‘inspectors’ dropped by to look around.

I love this photo: It reminds us of Escher’s three dimensional drawings. The white posts are the posts supporting the stair up to the upper level. The brown are the new ones, all fished between the existing posts.

Above left, I’ve cut all the posts for the stairs above, and it is supported on the new framing. Above right, it’s amazing how easily rotten wood comes apart. I took off the hand rails so that I could get the new framing in.

A pile of old wood is developing.

Janeen is checking the level of the new framing. I’ve got a block of wood taped to the end of the level. When laid on the framing, it reads level when the framing is sloping 1/8″ per foot, so that the whole deck slopes slightly away from the house. Janeen’s removing nails from the old wood (above right). Considering how rotten the wood is, it can be a real pain to get the nails out.

Putting hangers on the framing, and adding framing between the beams. Above right you can see a sheet of plywood stacked on the framing above: I couldn’t figure out how to get it up there once the framing was in, so we pulled it up first. Good thing it wasn’t a windy day.

A while back I promised a photo of the front stairs and front door. Here it is, after the painting. Because I did not have time to repaint the whole house, I used the same colors, and just painted the areas that where really in need. I’ve also finally got rid of that awful gate.