It’s been two years since I bought the moment frame. The beam has been in the garage, getting covered in dust waiting, but there was a lot to get done to prepare for it.
The column near the garage door is too tall to stand up in the garage, because the final height will have the bottom of the column buried in concrete. So I had to dig out the footing before I could even stand the column up:
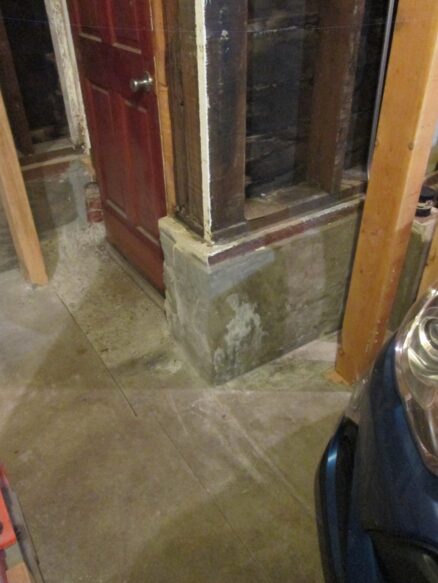
Here’s the column standing in a freshly dug hole. The top of the column has to be down below its final position so that we can bolt it to the beam. Once it’s bolted to the beam, the whole lot will be lifted into place. The columns will be hanging in the air and we’ll pour the new foundation under it.
The column at other end of the moment frame will be up on top of a concrete wall – but the wall isn’t there yet: So I had to make a temporary platform to sit it on.
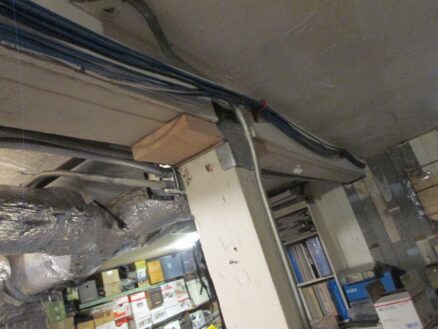
The major pain with this moment frame: Absolutely every utility in the house has to cross this beam: All the electric, gas, water, heating, and network wiring and piping had to be disconnected, and then routed through holes in the new beam or under it.
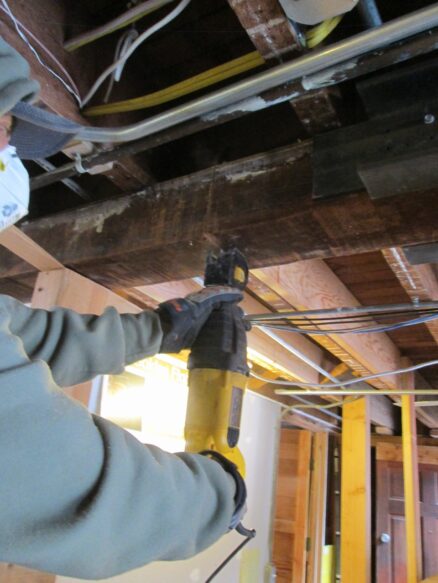
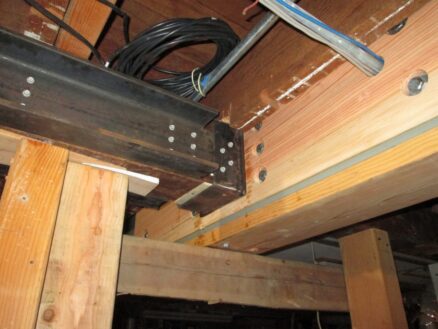
Holes in steel? I bought a “mag drill” to drill holes in the steel beam. It’s basically a small drill press attached to a powerful electro-magnet. I position the drill in the correct location, then turn on the magnet and it sticks to the beam.

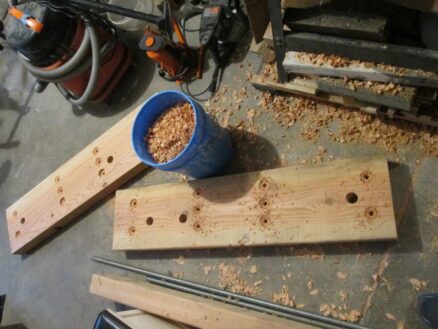
Then I drill a hole. I had to drill large holes for the utility pipes to go through, and smaller holes for bolts to hold pieces of wood to the beam so that I can support building structure off the side.

Here are two of the pieces wood, all drilled and prepared to attach to the moment frame beam. The bucket is filled with wood chippings for the compost.
Just the beam weighs a lot (over 1000 lb) plus each column is extremely heavy. I used two furniture dollies (they are supposed to be able to support 2000 lb each) to move the beam. They were creaking and flexing ominously.
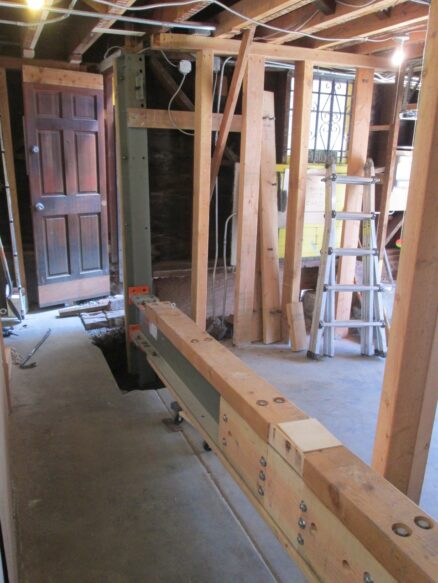
Once the beam was lined up in the correct location, I used a 20 ton bottle jack to slowly lift one end a few inches, then temporarily support it before lifting the other end. It took a full day to get it almost up to the floor above.

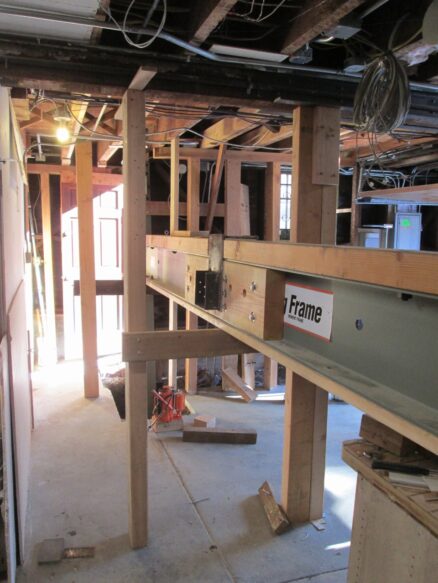
Once I got it close, I cut the old wood floor beam where this moment frame beam fits in. And I also had to disconnect all the wires and pipes that crossed over it.
It took me over a week to get all the wires and pipes reconnected. It’s interesting thinking about our priorities for what we need. First I reconnected the power for the kitchen, to keep the refrigerator running. Then the main water pipe. Then bit by bit I got the electrical reconnected. But we were taking cold showers most of the week until I could get the gas reconnected. Finally I got the network cables connected. I still don’t have the duct for the heating in the front room reconnected.
I made one mistake in measuring for the holes in the beam: I drilled the hole for the gas pipe right where the duct for the furnace was. The beam was already up in the air when I figured this out, so I had to lift the mag drill up, and drill a new hole. Because the floor joists were in the way, I couldn’t get the hole quite as high as the other ones, so the gas pipe will be a little below the ceiling.

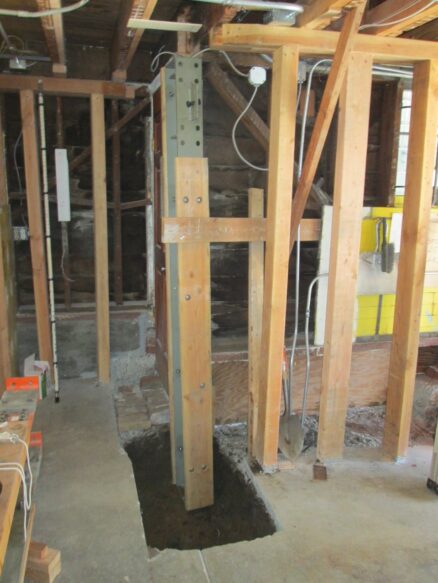
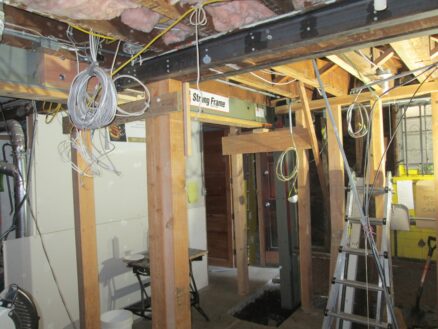
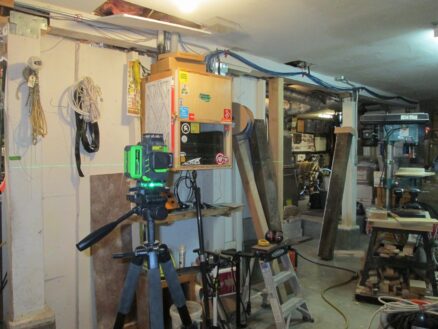
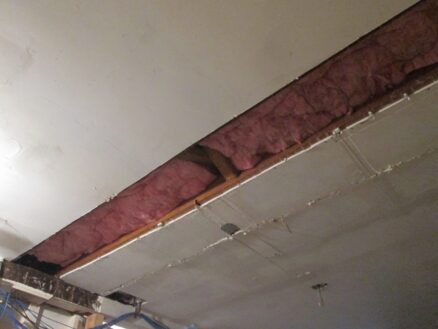
Here is the new steel moment frame beam temporarily supported in place.
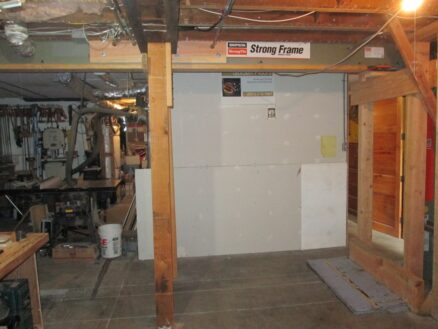
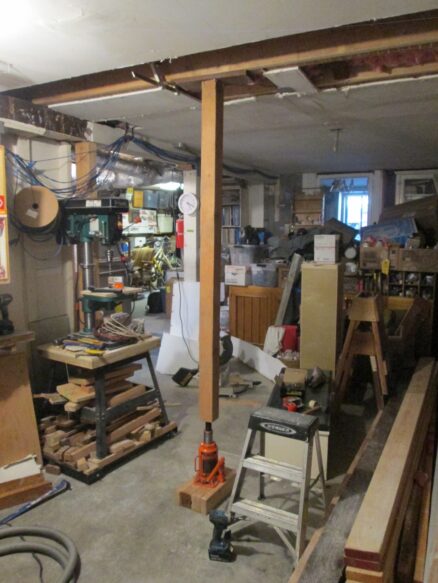
I have lots of temporary support posts holding everything up while I do the foundation.
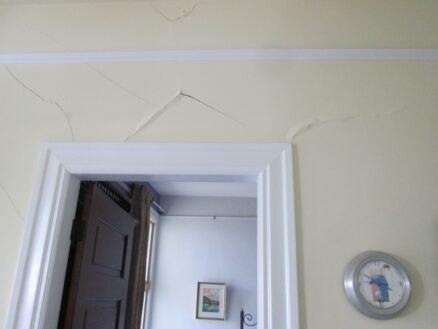
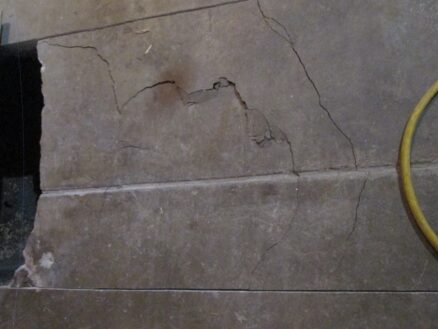
The old steel beam that used to be here was too small for the load, so it had sagged about an inch in the middle. The floors in the house are all sloping because of it. I figured when I put this new frame in place, I’d level out the floors – which I expected would damage the plaster.
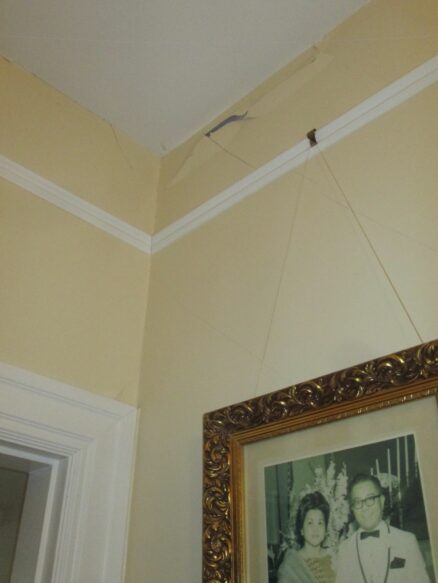
What I hadn’t expected was how badly it would crack the plaster. Now I again have to fix all this plaster that we had fixed perfectly over a decade ago.
I also didn’t anticipate quite how big the jacking loads would be to lift the beam into place. Once it the moment frame connected with the house and started lifting the house, the loads were huge: Enough that the jack crushed and cracked the concrete floor slab in the garage.
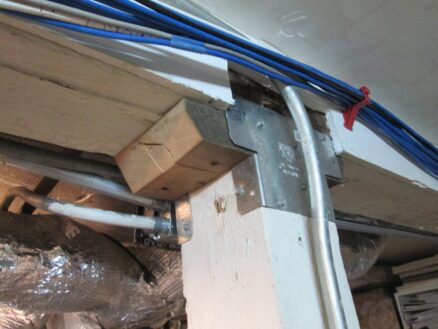
I used a laser level to figure out how much to jack up the structure. Once I got the beam to the correct height, I added temporary wood pieces that I’ll replace with a steel post cap.
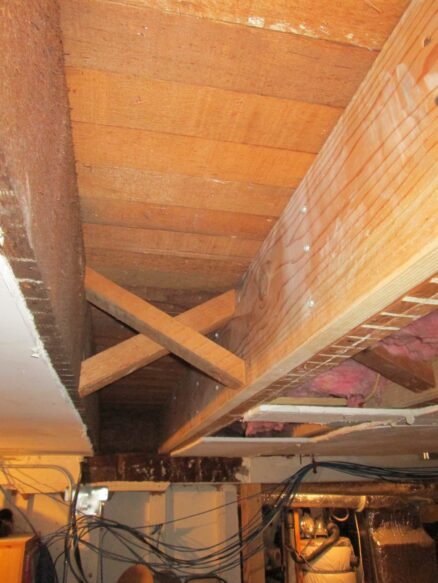
This piece of wood is almost 2 inches thick: That’s how much the floor got raised at this point.
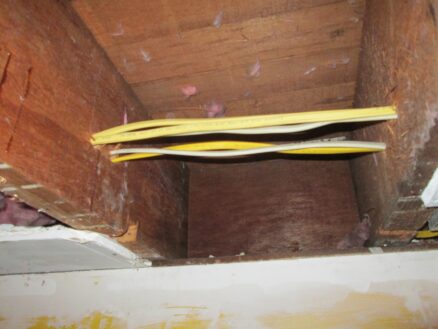
I talked about the floor joists being notched on the bottom in a previous post. But all this leveling of the floors suddenly made it obvious when a floor joist supporting one of the walls in the living room was sagging. So I added a joist to that one.
Again, I had to disconnect wires and reconnect them to put the new joist in. I also screwed this one up: At first I reinforced the wrong floor joist.
I spent a full day, removing the drywall, disconnecting the wiring, adding the reinforcing joist, reconnecting the wiring, and putting everything back. When I went up to the living room at the end of the day, I was surprised how little the sagging floor joist had changed – until I realized I’d reinforced the wrong one. So the next day I had to do everything again, but for the correct joist this time.
I temporarily jacked the center of the sagging floor joist, connected it to the new reinforcing joist, and then removed the jack.
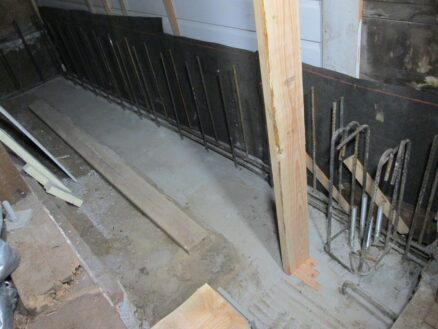
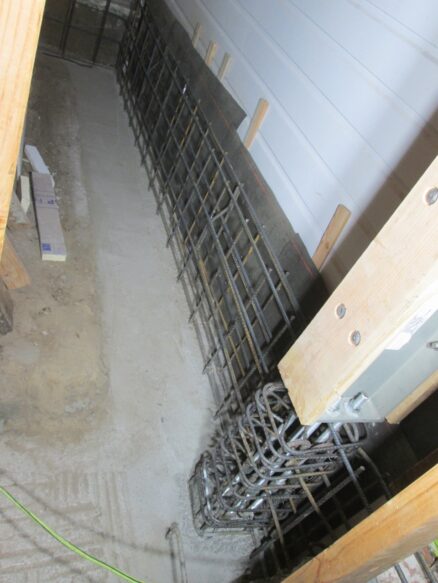
Now on to the concrete work. I’ve got the reinforcing done for the wall and the pilaster below one of the steel frame columns. Now I have to build formwork to hold the wet concrete in place, but I have to get the rebar inspected first.
Bella bella… we miss you…