Now that we’re done with the structural work, I need to fix what I broke.
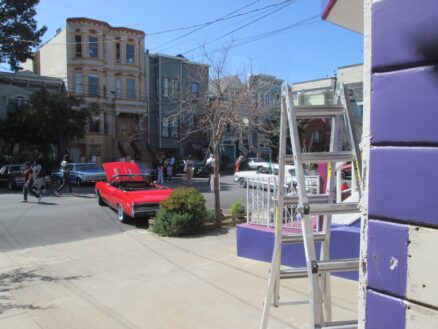
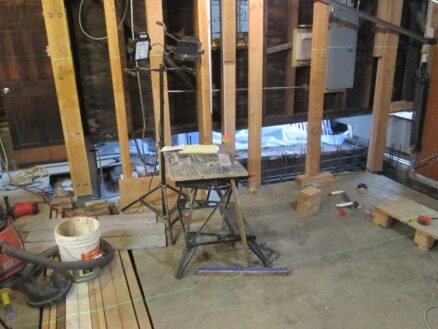
In the blazing sun — while the street was closed for a low-rider car show — I started working on the siding and trim around the garage door.
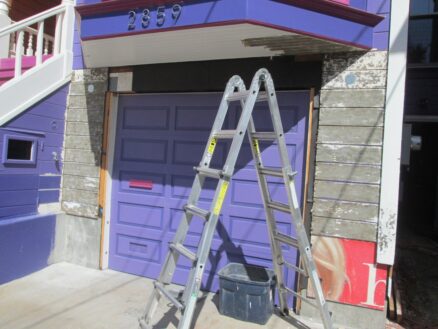
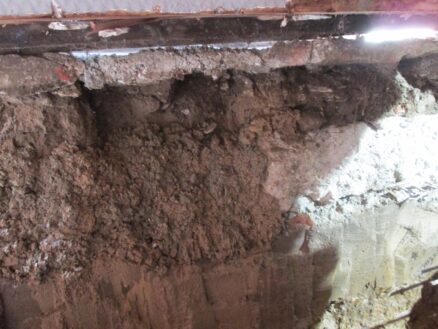
It was hard to see from photographs, but the paint on the siding around the garage door was bubbling up. So I stripped it down to the wood. The reason I’d waited too long on doing all the paint on the front of the house, is I’d wanted to strip it all. It’s prohibitively expensive to hire someone to do that, because it takes a long time. But the bubbling is because one of the layers of paint is not sticking to the layer below it: Probably because one of the times it was painted, the previous paint wasn’t sanded/cleaned properly.
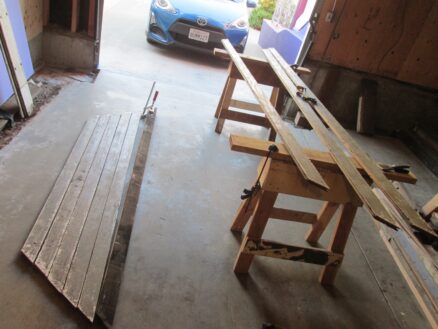
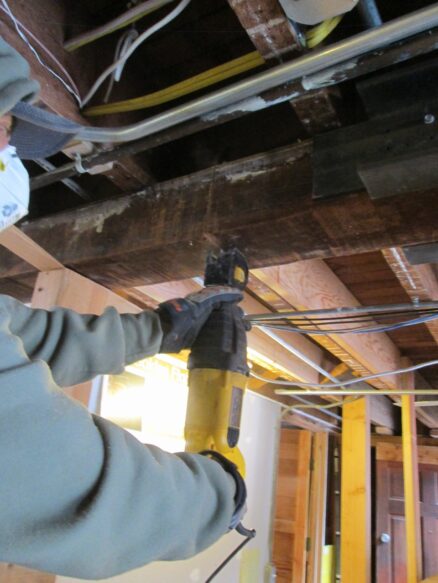
Working on the paint overhead is really hard on the neck and shoulders. I also re-used some old siding and filled in the lower left and right sides. That piece of old plywood with the interesting painting on it served many months. I think it even made it into a google street view.
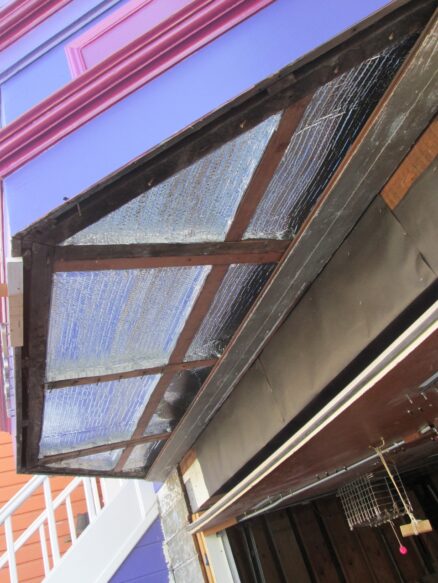
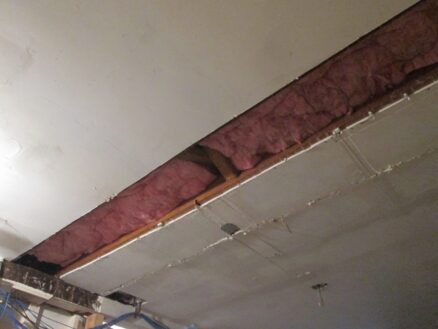
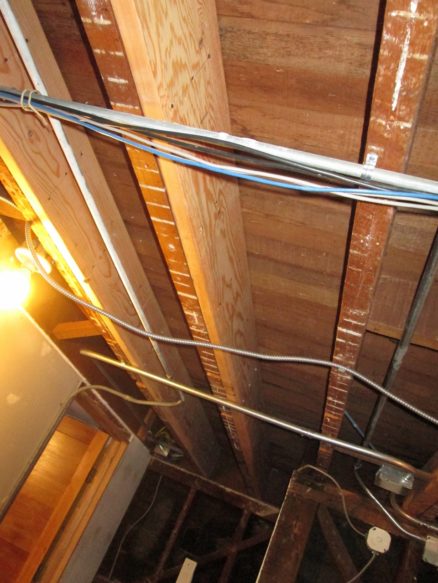
Only after I’d done all the overhead paint stripping, I thought: While I’m doing this, I should add insulation below the floor. So I pulled all the overhead wood off. Could have done it before stripping and made it so much easier on my neck. Oh well.
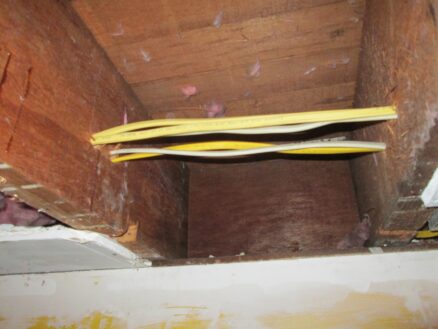
Insulation in. I used a double layer of closed cell “reflectix”–it’s a bit like bubble wrap–with an air gap between. I had to cut each piece to fit with enough to staple to the joists on all sides. I decided on this because I didn’t like the idea of glass fiber batt insulation possibly being a place for insects to nest.
I added some ventilation holes so that moisture doesn’t accumulate in this space. I did add metal mesh on the back side so that large insects can’t get in.
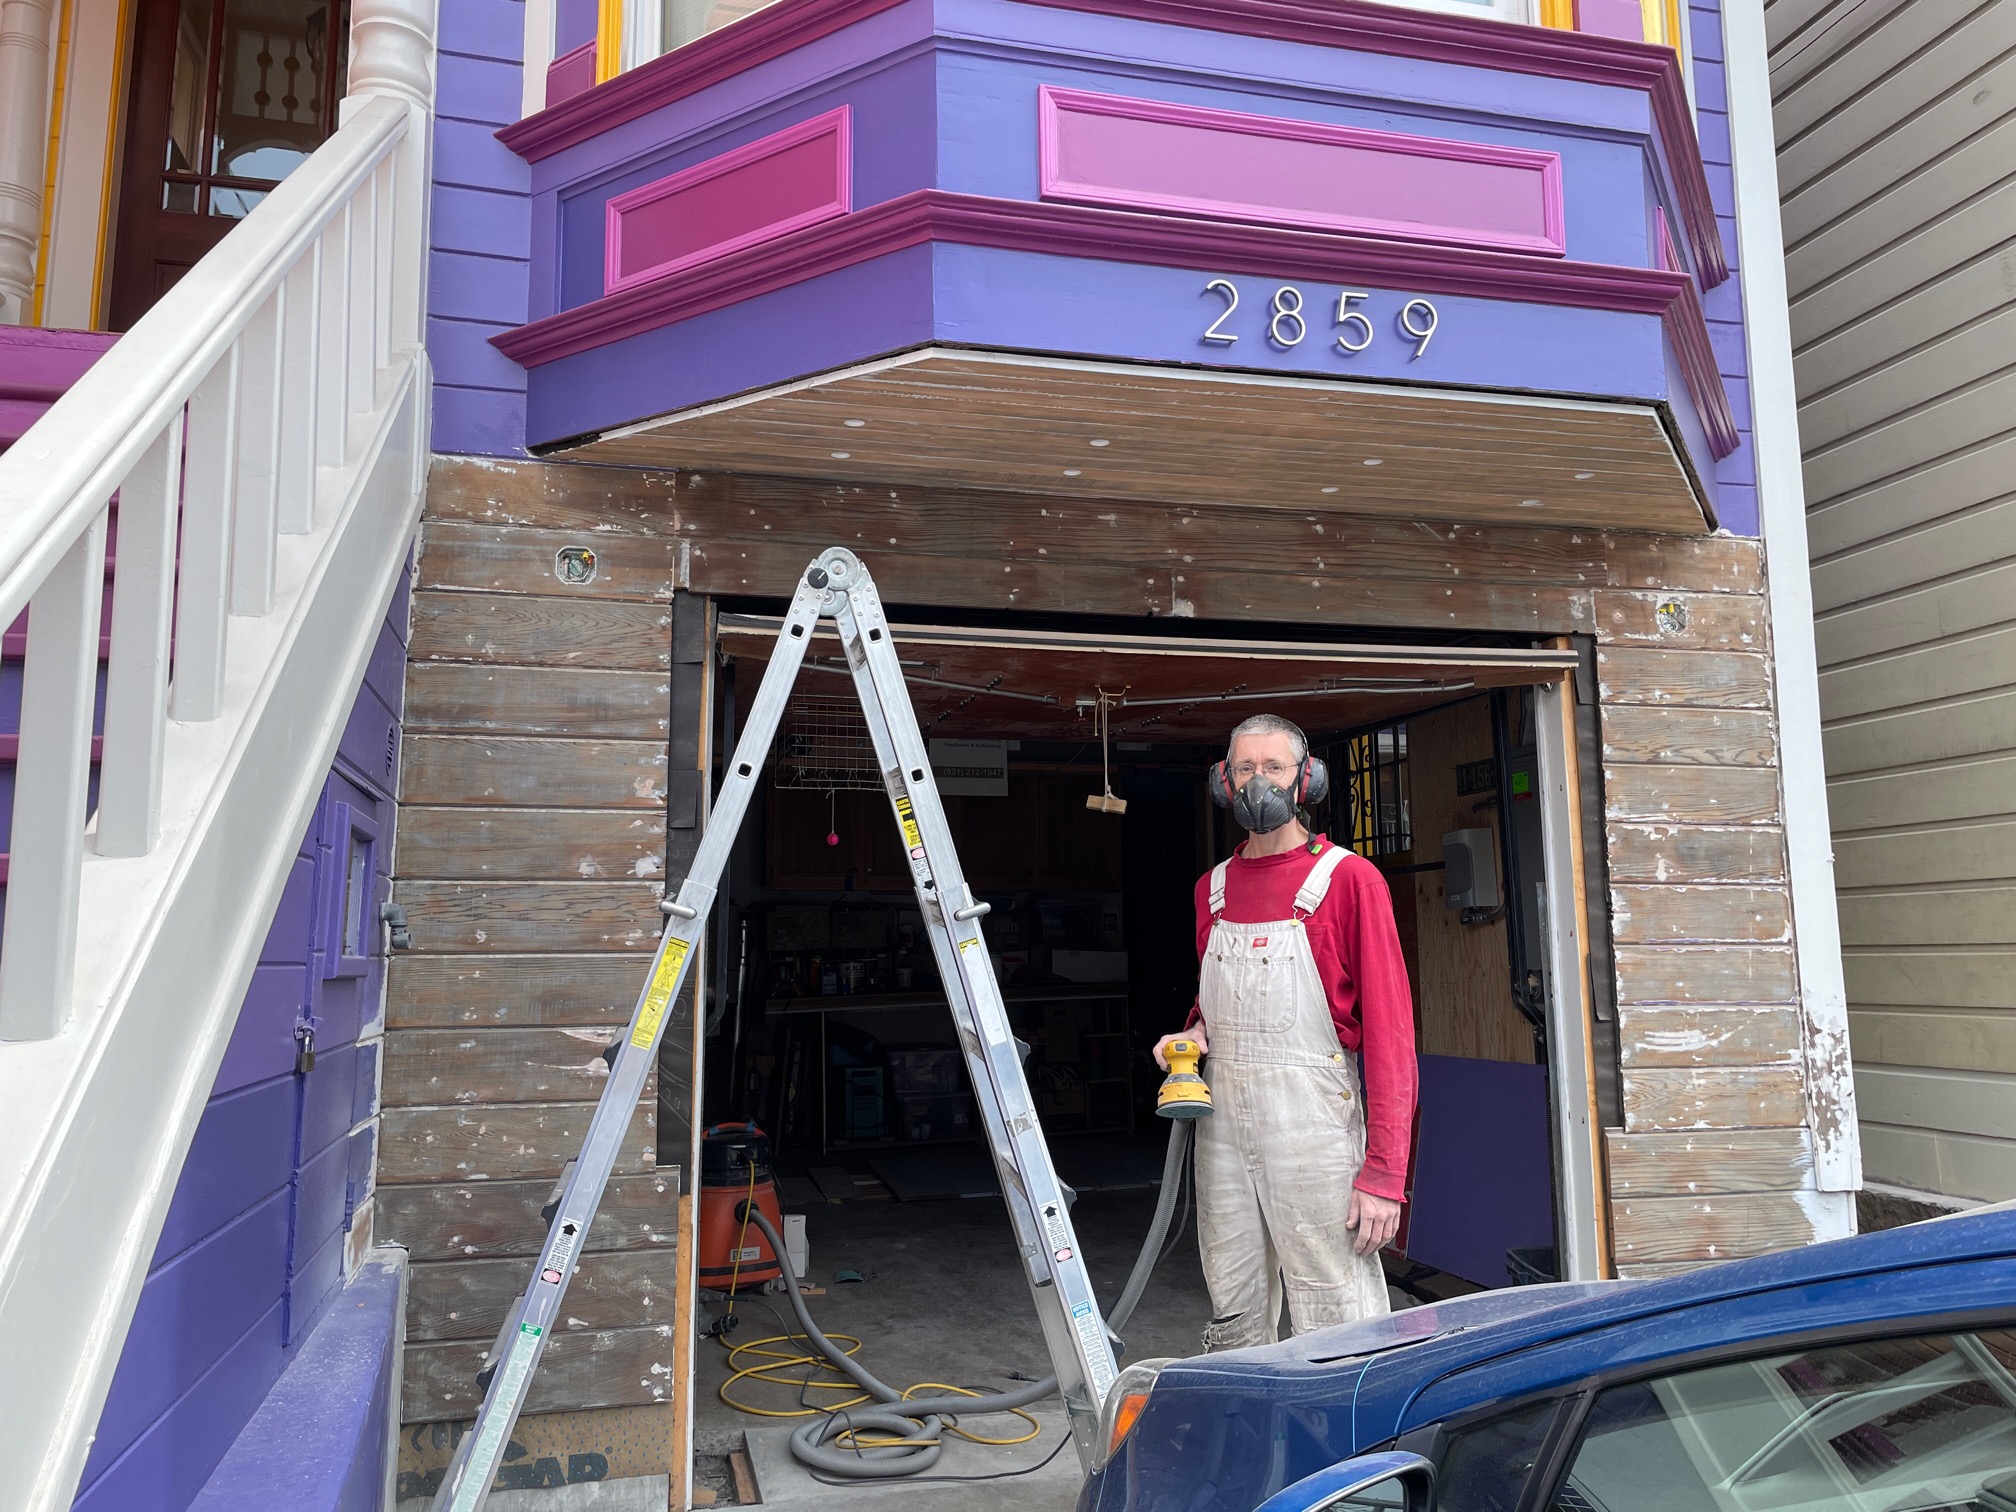
Mole snapped a photo of me after I’d got all the siding back on and was working on filling holes and sanding smooth.
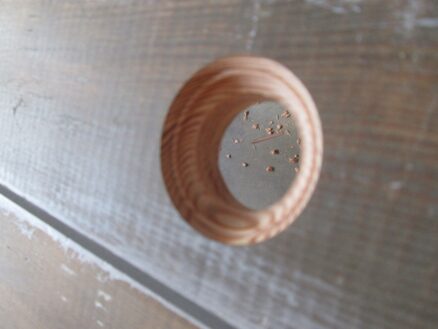
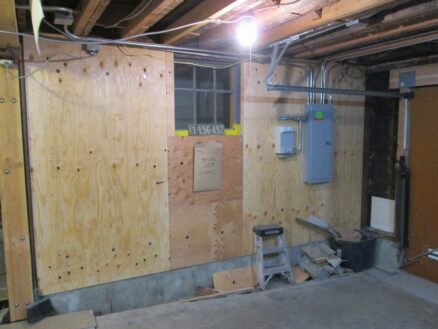
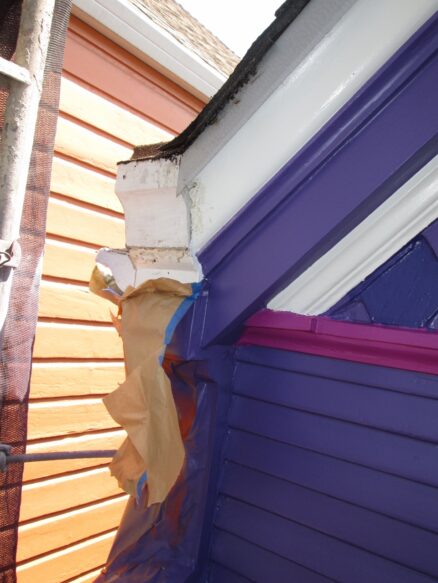
Now it’s getting much nicer than it was before I started: The trim around the garage door was a real botch job before. Now I’ve used some nice cedar with dimensions matching the rest of the house. It’s hard to see from the photo, but I added a piece of quarter round at the inside edge – another Victorian era detail.
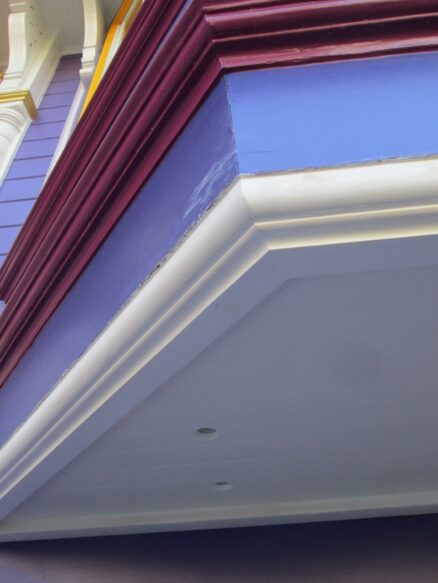
The lower edge of the bay window was always a bit of a mess. They’d used just a piece of quarter round, and butted it against the edge of the ceiling boards. I very much doubt that was original, because it results in exposed end grain.
I changed the detail by making the quarter round extend down a bit, and adding a piece of wood with a coved edge routed into it. In my mind this is a huge improvement because it hides the transition, and also provides a ‘drip’ edge.
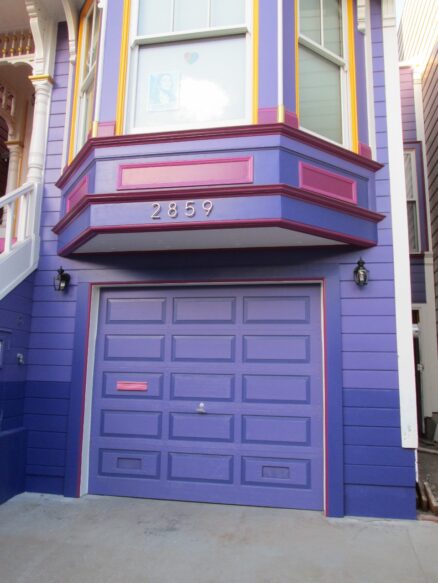
Here she is, painted. I added lights: We bought them about fifteen years ago (!) planning to put them here.
I’ve had a lot of help moving this project forward. By chance, I ran into Emilio — who, it turns out, is a floorman and immigrant like Dad. He initially agreed to help me with getting beams lifted into place. When we’d jacked up the first beam and got it attached, we stood back and he kept saying “Beautiful” — I told him Dad used to sing a “Beautiful, Beautiful” song when he was putting polyurethane down onto freshly sanded floors. It’s now become our mantra.
Since then, when his regular work is slow, he’s been helping me keep this project going. In January, we did a major push and got the final foundation poured. After re-reading mole’s post about Dad and me installing the floors, I realized Emilio reminds me of Dad in other ways too (quoting mole) “working with mathew was like working with a really high-maintenance, picky, perfectionist client who never left the house… during the entire weekend mathew was BOSSY but daniel, as always, maintained a positive attitude with a smile on his face.” Emilio too.
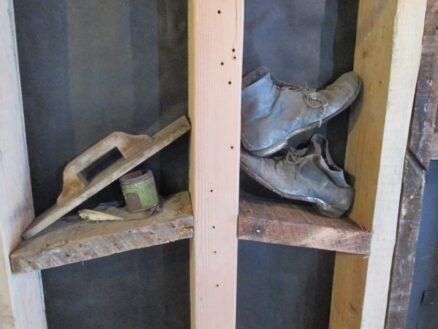
There were lots of interesting things hiding in the walls when I opened them up:
A wood concrete trowel, shoes, and a can of shellac lacquer
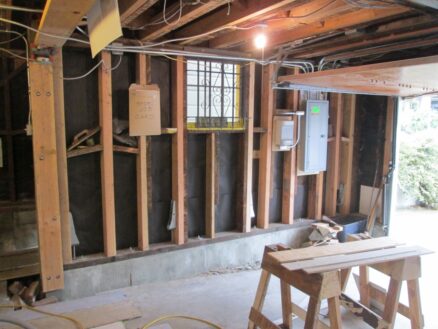
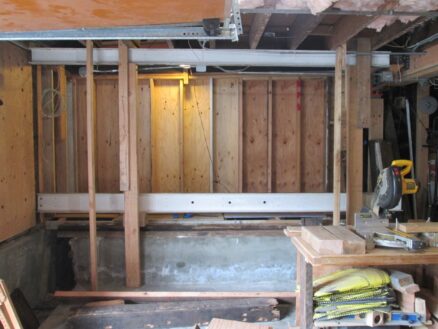
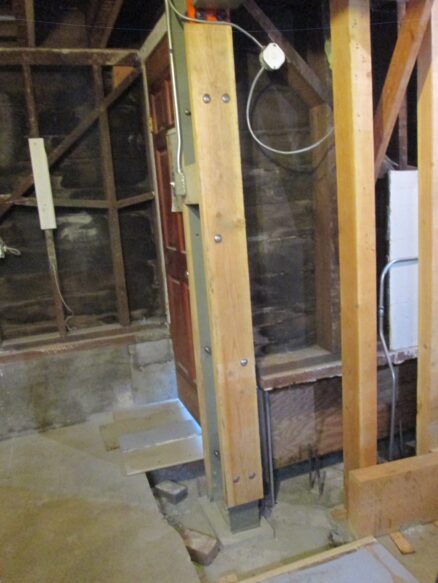
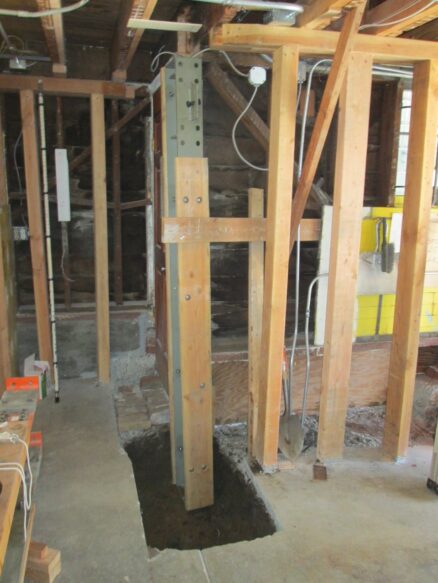
Here I’m starting to get the wall supported again. You can see the light shining through below the wall, and I’m adding new wall studs next to the old shorter ones, working left to right.
Even with all my shoring efforts, this corner dropped a bit. So I’ve got a jack under to corner lifting it while I put in the taller posts. It reminds me of when we first bought this house: The agent was showing us around, and in the back of the house, there was a jack supporting the extremely rotten and falling-down back stairs.
Corner post installed.
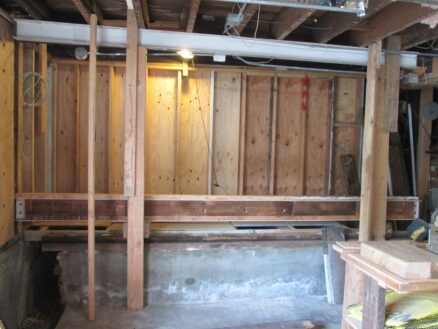
I had some original siding saved from the wall on the other side, so I stripped the paint, and repaired all the dents and dings. Now it’s on the lower quarter of this wall.
Siding and moisture barrier installed and shoring removed! Ahhh, such a relief.
I put the hidden treasures back into the wall, just the way I’d found them.
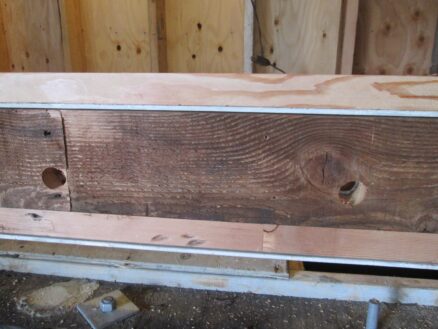
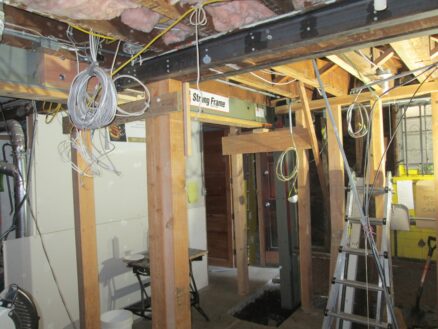
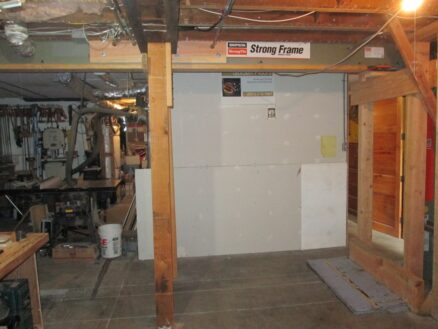
Then plywood to make it into a strong shear wall.
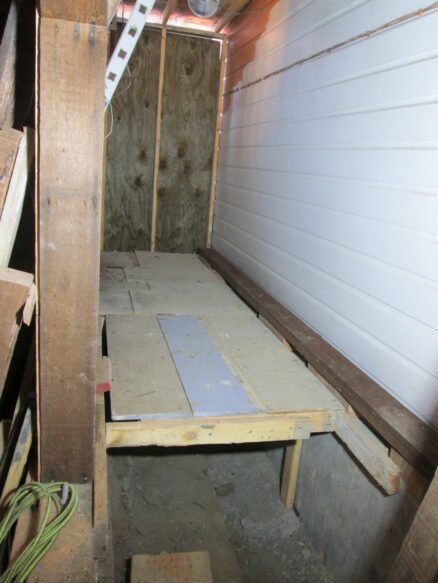
On the other side of the house, I had to construct a wall against the neighbor’s house. You can see the siding of their house on the right. To do it, I built a platform at the height of the concrete wall, and then planned to build the new wall on top of the platform, and slide it into place…
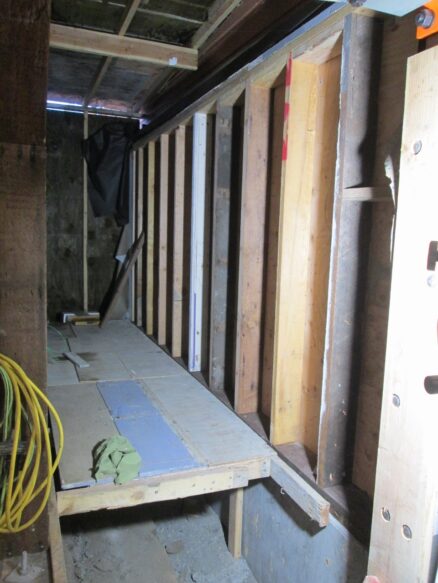
The new wall was incredibly heavy because it has to be a one hour fire wall. Moving it into position was difficult: The wall had to be moved over, and slid over the top of the anchor bolts. The bolt holes had to line up perfectly with the bolts sticking out of the concrete. Plus it had to fit in close at each end and somehow fit under the edge of the existing floor. I used a pry bar to gradually nudge it over, and had to tilt the whole wall at what felt like a 45 angle to get it to fit under the edge of the floor.
…Lots of grunting, false starts, and last minute trimming later: Wall in place. Success!
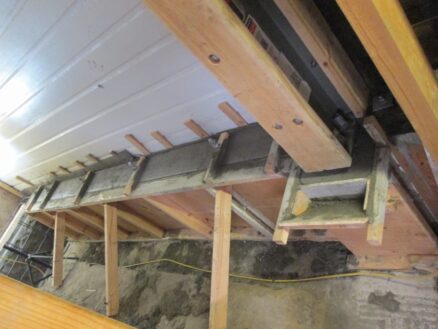
Then I shored up this side of the house and removed the old termite-eaten wall, in preparation for installing a new steel beam.
Actually, the beam is not “new” – it’s one of the beams that was over the garage before. I cut it down to the length for this new location, and with my mag drill, drilled the bolt holes into it.
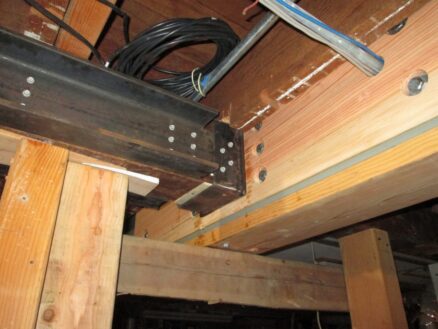
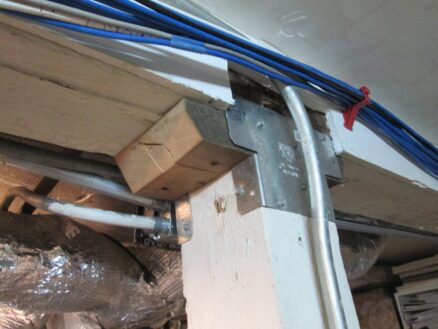
This view shows the shoring beam above, and the “new” permanent beam below. I drilled some extra holes in the middle in case I decide to run conduit through it in the future.
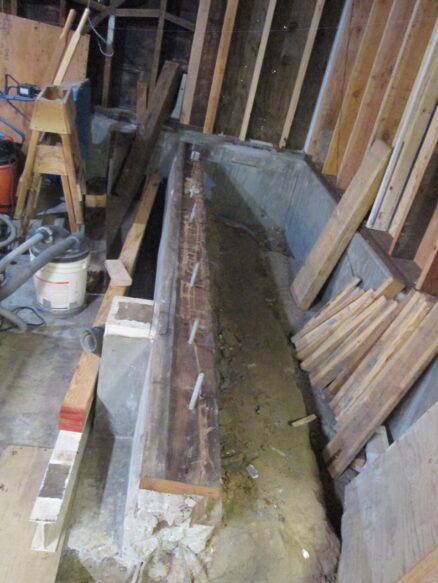
Reclaiming the remaining good pieces of wood that came out when I removed this wall, I filled in the sides of the beam so I can nail joist hangers to the sides.
Here are the floor joists notched to fit the new beam. I couldn’t make the beam go all the way up, because it runs under the landing at the front, which is lower than the floor inside the house.
And that’s it: Fully supported on the new foundation. Plus the garage is a bit larger now. Next I have to build back the wall framing and all the finishes that were damaged/removed during the foundation work.
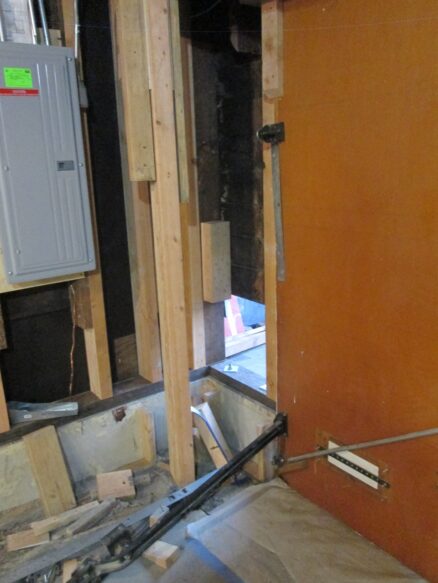
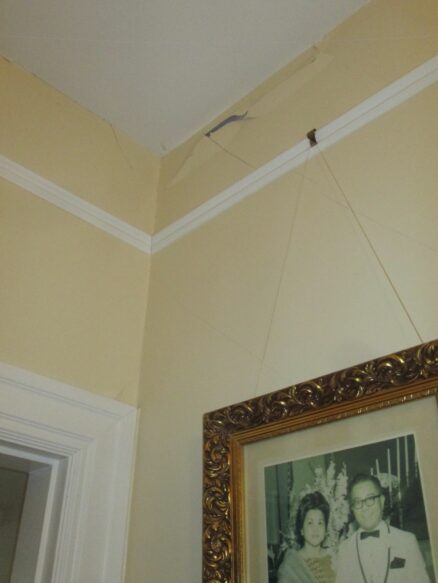
One more thing found in the walls. Maybe you can see where it went in the photo below.
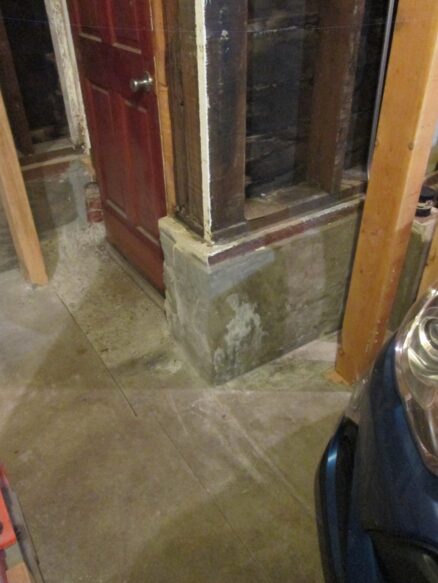
Now to remove this old wall: The threaded rods sticking out of it are the retrofit anchors I added a few years ago – before I got myself into this mess!
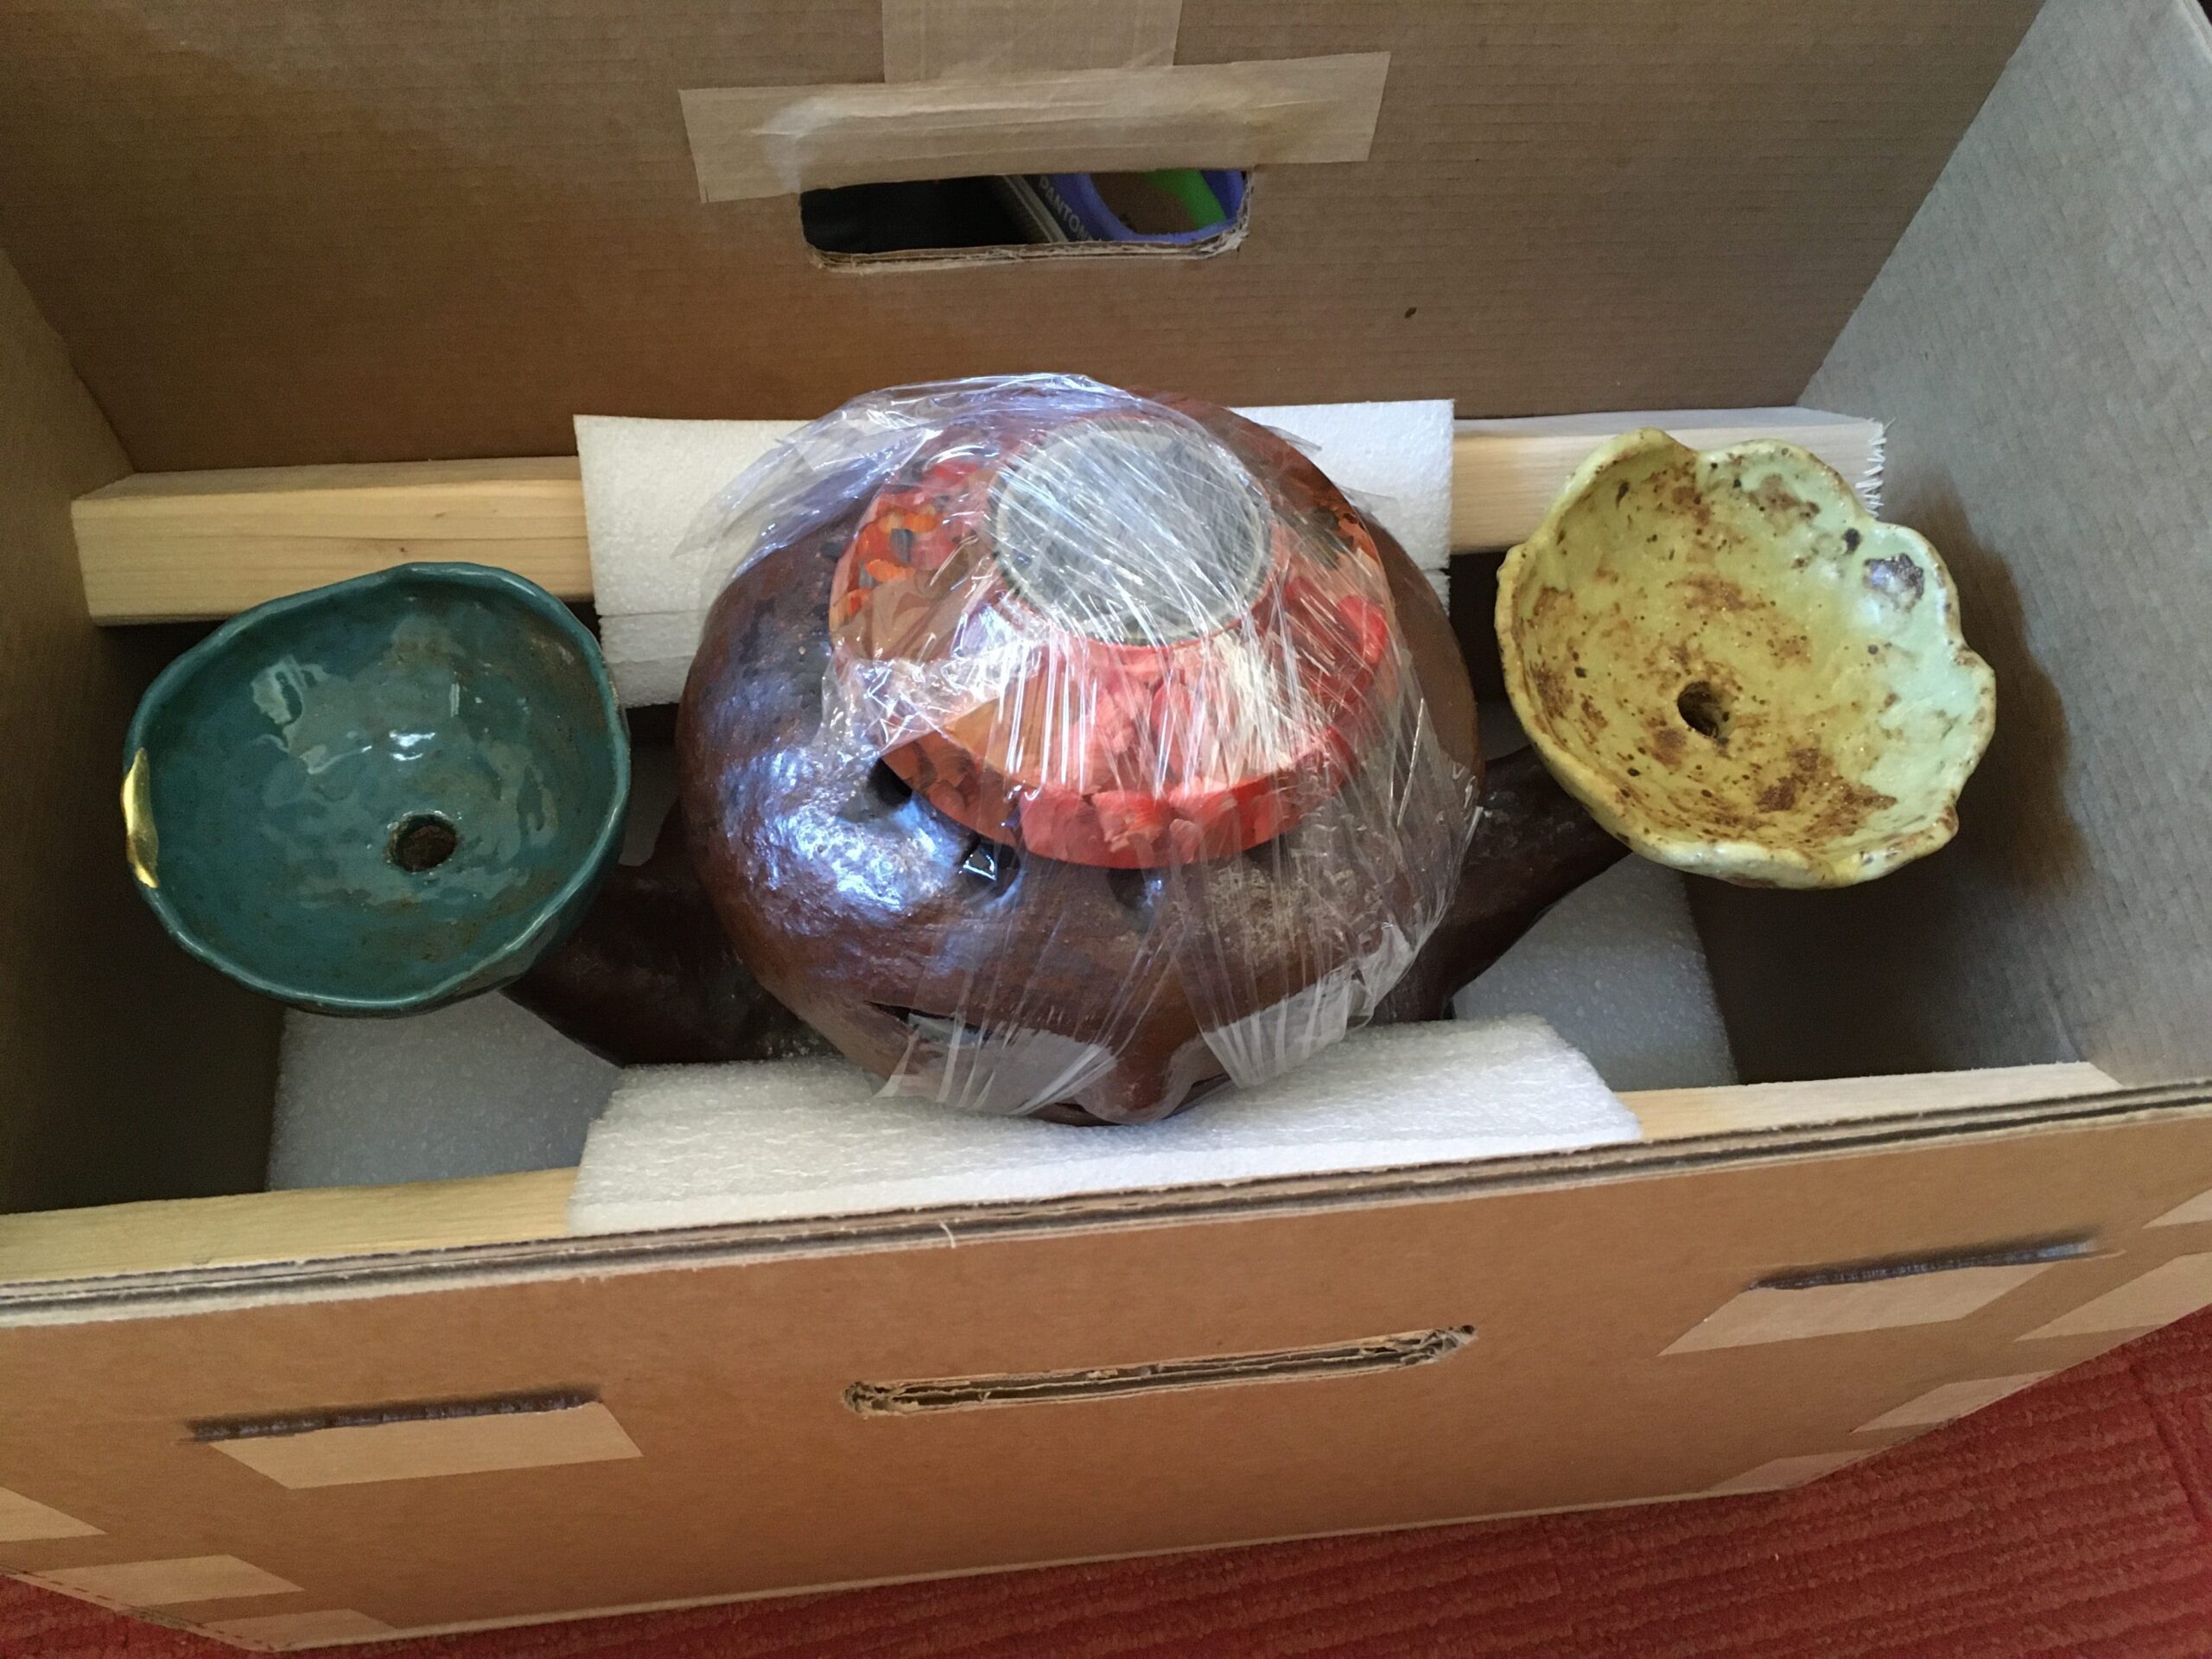
On a more fun note, some of Misha’s sculptures appeared last month… delivered by art delivery service. I was super worried they’d get broken in transit, but they were packed expertly and ADS drove their own truck here to deliver. No FedEx box-smashers please!
This so reminds me of a sad part in ET.
But now Blue Ganoogle lives happily out on our back porch. They don’t like living indoors. I think Arwen likes them, too.
Two bowls gnome’s arms were sooo tired.
Now he’s keeping watch at Bella’s grave. His hat is actually a solar light, so his eyes and all the holes around his head and belly glow at night.
This is the last phase of the foundation (at least for now.) I split this project into three phases so that I never had to have too much of the house up in the air, and it kept each part a manageable bite. Still, this last part felt intimidating.
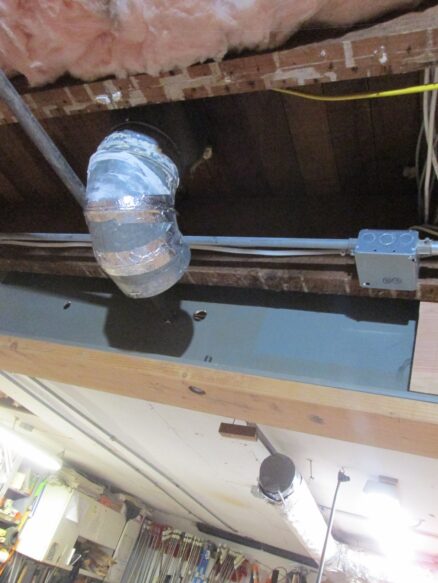
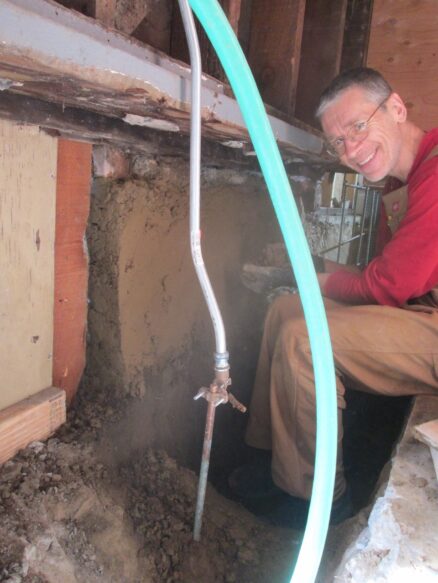
It was summer when I cut through all the utilities. The last part that I’d not fixed was the heating duct. At the end of October, things were starting to get a bit chilly, so I had to re-connect the heating ducts
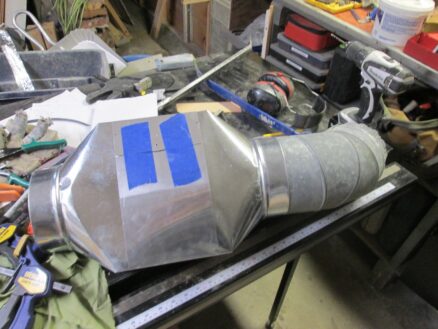
I made a custom sheet metal piece so it was flat under the beam.
Here it is installed. The heating can be turned on!
Before I could dig for the new foundation, I had to hold up the house. Here I’m putting a temporary beam to hold up the front bay window.
I added a big new beam above the garage door. This will be supported on the new concrete footings.
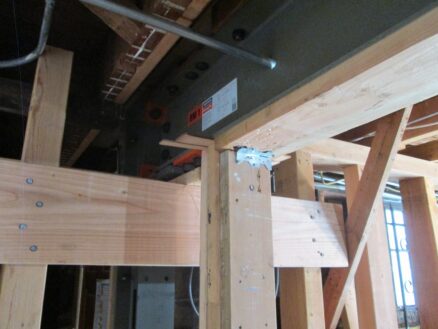
This is the inside showing how the beam that runs down the center of the house is connected to the new beam over the garage door.
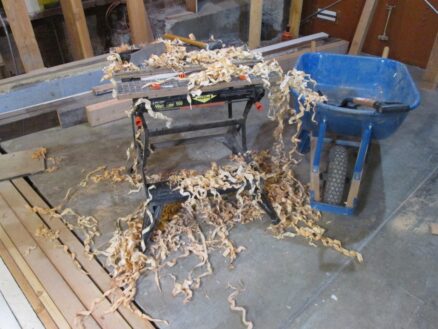
I had to make a few pieces to support the new beam hanger. This photo feels like it came from 100 years ago. Modern carpenters don’t use hand planes any more – no piles of wood shavings. But I’m not a modern carpenter.
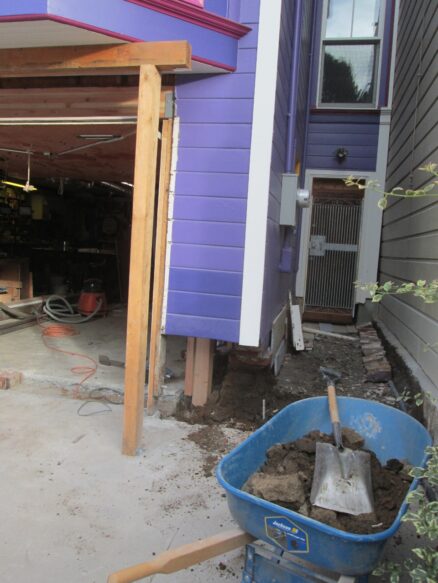
To support the front of the house while I dig out the foundation, I had to dig down below the bottom of where the new footing will be, and pour a temporary footing. This temporary footing will support the post holding up the corner of the house.
Here I’m pointing at the beam that’s supporting the front of the house. On the left side of the photo (to my right) you can see the unassuming post that is carrying most of the weight of the front of the house.
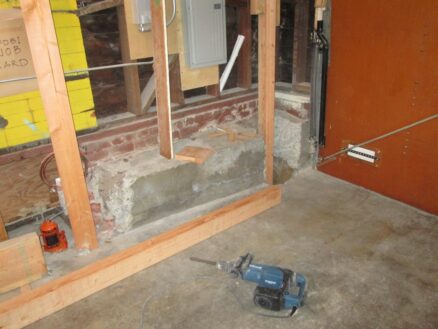
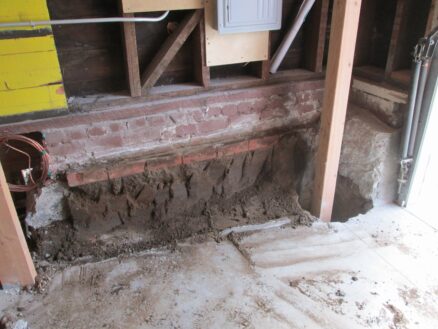
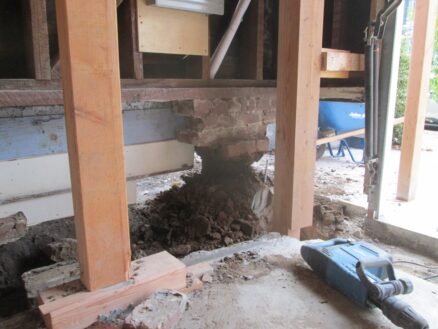
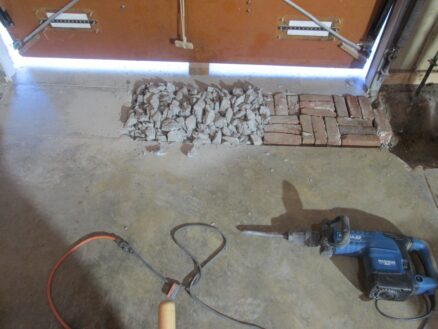
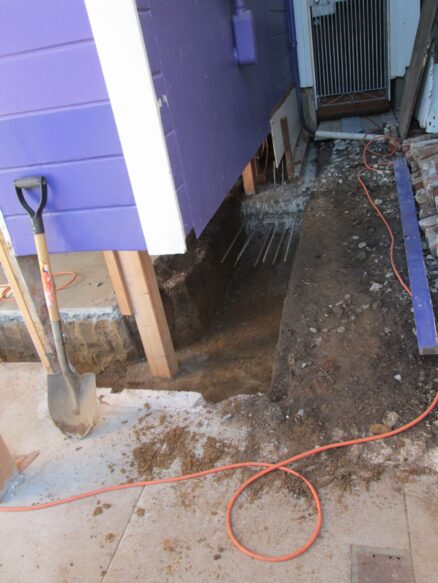
OK, so with the temporary support in place, I started digging out. The old foundation was a mix of bricks and un-reinforced concrete.
This was the scariest day. I’d figured out all the temporary supports, but it’s still intimidating taking away the very last bit of old foundation. If I’d missed something, now would be the time it would show up in a very dramatic way.
All was fine.
Once I started digging out for the footings, though, we started getting a lot of rain. We got some really huge rain storms – which apparently missed much of the rest of the state unfortunately. For me, they were a bit of a pain: The footings kept filling up with water that I’d have to pump out.
But for some, the dramatic rain is fun to watch.
A side effect of all that water is it started collapsing the soil on the sides of the footings.
So I did something a bit unconventional: I mixed the sticky mud that had lots of clay in it with concrete. That soil-cement mix made a very weak concrete that filled in all the areas that were collapsing. If I’d just used soil, it would have just washed out again. If I’d used concrete, it would have been expensive and more difficult to put in. And difficult to chip out if I needed to adjust the sides of the footing.
I enjoyed this image. The garage concrete slab on the left, in the middle all broken up, on the right some bricks put in (temporarily so I could drive the car into the garage).
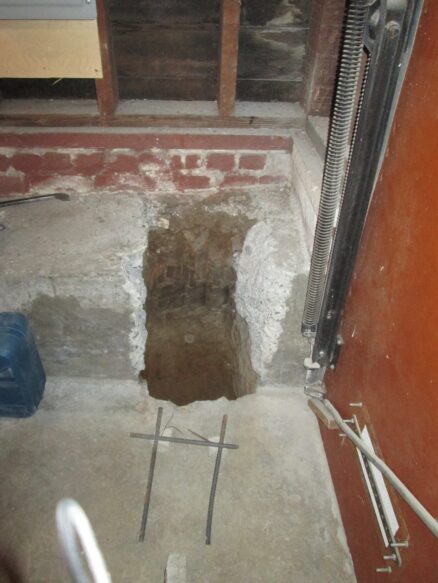
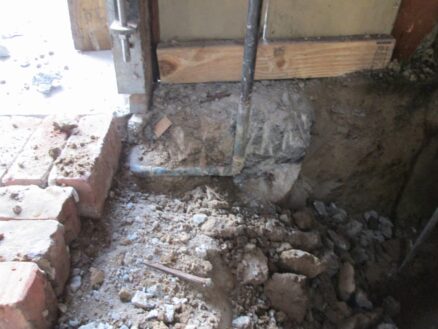
This is the water main for the house. It had been buried in a large block of concrete right next to the garage door. I chipped it out very carefully. In the rest of the house, the plumbing had always been a bit erratic, with pipe going left/right/up/down at the strangest angles. So I was worried they may have done the same thing here; I was right to be careful it appears. I very much doubt this meets any codes.
So here’s how the house looks from the outside. A bit like the house pulled its pants up. You can see her ankles: Very un-Victorian!
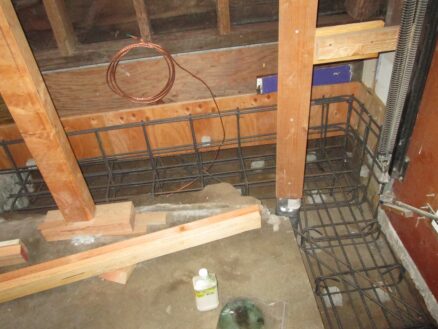
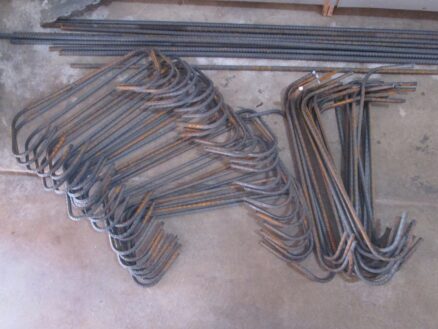
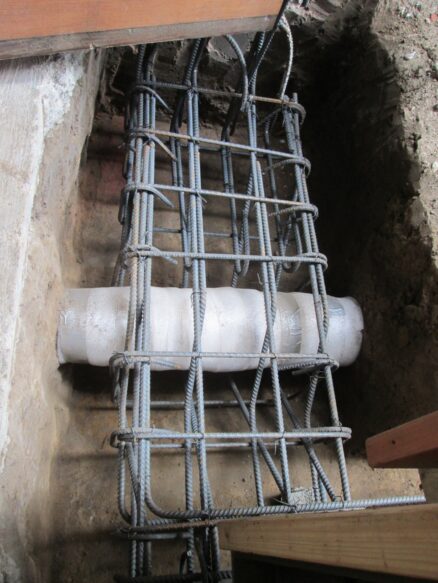
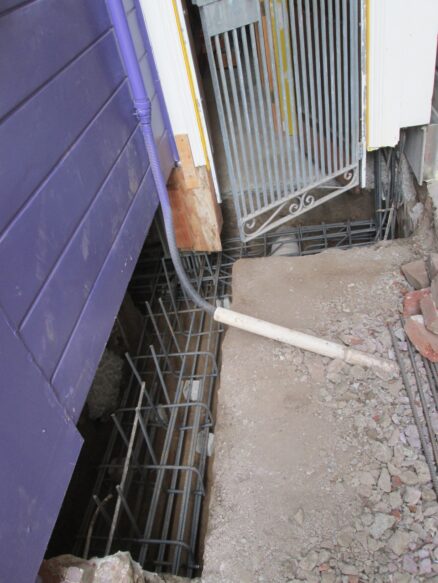
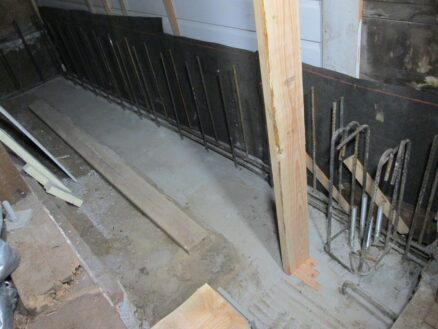
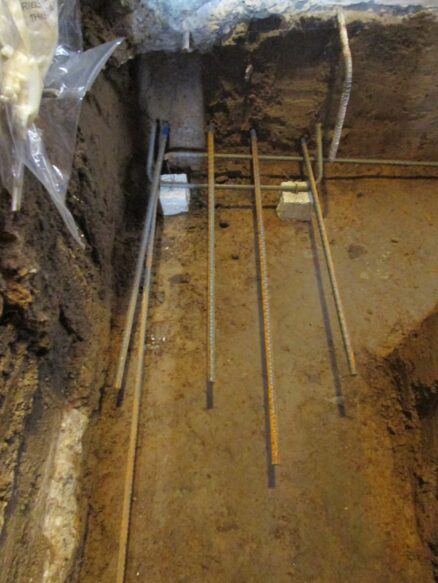
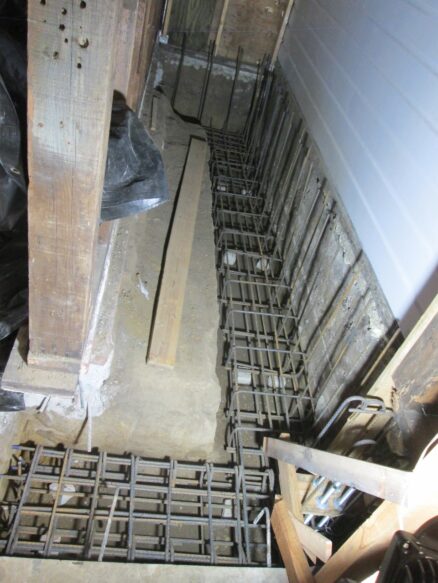
Next step: Put in reinforcing bars (rebar).
Here it is with all the rebar done on one side and I’m starting to build formwork for the walls. Concrete is so labor intensive: All the reinforcing steel has to be carefully put in the right place and held there. Then you have to build two very solid walls (forms) — one each side — that are only temporarily there to hold the wet concrete. Wet concrete is very heavy. If I skimp on the forms it may sag or bulge – or worse: collapse – while pouring the concrete.
Still more rebar and formwork to do…
Rebar done:
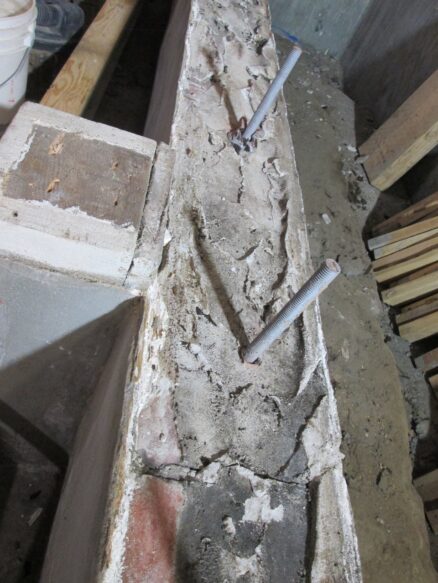
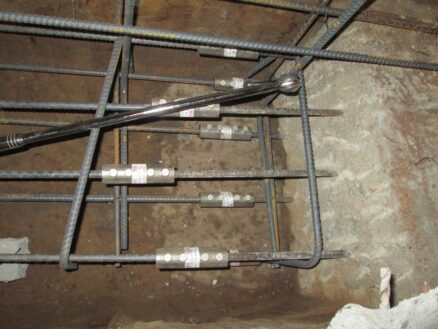
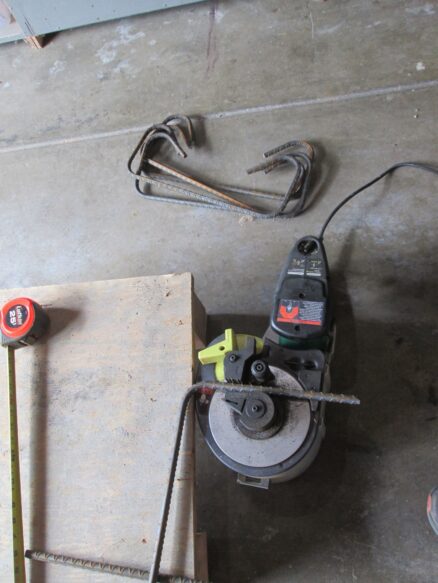
Something I’ve been using a lot to join the rebar when I’m connecting to a footing that I poured before are mechanical rebar couplers. There are different types, but the ones I’m using have bolts in them that have sharp points. You push the rebar in each side, and then tighten the bolts onto the rebar until the bolt head snaps off.
This would have been much easier with an air impact wrench (the type mechanics use on car wheels and make the sound drrrrrvvvffff). By hand I had to use a long breaker bar and it was a few hours of very hard work.
… much later …
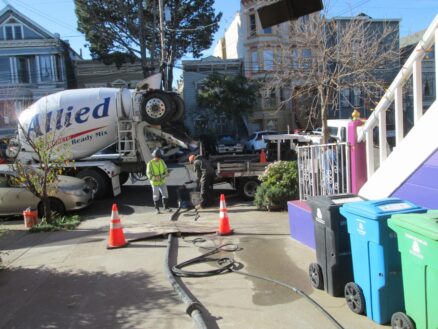
Pour day! Here’s a pic of the concrete truck and the pump truck (on the right). The pump truck pumps the concrete through that large hose. It’s much easier to place the concrete by aiming a hose than running back and forth with wheelbarrows! It’s an expensive day that takes a lot of preparation. I also have to hire an inspector to take concrete samples that will be tested to confirm that the concrete is strong enough.
It’s a Friday afternoon and the shadows are getting long. But the pour is finished.
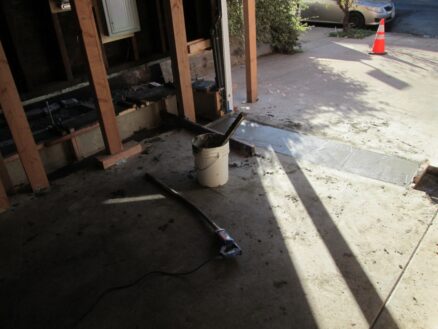
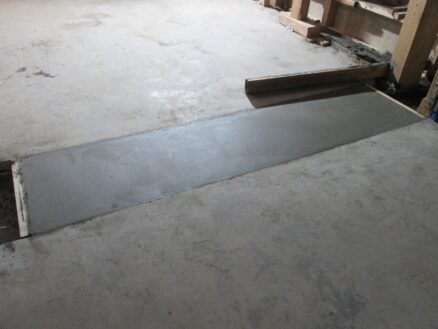
Now I need to do a lot of cleanup. I also poured a small piece of the slab back at the same time so I can get the car into the garage again. This will be the first time I’ve tried to do a hard smooth trowel finish on concrete.
Concrete is poured and vibrated in all the forms and they’re holding fine. All the anchor bolts are held in place with pieces of wood screwed to the top of the form.
This part of the pour was tricky because I couldn’t get to the top of the wall to pour the concrete in (there’s the existing wood wall in the way above.) So we made hoppers on the side of the form to fill the concrete from the side. Once the concrete was all in, we pushed down pieces of plywood to close off the hopper and hopefully match the rest of the wall. We’ll see when we take the formwork off!
Finishing a slab happens in many steps, and you have to wait for moisture on the surface of the concrete to go away between each step. The first two passes were with a wood or magnesium trowel. Then I did three passes with a steel trowel. It felt a lot like doing plaster, but I had more time.
But this photo is so much more fun. Arwen looks huge!
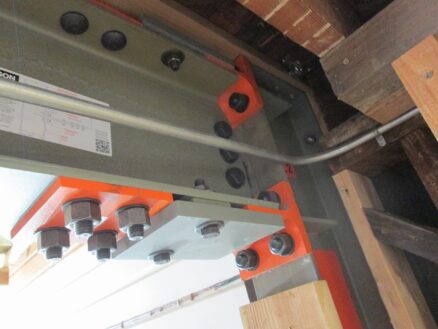
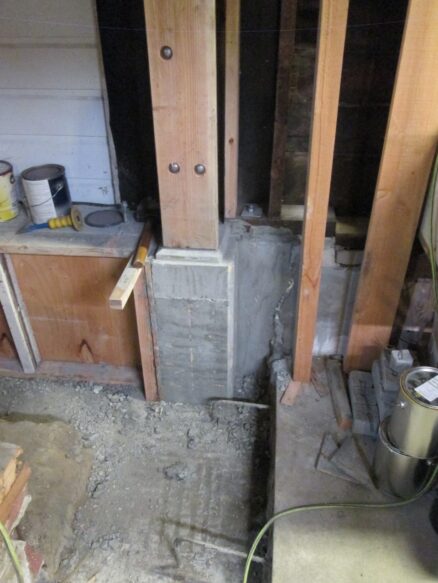
I’ve finished two of the three foundation pours, and the steel frame is now solidly supported. This is the connection between the beam and the column at the new steel moment frame.
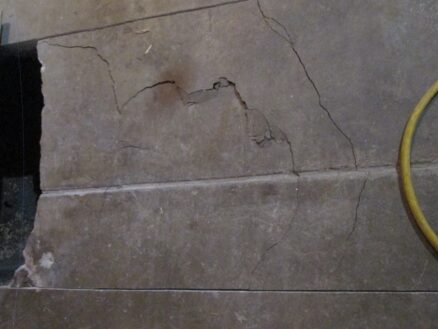
When I was jacking the moment frame into place, I was checking the level of the frame, and how tight it was against the floor, so I wasn’t looking down at the concrete slab. When I looked down I saw that the jack had so much load on it that it had cracked the floor slab. The loads on this are really big, in the region of 20,000lbs.
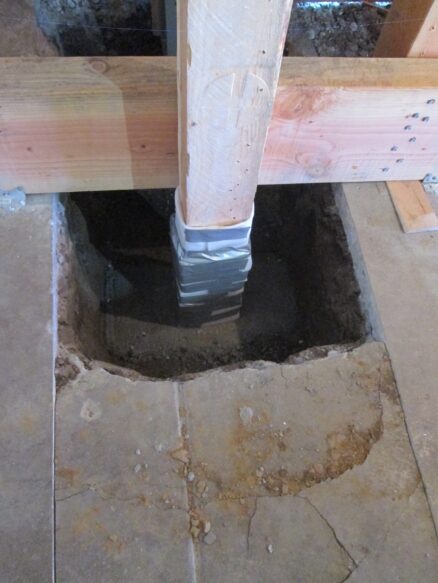
So I decided to put an extra post in under the steel frame to support it while I dug out around it, instead of relying on posts supported on the slab. If the slab cracks under those posts like it did under the jack it would be “very bad” (ie I’d be the engineer whose house collapsed.)
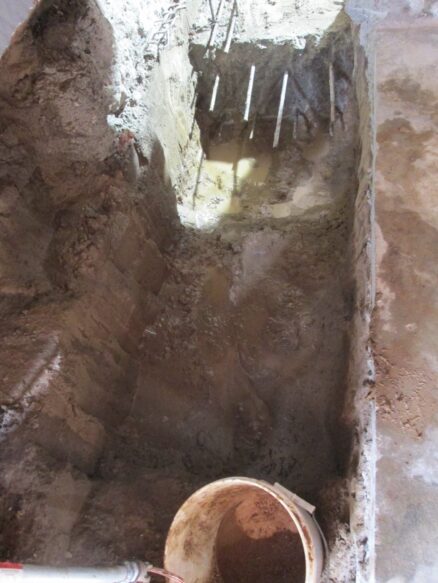
I dug a hole down to the bottom of where the new footing would be, then about 8 inches deeper, so I could put a reinforced concrete footing down below to support the post on. The new footing will be poured around this post and above the temporary footing. I’ll pull out the post once the frame is supported on the new concrete.
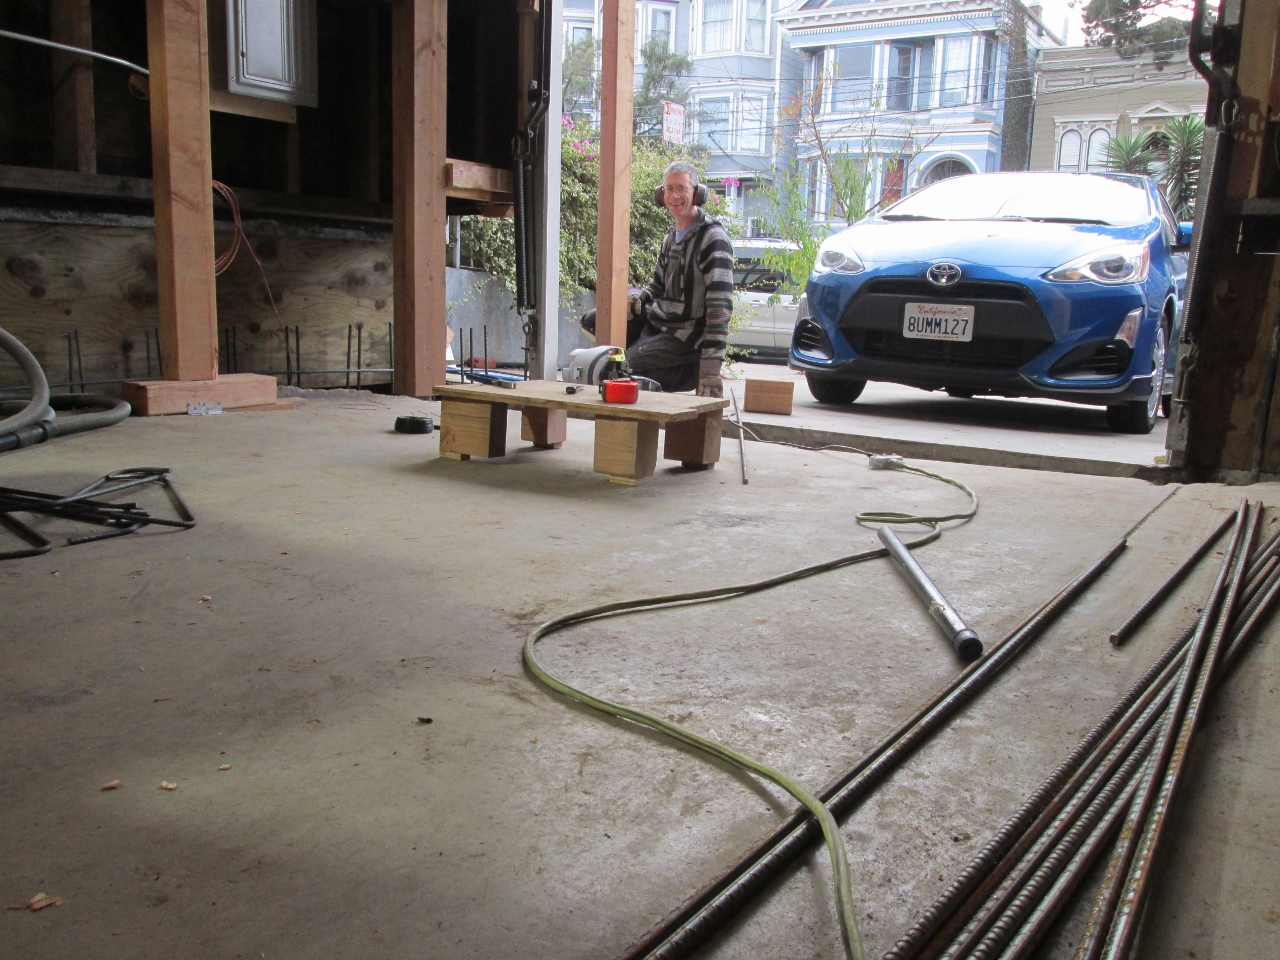
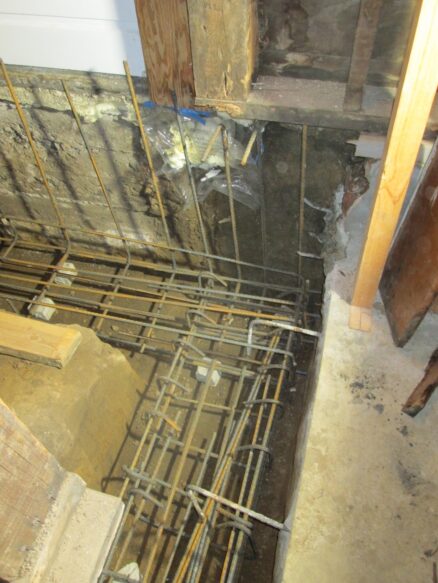
I had to get a bit of a production line going to make all the pieces for the rebar.
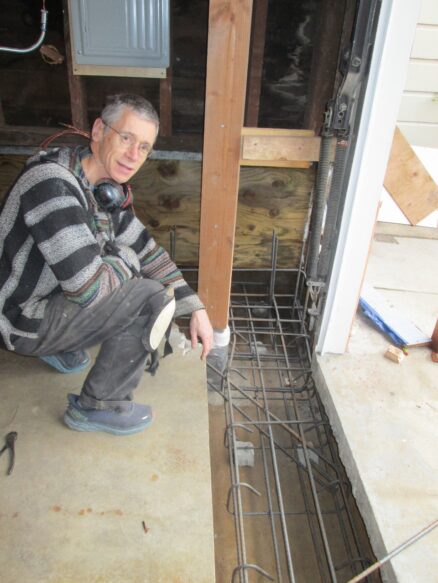
The sewer pipe goes right through where the foundation will be. I dug out around it very carefully.
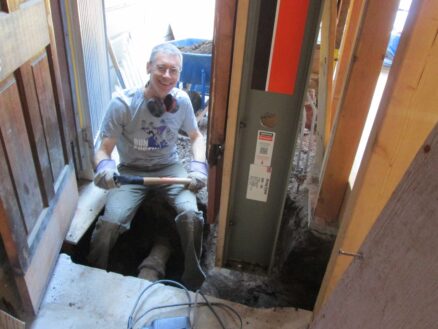
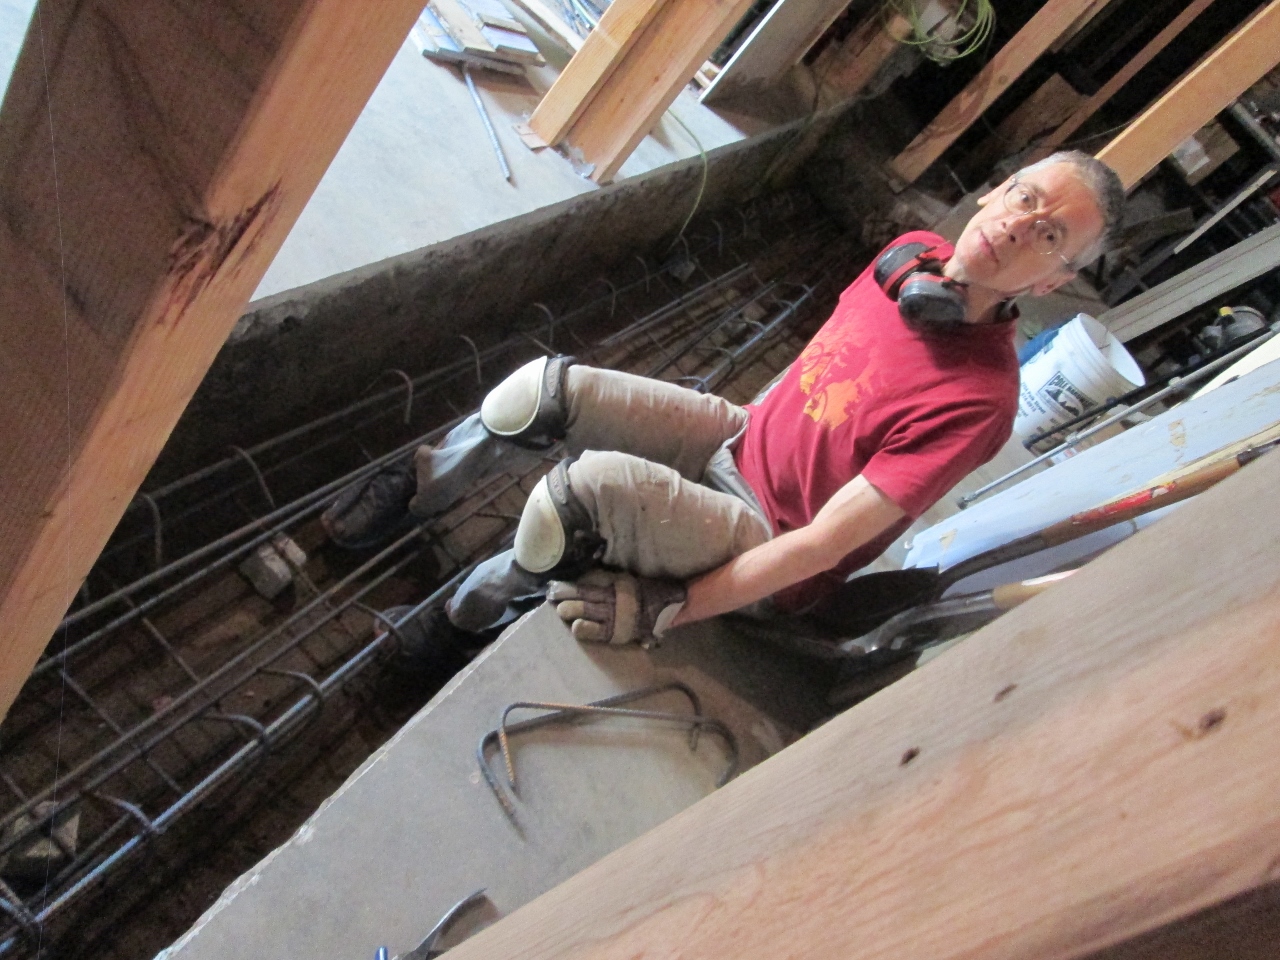
Tying rebar is one of the hardest jobs. You’re usually leaning down, probably into a ditch below ground level, and working with spiky sharp tie wire. Plus it’s a bit of a mind twister trying to figure out what order to assemble it all so things are layered correctly and can fit.
This face is the closest I could get to a smile.
I wrapped the sewer pipe in flexible foam wrap to protect it from the concrete and allow the two to move slightly differently. The reinforcing around the opening got pretty complicated.
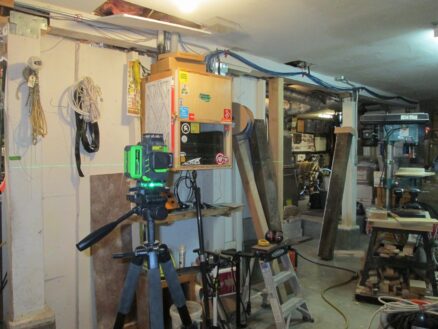
One tool I’ve been using a lot is a laser level. It can beam out a line in three axes, perfectly level and vertical and all at 90 degrees to each other. It makes it so much easier to line things up and get them level and square. This would be so hard without one.
This is the wall right after the concrete pour.
Here I’ve taken off some of the formwork. The steel frame is supported on concrete!
People ask how close to complete I think I am on this foundation project. And when I say “oh, about 50% complete” they are surprised. But I still need support the front of the house, dig out the old brick, concrete and soil, tie rebar and do the third concrete pour, and then build walls on it and pour back the garage slab. Plus rebuild the landing and redo all the tilework we tore out.
Then I need to fix all the plaster I damaged doing this.
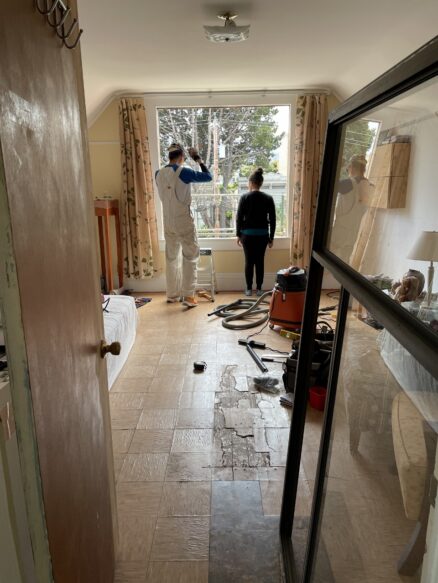
My sibling came to visit – and helped put in windows that I bought about fifteen years (!) ago for the upstairs. First we had to put up scaffolding, which is rather a scary endeavor so high up.
It was surprisingly easy to get the old aluminum window out of there. Then there was a gaping hole in the front room.
First step was to add a center jamb. In retrospect, I wish I’d thought about making this thinner in the middle – the windows could have been about an inch wider.
There was a lot of shimming, and adjusting to get the windows to fit right. But they went in nicely. Still need to finish off the inside, though.
I decided to strip the paint off the window sill, because latex paint seems to have a soft sticky quality about it that I really don’t like on shelves, window sills, etc. But the wood is going to need some careful repair.
We also got to have some time exploring, and drinking coffee – I even made latte art.
Right before they left, we stopped in at the happy vegan. The location is truly unpleasant – but it’s takeout only and we loved the food.
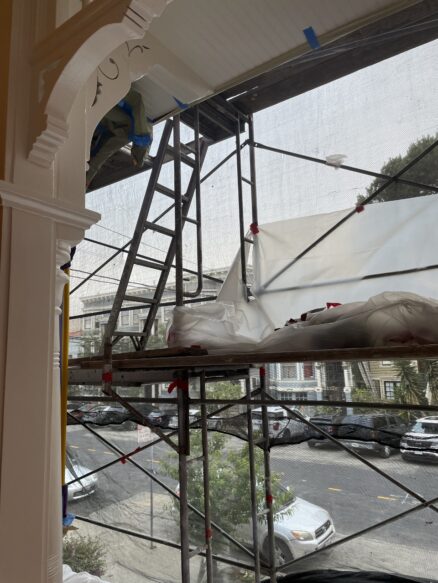
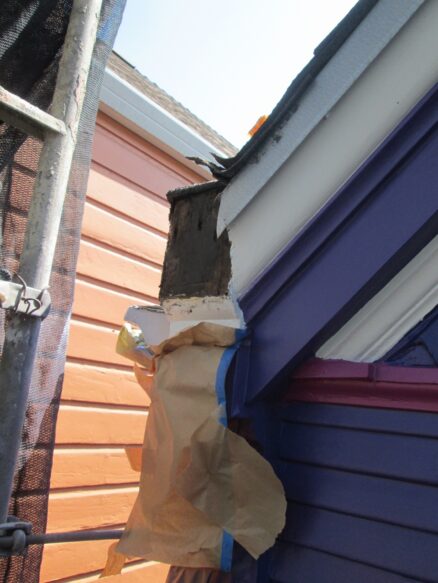
While we were up the scaffolding, we got a close look at the state of the paint on the front of the house: It really wasn’t good; the ornament was starting to come loose, there was exposed wood, and lots of peeling paint. My sibling gave me an earful about how I need to stop delaying and hire someone to paint it, or the decoration will be irreparably damaged.
So we did: Our lady was hiding behind sheets of plastic and screens for the month of July while our painter labored away.
I took a cycling vacation in France while they were working on it. And came home with Covid. Again.
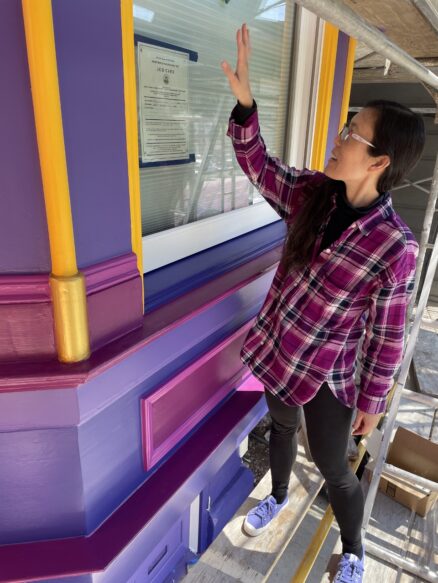
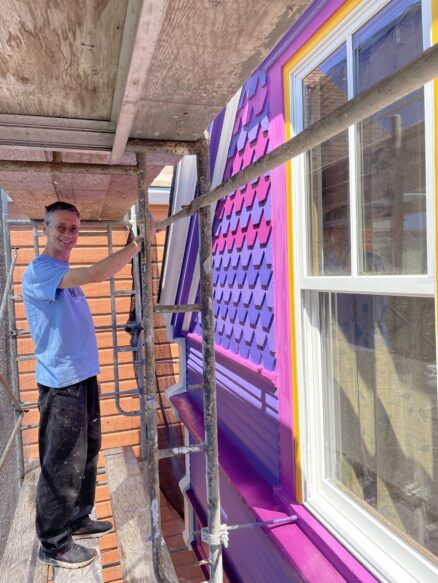
But as the colors started appearing, it got more and more exciting.
Here’s mole discussing the paint colors around the windows. We generally stuck with the initial plan that mole and I made, but there were some last minute tweaks. Can you guess who picked the colors?
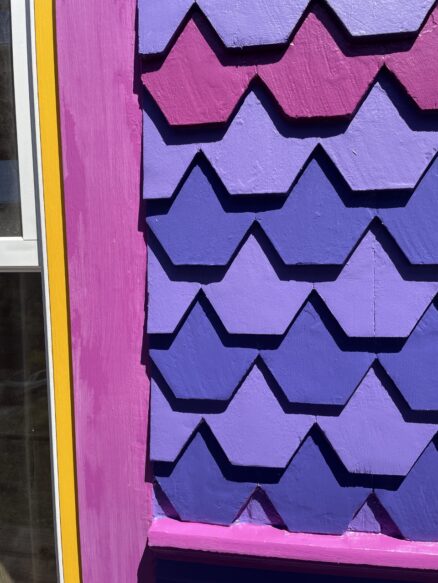
Our painter felt that the way we’d colored the tiles wouldn’t show up well from below. I think he was right, but we didn’t want to ask him to re-paint them.
note from mole: the painter really didn’t want us to go with any of these colors! he thought they were too dark, too bright and not traditional. but in the end i think he was really pleased with it. he even had a sign made to put out front.
There was one decorative piece of molding that had been destroyed by the roofers many years ago. It had always bothered me, so while the scaffolding was up, I repaired it.
I saw a photo of the house around 1906 and it had decorative finials on top of the part I’d repaired. I was sure I had a copy of that photo somewhere, but can’t find it. Luckily for us, I think most of the decoration has survived.
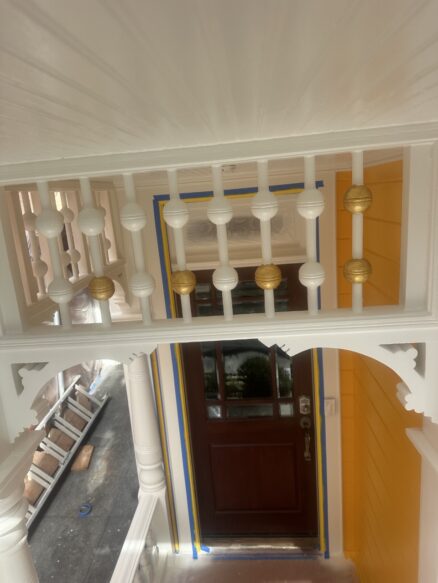
Here’s the final decoration getting finished. At first I was thinking it would look nice in silver. In the end we went with gold accents because it was more traditional and stood out better.
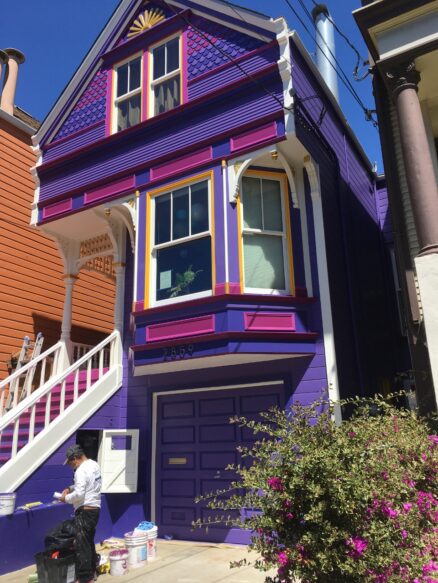
So here she is in all her glory. She’s a painted lady again.
When it was first done, mole said it looked like Disneyland. I heard someone walking by saying it looked “right out of Alice in Wonderland”.
I regularly see people taking photos in front. So I think people appreciate the bright colors.
Here’s the original mockup. I did the line drawing and mole came up with all the colors and placements. mole said it was like a really big, high-pressure print project.
It’s been two years since I bought the moment frame. The beam has been in the garage, getting covered in dust waiting, but there was a lot to get done to prepare for it.
The column near the garage door is too tall to stand up in the garage, because the final height will have the bottom of the column buried in concrete. So I had to dig out the footing before I could even stand the column up:
Here’s the column standing in a freshly dug hole. The top of the column has to be down below its final position so that we can bolt it to the beam. Once it’s bolted to the beam, the whole lot will be lifted into place. The columns will be hanging in the air and we’ll pour the new foundation under it.
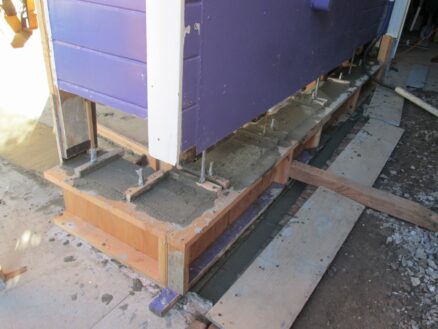
The column at other end of the moment frame will be up on top of a concrete wall – but the wall isn’t there yet: So I had to make a temporary platform to sit it on.
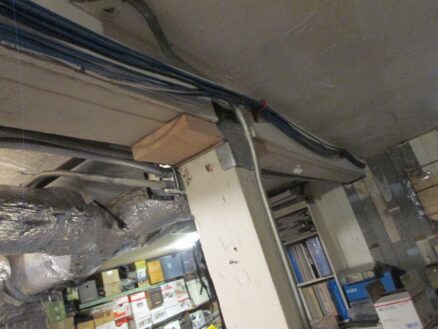
The major pain with this moment frame: Absolutely every utility in the house has to cross this beam: All the electric, gas, water, heating, and network wiring and piping had to be disconnected, and then routed through holes in the new beam or under it.
Holes in steel? I bought a “mag drill” to drill holes in the steel beam. It’s basically a small drill press attached to a powerful electro-magnet. I position the drill in the correct location, then turn on the magnet and it sticks to the beam.
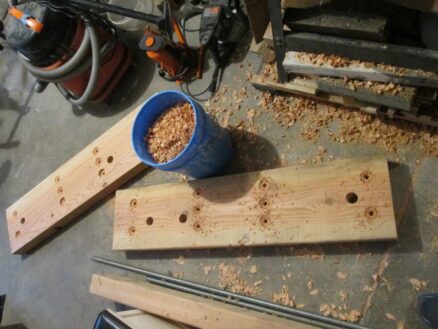
Then I drill a hole. I had to drill large holes for the utility pipes to go through, and smaller holes for bolts to hold pieces of wood to the beam so that I can support building structure off the side.
Here are two of the pieces wood, all drilled and prepared to attach to the moment frame beam. The bucket is filled with wood chippings for the compost.
Just the beam weighs a lot (over 1000 lb) plus each column is extremely heavy. I used two furniture dollies (they are supposed to be able to support 2000 lb each) to move the beam. They were creaking and flexing ominously.
Once the beam was lined up in the correct location, I used a 20 ton bottle jack to slowly lift one end a few inches, then temporarily support it before lifting the other end. It took a full day to get it almost up to the floor above.
Once I got it close, I cut the old wood floor beam where this moment frame beam fits in. And I also had to disconnect all the wires and pipes that crossed over it.
It took me over a week to get all the wires and pipes reconnected. It’s interesting thinking about our priorities for what we need. First I reconnected the power for the kitchen, to keep the refrigerator running. Then the main water pipe. Then bit by bit I got the electrical reconnected. But we were taking cold showers most of the week until I could get the gas reconnected. Finally I got the network cables connected. I still don’t have the duct for the heating in the front room reconnected.
I made one mistake in measuring for the holes in the beam: I drilled the hole for the gas pipe right where the duct for the furnace was. The beam was already up in the air when I figured this out, so I had to lift the mag drill up, and drill a new hole. Because the floor joists were in the way, I couldn’t get the hole quite as high as the other ones, so the gas pipe will be a little below the ceiling.
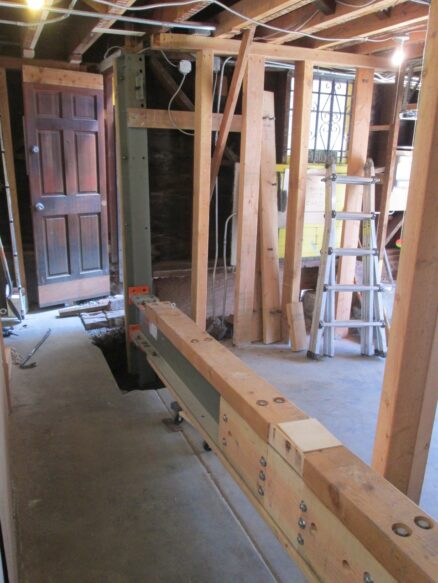
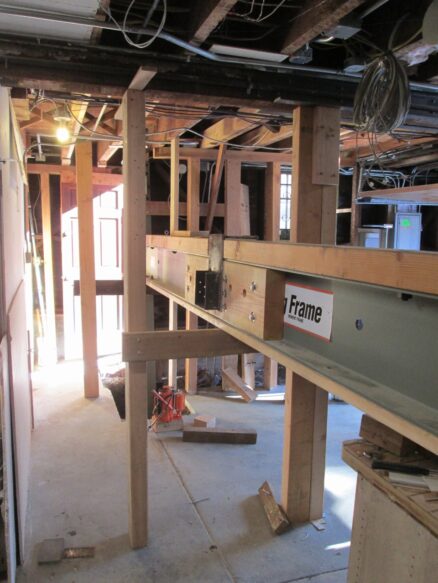
Here is the new steel moment frame beam temporarily supported in place.
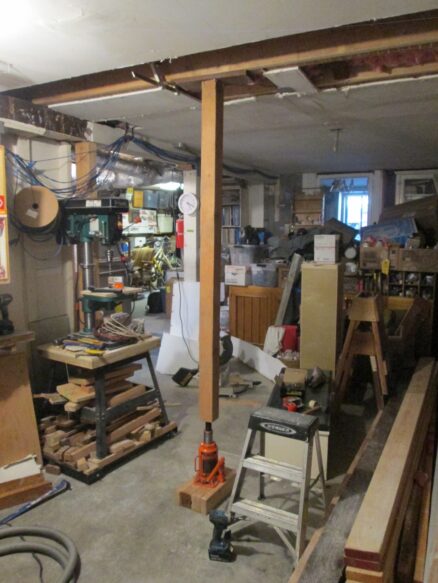
I have lots of temporary support posts holding everything up while I do the foundation.
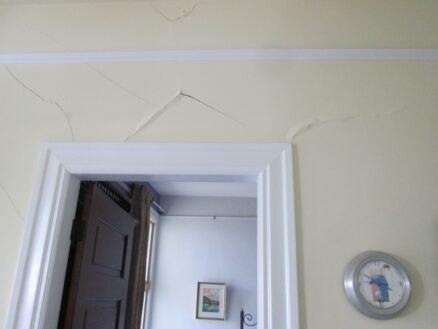
The old steel beam that used to be here was too small for the load, so it had sagged about an inch in the middle. The floors in the house are all sloping because of it. I figured when I put this new frame in place, I’d level out the floors – which I expected would damage the plaster.
What I hadn’t expected was how badly it would crack the plaster. Now I again have to fix all this plaster that we had fixed perfectly over a decade ago.
I also didn’t anticipate quite how big the jacking loads would be to lift the beam into place. Once it the moment frame connected with the house and started lifting the house, the loads were huge: Enough that the jack crushed and cracked the concrete floor slab in the garage.
I used a laser level to figure out how much to jack up the structure. Once I got the beam to the correct height, I added temporary wood pieces that I’ll replace with a steel post cap.
This piece of wood is almost 2 inches thick: That’s how much the floor got raised at this point.
I talked about the floor joists being notched on the bottom in a previous post. But all this leveling of the floors suddenly made it obvious when a floor joist supporting one of the walls in the living room was sagging. So I added a joist to that one.
Again, I had to disconnect wires and reconnect them to put the new joist in. I also screwed this one up: At first I reinforced the wrong floor joist.
I spent a full day, removing the drywall, disconnecting the wiring, adding the reinforcing joist, reconnecting the wiring, and putting everything back. When I went up to the living room at the end of the day, I was surprised how little the sagging floor joist had changed – until I realized I’d reinforced the wrong one. So the next day I had to do everything again, but for the correct joist this time.
I temporarily jacked the center of the sagging floor joist, connected it to the new reinforcing joist, and then removed the jack.
Now on to the concrete work. I’ve got the reinforcing done for the wall and the pilaster below one of the steel frame columns. Now I have to build formwork to hold the wet concrete in place, but I have to get the rebar inspected first.
Well first I just had to add this photo of mole – we went to Hawaii and found some really great vegan ramen. This is how happy we were.
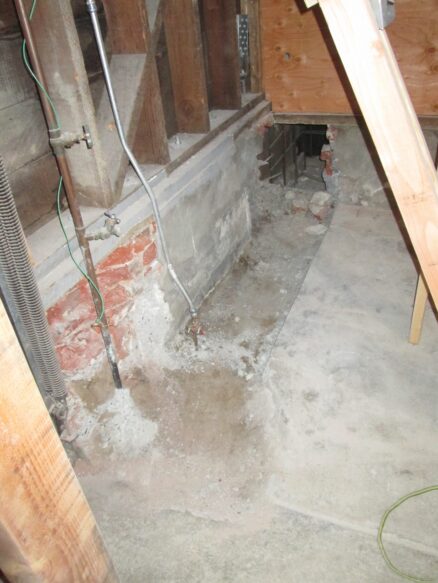
Back to business: I finished chipping out the concrete and digging for the first part of the foundation. This is where one end of the steel frame will be supported.
So that means more sacks of soil. I’m becoming a regular customer for these guys. This time I was careful to try not overloading the sacks. It probably helped that it wasn’t raining any more.
I’d been dithering on buying this tool for a year or so because it’s so expensive: It’s an electric rebar bender. You can get manual benders, and I’ve done that before: It’s a lot of work, and not very accurate. And you can rent (or buy) bigger bending machines that weigh about 800lb, but can bend bigger bars. But then I’m either hauling it back and forth to the rental place, or trying to find a place to store it. This one is limited to no bigger than #5 bars, but I’m only using #3 and #4 on this project.
Here I’m starting to lay out rebar. In the future, the foundation will continue from here, so I made a bar long enough to “lap” the rebar, and covered half of it tightly with electrical tape, and drove it into the soil. When I excavate for the new footing, hopefully the bars will be there and protected by the tape…
Here I’m starting to bend bars. It’s a really great tool – very glad I got it. It even has a cutter built-in.
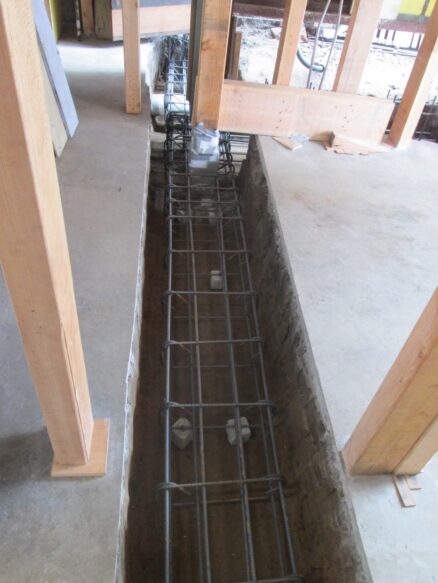
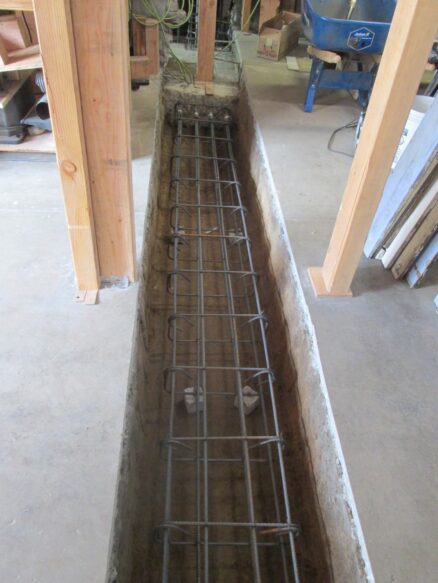
One of the really tricky things about rebar is that there are layers, and lots of pieces that interconnect. You have to be really careful to put things together in the correct order, or it won’t be possible to get some of the pieces in. I had to take it apart a couple of times to get it right. Here I’m about halfway through.
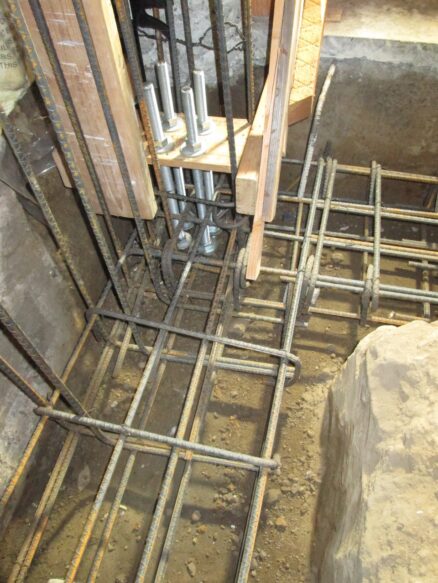
These are the anchor bolts for the moment frame. I’ll have to extend them with couplers but this part is firmly held in place so it can get poured into the footing.
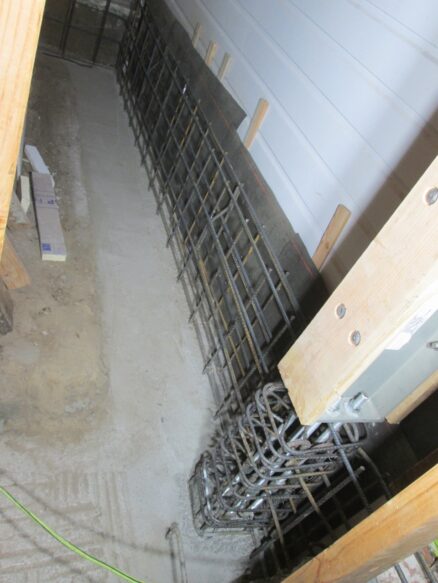
All the rebar ready for a concrete pour.
A concrete pour is a big event: You have to schedule inspectors, concrete delivery and pump truck all to be there at the right time. And hopefully there’s space on the street (the whole road was closed most of May while they replaced the sewer lines under the street).
So much work, and it’s all hidden:
Oh I just realized I’ve been really going on a bit of a splurge with tools. This machine is definitely more of a frivolous purchase. But it’s oh so nice.
My brother (in law) and sister, nieces and nephew came to visit and we all hiked up to the top of the nearest hill.
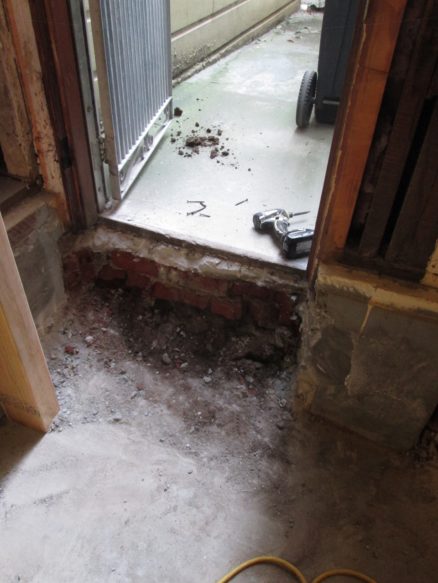
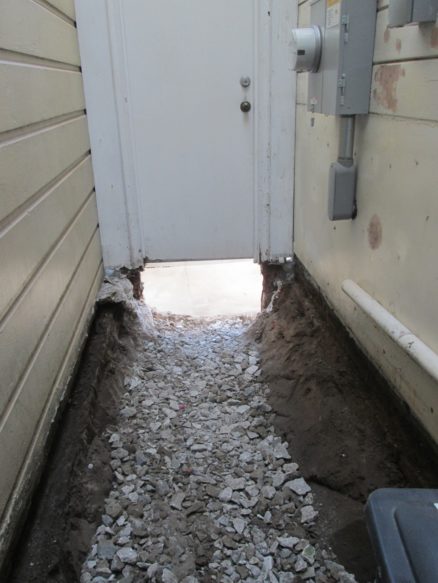
This seismic project is really going to take a long time! OK, so I got started digging out the opposite side. I’ve been looking forward to removing this step for a while.
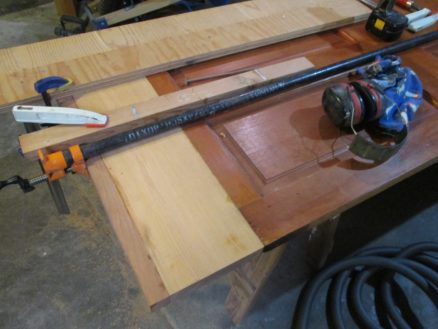
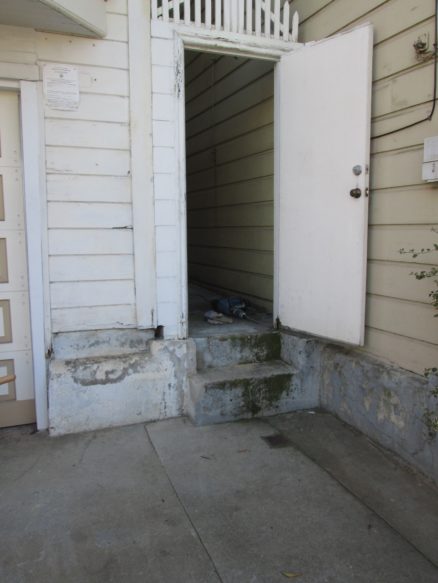
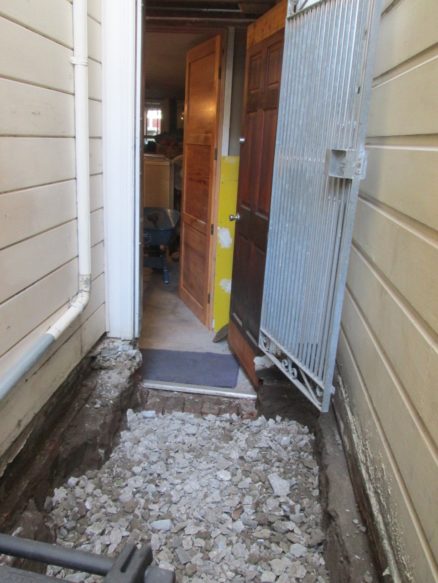
After I’d chipped out the steps, I realized: There’s going to be a gaping hole at the bottom of the door. I put the concrete breaking on hold while I worked on extending the door by 14 inches!
I just glued a piece of wood on the top and the bottom. Not the most ideal method, but it was quick, and this door isn’t a beauty. I then used 10″ long screws to screw through this wood into the door frame. Really difficult to keep the screw going straight: Actually it came out the face on a couple of places. Ooops.
This is how things looked before I got into messing it up (so tidy!):
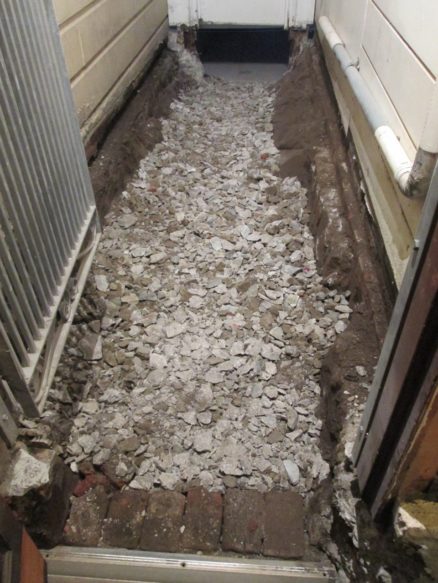
First I took off all the concrete and put it directly into a big yellow sack. Then I got started on the soil. Manual labor is hard.
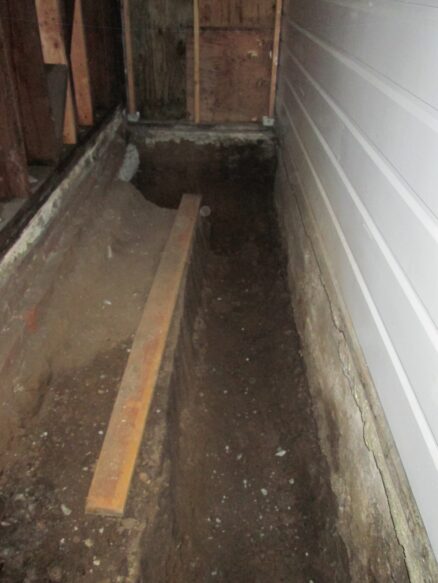
Here it is, dug out (well, as much as I can do right now). On the right side, the foundation is much higher up than the ground level, so I had to leave the soil sloped back to that. I’ll be taking out all that foundation eventually.
On the left side, because they had poured concrete against the wood, there’s gaping hole all along the bottom of their house where the wood has rotten about 2 inches into the wall. It was all filled with soil. Not good!
I saved the small pieces of broken concrete to use as gravel while I’m working on this. Hopefully it will keep the amount of mud down.
So that’s what two sacks full of soil and one full of concrete look like. The weather forecast says 1 inch of rain on Wednesday: That’s the day they are picking the sacks up. I’d better cover them with a tarp!
Is that how it is? Well, last year, very little happened on the house, but a lot of other things did happen: Multiple trips. Marathons. But I’ll have to write about them another time. Just wanted to try to catch up on the house a bit here.
I decided to remove some more concrete, and plant a tree:
This soil has been below concrete, and compacted for so long that it can’t be healthy. I dug out quite deep, then threw in some compost: that’s some of the buggy apples from the ground (I guess it wasn’t quite rotten yet.) I layered compost and soil all the way to the top, then planted the tree.
And here is our new little Japanese maple. I hope it thrives here.
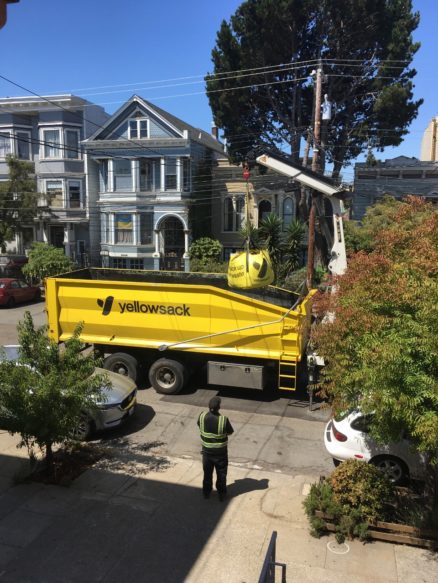
So the pile of concrete and dirt from my earlier post sat in our driveway for about 3 months. I had it covered in plastic to prevent a mud slick when it rained. My initial plan was to stockpile it so that I’d get a dumpster and fill it in one go. Well, I just got tired of having a huge pile in the driveway (it was in the way when I took out the garbage, it was difficult to get out of the car, etc.) And life was filling in a lot more of the weekends than I’d expected.
So I used a service called yellowsack. It’s quite a bit more expensive than a dumpster per ton, but if I’m just hauling out 9,000 lb at a time, that fits into three sacks, and they come pick them up with a truck that has a crane on it. No need to reserve street space.
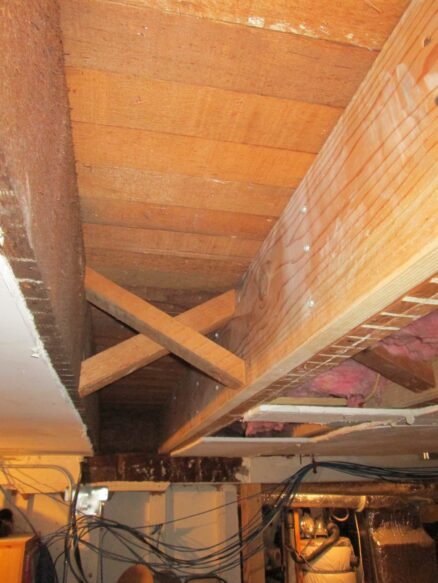
OK, so there’s another project that’s been keeping me busy. I spent a few months reinforcing floor joists. Remember this phot? This one notch, even though it’s about 2″ deep, has probably halved the strength of this 10″ floor joist, because the edge fibers are the most important:
So one by one, I sistered on new joists to the old ones to try to strengthen them back up. I need the joists to be strong for when I’m shoring up the side of the house to replace the foundation.
Had to move some electrical wiring, and removed some rotten wood also.
It’s quite a pain trying to get a full length joist into that space. Actually, I made them a bit short, turned them on their side and pushed one side up high, while the other side I pushed up. Once it was in the space, I could flip it up and push it against the joist. Quite a workout. Don’t ever let an electrician notch a joist.
Oh, I just liked this photo: It’s the bag on my dust collector that’s connected to my table saw and thickness planer. I like how the different wood I was working put different colored stripes.
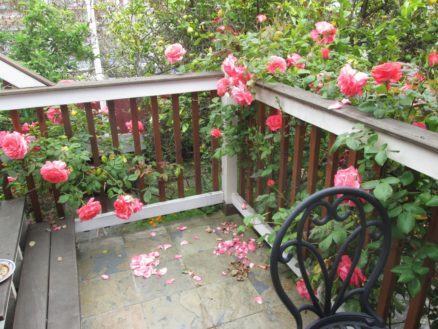
Years ago, on an impulse I bought a rose plant from the sale bin outside Lowes for about $3. I planted it against the post for our deck, and it’s loved the location. We get flowers almost all year round. Mole took a photo:
We also did a bit of gardening in the neglected corner of the garden that gets the greywater. It’s a bit of a tricky corner, because it’s the south side, so it gets shaded by the fence on two sides, although in the past tomatoes have grown well here. We decided to get some blueberry bushes. Didn’t realize until after we got them that greywater is not ideal for blueberries, because they are so acid loving. We’ll see how it goes.