
We started to do the framing for the deck this weekend. Instead of doing the whole thing in one go, I’ve decided to split it into two parts: First I shore up the upper stairs, and build the lower landing. Then, when there’s a safe platform to work from, I’ll start on the stairs.


I think there were a few raised eyebrows when I managed to get some 16ft long 4×6 beams onto the Honda Civic! It’s amazing what you can do with some cardboard (padding) and ratchet tie-downs. I’ve not been organized enough to arrange for a delivery, so I’ve been using the trusty old car to bring all the wood. It took three trips. By the third one, I realized how much time I’d have saved to just pay for the delivery. Next time. Above right, we’ve got the first post installed.


Janeen is holding one of the posts in copper green wood preservative. It smells nasty enough that I’m sure it works. We’re using preservative pressure treated wood, but any cut ends need to be treated. Above right, some ‘inspectors’ dropped by to look around.

I love this photo: It reminds us of Escher’s three dimensional drawings. The white posts are the posts supporting the stair up to the upper level. The brown are the new ones, all fished between the existing posts.


Above left, I’ve cut all the posts for the stairs above, and it is supported on the new framing. Above right, it’s amazing how easily rotten wood comes apart. I took off the hand rails so that I could get the new framing in.


A pile of old wood is developing.


Janeen is checking the level of the new framing. I’ve got a block of wood taped to the end of the level. When laid on the framing, it reads level when the framing is sloping 1/8″ per foot, so that the whole deck slopes slightly away from the house. Janeen’s removing nails from the old wood (above right). Considering how rotten the wood is, it can be a real pain to get the nails out.


Putting hangers on the framing, and adding framing between the beams. Above right you can see a sheet of plywood stacked on the framing above: I couldn’t figure out how to get it up there once the framing was in, so we pulled it up first. Good thing it wasn’t a windy day.

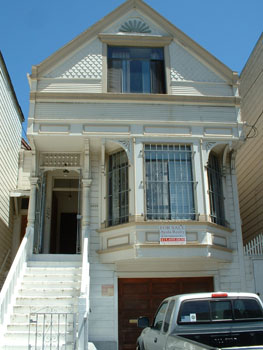
A while back I promised a photo of the front stairs and front door. Here it is, after the painting. Because I did not have time to repaint the whole house, I used the same colors, and just painted the areas that where really in need. I’ve also finally got rid of that awful gate.