
This is a huge post – I just never got round to posting. Fear not, there are some cat pics towards the end.
We kept the front room of the downstairs unit for our office. But in this Victorian, as in most, the front room is connected to a second front room with double sliding doors. The double doors do not seal any noise between the rooms – you can clearly hear everything in the adjoining room. Now that the second front room will be a bedroom, we had to come up with a way to provide some sound privacy: A built-in bookshelf.


Here are pictures of all the clamping and drilling…

I built the shelf in three pieces, because the door opening is so large that a single shelf would have been too tall to stand up in the garage, and would have been really difficult to move around (it wouldn’t have fit through the front door!) The design is two tall bookshelves above, and a slightly deeper cabinet at the base. The photo above is the piece of wood that joins the top and bottom part. Because I’m using plywood, I either mitered exposed edges, or glued solid wood to the edges.

This is the base cabinet all assembled.
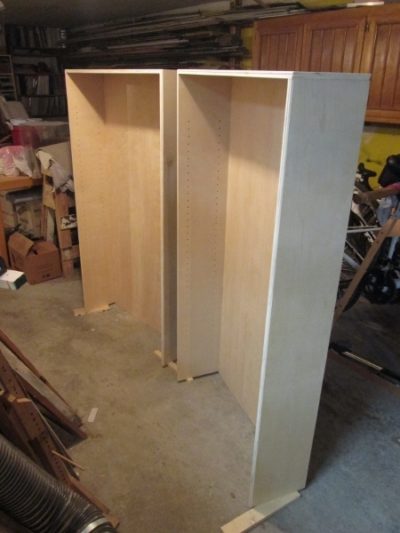
And here are the bookshelves.
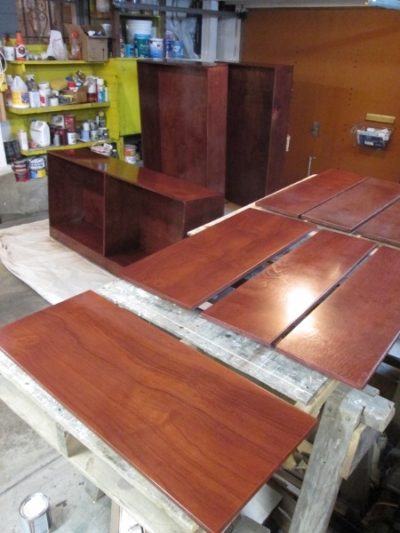
Then I stained and varnished everything to match the wood doors in the living room. The car gets to be outside for a while.

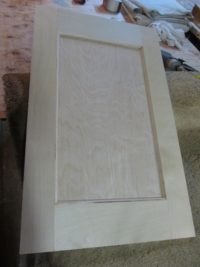
The base cabinet will have doors on the front. I made these from the remaining scraps of the plywood sheets.
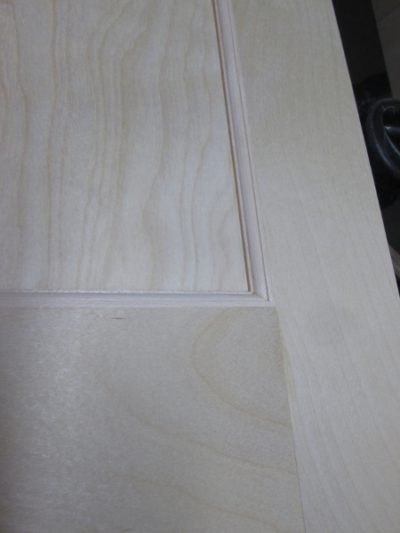
Here’s a detail I’m particularly proud of. The doors are made from plywood, so I made decorative molding to glue into the edge around the panel.

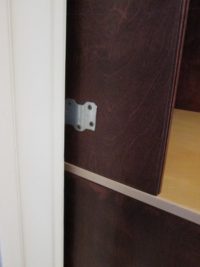
An engineering problem: How to hold the bookshelves in place, without damaging the beautiful wood pocket doors. I made metal brackets that fit into the gap between the doors and the pocket in the wall. These I wrapped with fabric, and one leg slides into the gap, the second side screws to the side of the bookshelves. I’ll cover this with some wood trim attached to the side of the book case.
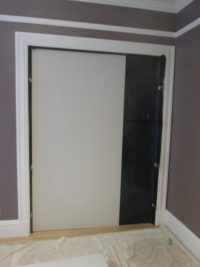
The sound insulating material went against the doors, but how to hold it in place while I assembled the book case? The solution: I cut drywall to fit tight into the space, and glued the sound insulating material to it with double sided carpet tape. The drywall serves to hold everything in place, and also adds to the sound absorption.

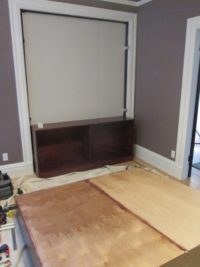
Here’s the book case almost complete. Still needs the doors on the bottom, and the trim around the outside to close the gap. But it’s working quite well to insulate sound. It’s not perfect, but enough to muffle sound between the two rooms.

Here are the doors with stain and two coats of varnish. One to go.
Oh, and what else? Yes, the “garden room” work.
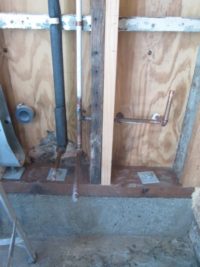
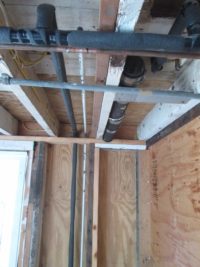
Here are some photos of plumbing work preparing for a sink.

This the the plumbing for the space that will be the toilet. Beautiful.

The concrete in the garden room is a total mess. Here I’ve chipped and ground down concrete that was too high, and I need to fill in where there are holes.
The left side is after filling in the holes. But the floor still slopes, so I added a skim coat of leveling mortar to level the floor.

That’s me. Poor back.

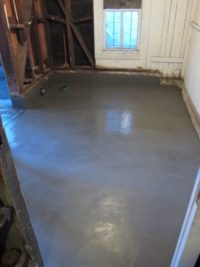
The concrete in the area that I tore up the wood floor was extremely degraded. It was rough, and would dust every time I brushed it. So I coated the whole floor with a layer of non-shrink repair mortar. I had a great time doing it: Felt just like doing plaster.

It looked really great until it started to dry…
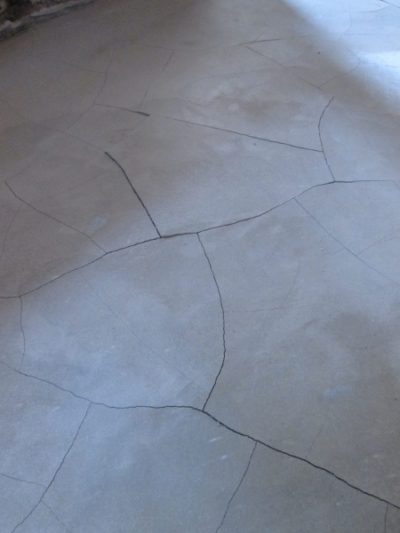
There must have been something wrong with one of the bags of repair mortar, or it may have reacted badly to the old concrete. But instead of being low-shrinkage, on about half the floor it shrunk like mud in a desert. Cracks everywhere.
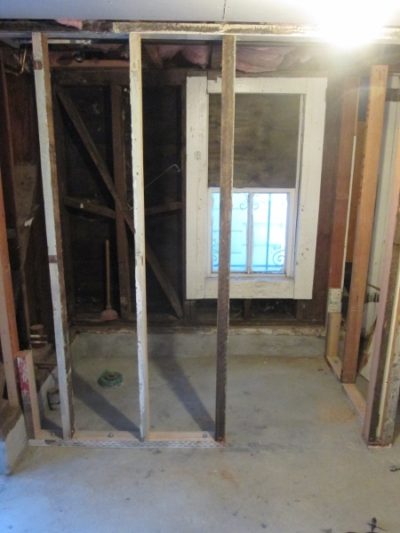
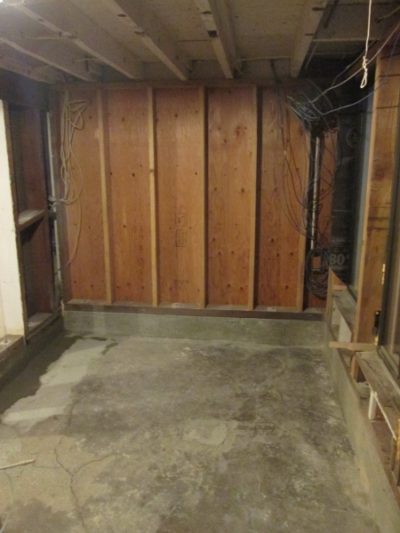
Here I’m adding the wall to make the space for the toilet room. Yes, I still need to repair the window.

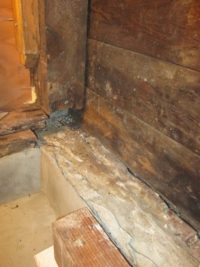
The old plumbing that used to come through here caused this wall, and the window next to it, to rot badly. So I repaired the wall. Above right is before I put in the new wall framing.
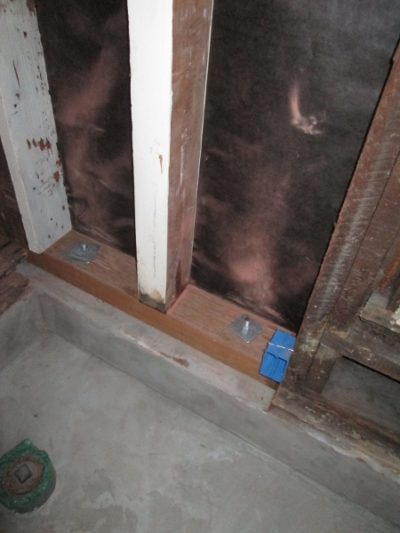
This is the repaired wall. I used mostly scraps – trying to use up the huge pile of wood I have stashed in the garage. Now I need to get the wiring in.
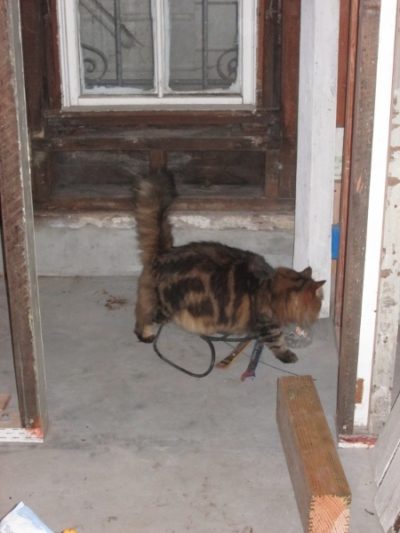
Arwen came to inspect my work.

“Hmm, good level concrete. Let me check the flatness…”

“Prrrfect for rolling on.”