Plastering Done

I mentioned before how good Arwen is at shredding paper. Well, she finally got her paws on a bill. I had to piece it back together with tape. “My cat ate it!” Good thing mole is really good at puzzles and found all the pieces.

01-AShred_2013093002-ThruSkylight_20130930

Above left: Unshredding. Above right, looking down through the skylight while I was plastering the ceiling.

03-plasterer_2013093004-skylight_20130930

I set up boards over saw horses so that I could reach the ceiling. Plastering the ceiling went quite well. I followed all the directions: “Blue” board as the base, then “Kal Kote” base coat, then “Uni-Kal” veneer plaster.

One problem I’d always had when plastering was there would be small patches of the plaster that would come loose as I was trying to polish the plaster. It was as if that section did not set up as fast. I’ve finally learned that when putting on plaster, the first pass must be very thin – basically scrubbed onto the surface so it’s almost translucent. If it’s too thick, it will get air bubbles under it, and that’s what was happening to me. Then, from the same batch, I come back and build the coat of plaster up to about 1/16 inch thick. This is the first time I’ve done that (the manufacturer’s instructions say to do that — it was just never clear to me how thin the first pass must be). It worked like a dream.

05-moleArwen_20130930

So now the plastering is done in the laundry room. Here’s mole and Arwen coming to inspect right after I’d finished the walls. The plaster was just setting up; it goes a brownish grey until all the water evaporates.

06-arwenRoof_20130930

Then Arwen decided to get up to her old tricks and ran up onto the roof. Here she is walking along the ridge, with the sun setting behind her. Must be a great view.

07-bellaRailing_2013093008-bellaWindow_20130930

Not to be outdone, Bella jumped up onto the handrail and walked back and forth. Then she walked into the open window of the laundry room.

Tile Shopping

We had a week of hot weather for San Francisco. The poor cats have been losing their summer coats and getting their winter coats at the same time.

03-hotBella_20130909

Above is Bella trying to stay cool.

04-showerPan_2013090905-showerPan_20130909

Continuing on the shower rebuild in the laundry room bathroom, I made the shower pan. Because I’m using Kerdi as the waterproofing membrane, I use their special drain flange, and cast it into a bed of mortar.

06-spdone_2013090907-jaBondo_20130909

Above left is the finished shower pan. Above right mole is putting bondo onto the pressure treated wood we used for the back stairs. The wood gets incised when it’s treated, so has all those holes all over it. Looks much better when filled.

08-ptWood_2013090909-ptFilled_20130909

Above: Before and after filling with Bondo.

10-muntins_2013090911-fancyTile_20130909

Over a year ago I made some balusters for the back stairs. I just got them primed, and will put them up soon.

But the most interesting thing we’ve done lately is go to Fireclay tile and we bought fancy tile for the bathroom. Above right are two nice decorative pieces we’ll add in. The only downside is that this tile is $$expensive$$ !!

12-fancyTile_2013090913-fancyTile_20130909

We went to their ‘boneyard’ and bought a couple of boxes of seconds at about 1/4 the price. Now we need to figure out exactly how much more we need and order it.

01-fancyTile_2013090902-fancyTile_20130909

Some other tile we looked at was at Latch tile in San Francisco. The person working there was super helpful and patient. Above left, cool shapes, but how to use it? Above right, these tiles are beautiful (reminded mole of her parent’s house) — maybe we’ll use a few as accents.

14-daTile_2013090915-bellaInspector_20130909

We’ve been watching a lot of Downton Abbey lately… Funny, with all the fancy stuff “upstairs”, the thing that caught our eye was the tile in the kitchen. We may do something like this on the floor in the laundry room & bathroom. Above right Bella came to inspect right before I started plastering.

16-baseCoat_2013090917-baseCoat_20130909

This is the first time I’ve used basecoat plaster. It’s similar to plaster, but has sand in it. It goes on slightly rough so that the plaster sticks to it properly. Above you can see the ceiling after the basecoat is on and drying.

18-plastered_2013090919-plastered_20130909

On top of the basecoat, I put a finish coat of veneer plaster. I forgot how much I enjoy plastering. Yes, I did get quite a bit in my face and on the floor while working on the ceiling. Still, it’s very satisfying to start out the day with rough uneven surfaces, and end with perfectly smooth white plaster.

20-taping_2013090921-taping_20130909

In the laundry room, I taped all the joints. I don’t need to be very careful with the taping, because it will be covered in veneer plaster.

22-taping_2013090923-taping_20130909

Next: More plaster!

from cobbler to cement board

Our peach tree gave us lots of peaches this year. The tricky thing with peaches–at least the ones on our tree–is they all ripen at the same time.

01-cobbler_20130903

The peaches were not as sweet as last year, so Janeen made lots of peach cobbler. MMmmm. Especially good with vanilla coconut bliss.

02-kittenBag_2013090303-kittenShredder_20130903

Arwen still loves to get into bags. I think she’s amazed at how a space can be created out of a folded up piece of fabric. She loves to be carried around in the bag, too. Oh, and we don’t need a shredder anymore: Arwen does a fine job of it. We have to be careful never to leave anything important out, though.

04-bellaPurr_2013090305-abPaper_20130903

Here’s a photo of me and Bella (above left.) Arwen and Bella are having a discussion about who gets to shred this piece of paper.

06-ceiling_20130903

This is an unusual view: Looking straight up at the ceiling of the bathroom-to-be beside the laundry room. I’ve used cement board on all walls and the ceiling.

07-shower_2013090308-toilet_20130903

Above left is the shower with the niche, and above right is the space for the toilet.

09-plasterweld_2013090310-firstStage_20130903

Here is mole painting on the plaster weld. I’m going to plaster the walls on two sides, and tile the remaining walls. Above right I’ve done a first pass with alkali resistant mesh and plaster over the joints. I forgot how much I enjoy plastering.

11-skylight_2013090312-skylight_20130903

Here’s the skylight in the laundry room. I finally put the drywall around the inside of the skylight. The photo is taken from two opposite sides of the skylight. Above right you can see I have curved the piece where the ceiling steps back (see above left on the right side). Next step is plastering – not sure if I know how to plaster a curve. This will be a challenge.

Ta da: walls!

Bella and Arwen got into some remodeling of their own:

01-bellaHouseBed02-arwenBellaHouse_20130805

I think Bella likes the additional area that the walls provide for sleeping space. The house is also centrally located in the middle of the dining room. Arwen (above right) looking through the window at Bella inside.

03-bellaPose_20130805

MY house.

04-tinyKitchenBrews_2013080505-brownAle_20130805

This weekend we bottled the most recent batch: amber ale. I’ve tried a bit right after bottling (still too sweet from the bottling sugar, and no carbonation). The previous brew, though, a brown ale, is really good. We decided to call this “Tiny Kitchen” brews.

06-showerPlumbing_2013080507-showerComplexity_20130805

Finally finished all the rough plumbing for the shower (had been waiting for some parts to be delivered). And true to form, I can’t keep things simple: I’ve put the shower controls centered on the wall in the shower, but there’s a window, so I have the pipe crossing over. And, I got clever with 45 degree bends, even using a pipe bender on part of it to get a smother flow. The hardest part is drilling at 45 degrees through a stud.

09-moreInsulation_2013080508-ceiling_20130805

Here’s all the insulation in place, and a view up at the ceiling in this tiny little bathroom.

10-recessedLayout_2013080511-cutout_20130805

Now the hard part: putting up drywall. As you know, I love plaster — the real stuff. So here we are using ‘blue board’. It’s supposed to make it easier to adhere the veneer plaster. The only problem is that the supply place only had 5/8″ thick blue board. Heavy. Here I’m cutting out the openings for the recessed lights.

12-firstBoard_20130805

Oh, that looks easy? Let me tell you: That one board weighed over 70 lb. Hefting it overhead, and screwing it in place is hernia material. Luckily all my measurements for this board were correct, so the holes all lined up, and everything fit.

12-ledge_2013080513-ledge_20130805

I came up with one little idea to help get the pieces of drywall in place overhead. I temporarily screwed a piece of wood to the wall just below the edge of the board. That way we could rest that edge of the board in place and only support one side while trying to position it and screw it up.

15-walls_2013080516-walls_20130805

Here’s how one side looks with all the walls covered in drywall now..

17-walls_2013080518-walls_20130805

And the other side. Still not quite finished the walls on this side.

Cat-in-the-Box

To make up for last post’s absence of kitten-pics, I’m going to over-do it now.

01-sleepingCats_20130728

They are getting a bit big to share the same bed now. Bella is looking grumpy because Arwen came along and wanted to snuggle with her.

02-brewing_20130728

And I made my second large brew (brew #7). Up until now, I’d been making one gallon batches. I’ve moved to 3 to 5 gallon batches. This time five gallons of an Amber Ale. And I had a bit extra, that I put in a separate one gallon jug and fermented with extra hops. The main batch is has one more week of fermentation before bottling.

03-dadBirthday_2013072804-dadJohnCharles_20130728

Dad had his seventy fifth birthday this year. Here we are talking at the surprise party that Eva and Elijah threw for him. Above right is a photo with Dad and two of his closest friends: Charles, and John.

05-dadBirthday

A picture with some of the attendees to Dad’s birthday party.

07b-ArwenAnchor_20130728

And these photos were irresistible: Above, Arwen; below, Bella. They like Anchor Brewing as much as I do…

08b-BellaAnchor_20130728

Since I’ve not been eating dairy, one of my favorite things I can’t eat: Haagen-Dazs Dark Chocolate bars. But, now there’s a solution: Coconut Bliss makes coconut bliss chocolate fudge bars. All I had to do is coat it in dark chocolate. Not quite as pretty, but really *dang* good:

09-fudgcicle_2013072810-fudgcicle_20130728

Oh, yes, the reason for the blog: I finished up the wiring and added a ceiling in the small bathroom that’s attached to the laundry room (no photos). Then I put in all the insulation.

11-insulation_2013072812-insulation_20130728

Here I am working on the insulation in the ceiling. We bought ‘encapsulated’ insulation, which is basically fiberglass insulation, with a plastic bag around it. In the past, it was really well made, so that the bag fitted well around the insulation pretty much stopped it from coming out as dust. (The batch we bought this time, though, had terrible quality control: The bags were not sealed up, so basically it was just fiberglass batts with extra sheets of plastic packed with it.)

Next week we’ll put up the drywall.

13-SundayStreetsMaeNancy_20130728

And one more thing: Mae and Nancy came to visit on a cold SF summer Sunday Streets day in the Mission. We walked all the way up Valencia and had a chance to catch up over lunch.


misha’s visit part 2

just to prove we do more than work on the house when misha visits, i finally downloaded photos from my camera!

1misha-6.16.13

here we are at the betabrand store. misha and mathew are posing with a creepy mannequin and his silver dog (in mathew’s lap.)

2bella-6.16.13 3arwen-6.16.13

the cats insist on going outside every evening. (left) bella checking out the poppies and bumble bees. (right) arwen hanging out with the nasturtiams

4misha-6.16.13 5misha-6.16.13

i can’t remember what we were doing when these photos were taken. i think we’d just had dinner at cha-ya and come home for tea. mathew is also taking funny self portraits, none of which i have posted. perhaps they will become an animation..?

6arwen-6.16.13 7bella-6.16.13

another outside visit. (left) arwen investigating the new compost tumbler. (right) bella showing off her balancing skills, spying on birds in the tree. she almost caught a bird recently when climbing in the tree, luckily the bird got away!

8misha-6.16.13 9misha-6.16.13

mathew and misha painting and then reviewing their work.

10walk-6.16.13 11walk-6.16.13

(left) we went for a walk into bernal heights with misha and daniel and made a new feline friend. (right) we also found quirky water features advertising a business outside someone’s home: watercontraptions.com

12misha-6.16.13

misha looking out over our beautiful city on a beautiful day. 🙂

13walk-6.16.13 14walk-6.16.13

three bittleston men having a chat on a bench.

15arwen-6.16.13 16arwen-6.16.13

arwen has gotten adventurous again. she’s figured out how to jump onto the other neighbor’s house. i love how casual she is; she has no idea how freaky this is for us!

17arwen-6.16.13 18arwen-6.16.13

when she’d decided she’d had enough, she finally came back to the place she’d originally jumped from and it didn’t seem so fun coming back. she was more than happy to run to the bathroom window where i pulled off the screen and let her in.

19cats-6.16.13

and when they’re not getting into trouble, they spend a lot of time lying around being cute…

fathers-day-6.16.13

and before i forget, HAPPY FATHER’S DAY to our dads! we love you both!

20mathewbella-6.16.13

mathew is currently in new orleans. he had a 3-day master camp training and a belt test that he’s been preparing for for months. HE PASSED!! he’s now a third degree black belt in shotokan karate. (above: bella helping mathew study.)

Bigfoot

We have been slowly progressing with finishing the trim around the windows of the laundry room and garden room.

02-upperWindows_2013042903-shortTrim_20130429

I spent almost all day getting the trim to fit in above the windows, and tight against the soffit. Had to splice on a piece at the end, because the board wasn’t quite long enough (above right). But that’s nothing: When I bought the redwood, I got tempted by the slightly cheaper, rough-sawn redwood planks intended for fences. We had to plane and sand and prime them all before putting them up. Silly Turtle – no wonder it takes so long! Now that all the trim is on around the windows, though, it’s starting to look finished.

04-lowerWindowHead_2013042905-routedEdge

This (above left) is the window under the laundry room (‘garden room’). We built out a small box head above the window to shade and protect the windows from rain. Turtle being turtle, I couldn’t resist getting my router out and adding a bit of decorative edge (above right) to the trim. It also serves a purpose: Rounded edges don’t show dents, and they hold paint better than sharp corners.

07-overall_2013042908-corner_20130429

The photo above left shows the back wall of the laundry room — a bit difficult to see, as my home-built scaffolding is in the way. Above right is the corner that faces the deck. So, this is quite exciting (for me): All the exterior trim and siding are installed on the laundry room. Now we need to fill all the holes, sand, and paint.

While we were working on the laundry room trim, the cats sometimes came out to play. All the flowers have been blooming in the back yard, and the bees are loving it. Unfortunately, Bella doesn’t know the difference between a fly and a bee…
01-bigfoot_20130429
She decided to catch a bee, and when she slapped it down on the ground, she got stung. Mole was calling her ‘bigfoot’ for the rest of the day…

the adventures of arwen and bella

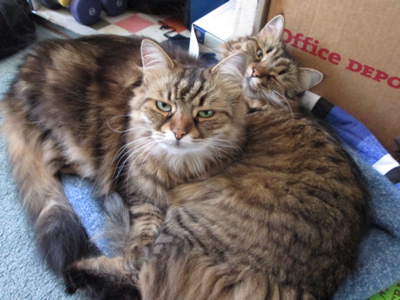
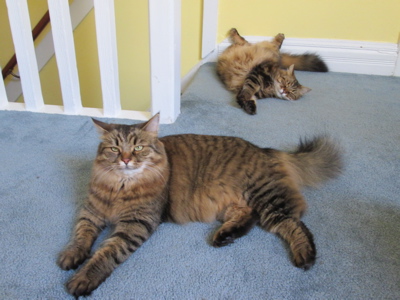
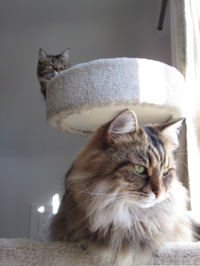
arwen and bella have been busy in 2013, making new friends, having fun and getting into trouble…

1-bella-4.9.13 2-arwen-4.9.13

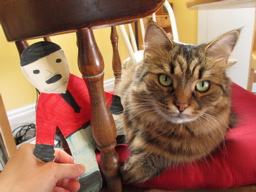
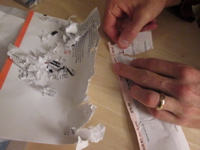
here they are with their new friend ‘flat stanley.’ flat stanley came to visit from southern california. he stayed for a few days and i showed him around our neighborhood, then he went home with a photo-essay to teach 1st graders about the mission district in san francisco.
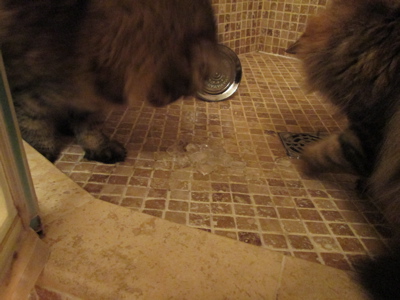
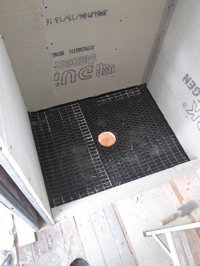
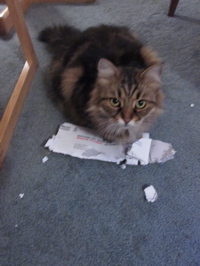
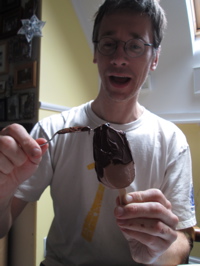
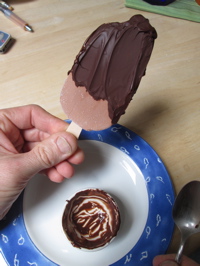
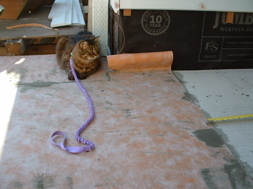
3-ice-4.9.13

“WHAT IS THIS?!?!”

ice. 🙂

4-tree-4.9.13

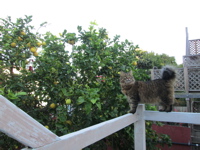
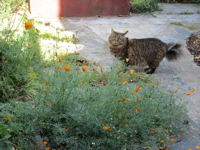
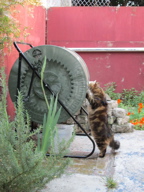
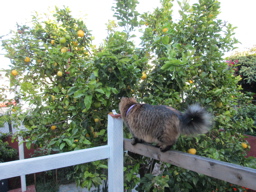
bella climbed her first TREE!! before she attempted anything, she stood beneath the tree for about 30 minutes studying and strategizing. it all went well, but could have been better if it weren’t a lemon tree. the cats aren’t crazy about lemons…

5-bella-4.9.13

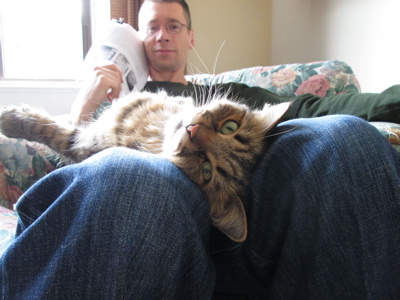
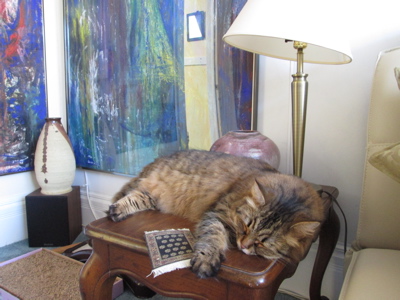
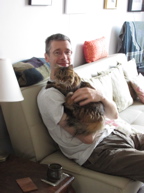
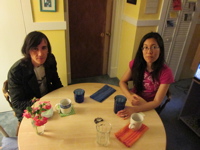
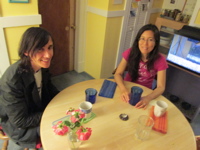
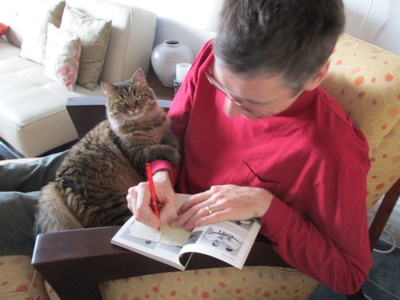
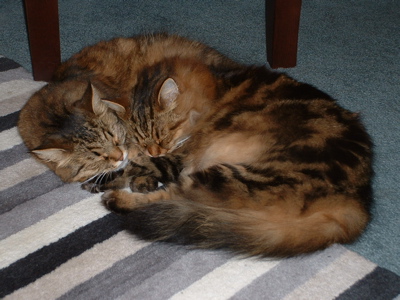
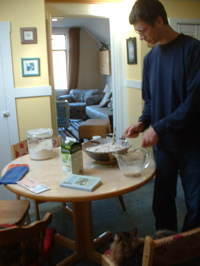
a lazy afternoon with bella and mathew.

12-bella-4.9.1313-arwen-4.9.13

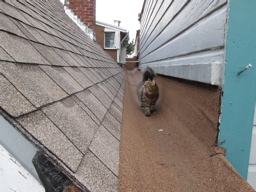
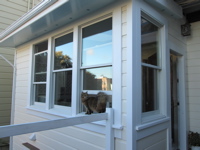
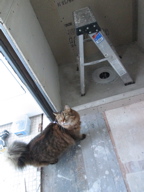
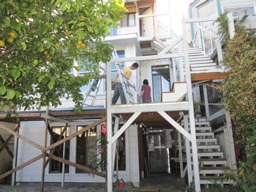
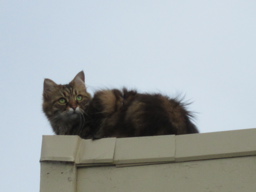
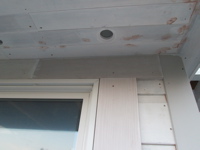
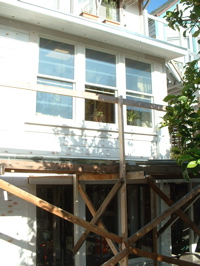
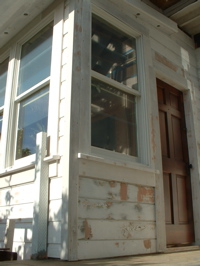
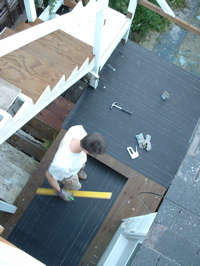
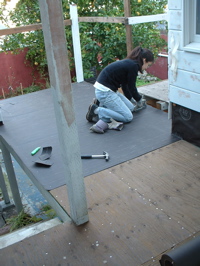
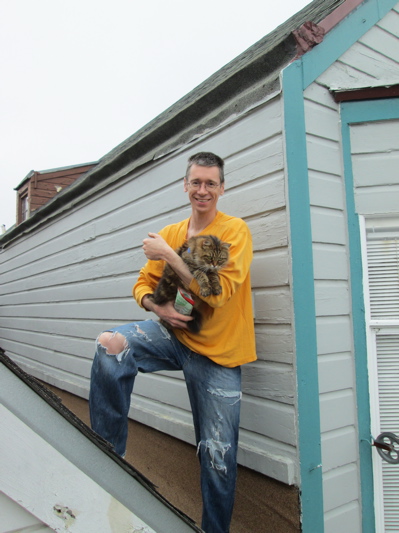
(above left) bella also climbed onto the roof for the first time. she jumped onto the kitchen, climbed to the very top of our roof, looked around, skidded down and decided she’d had enough.

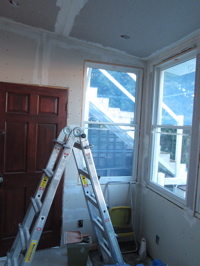
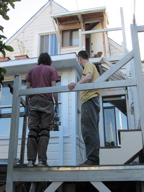
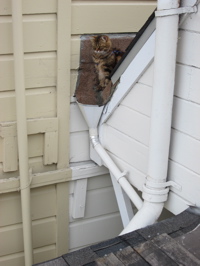
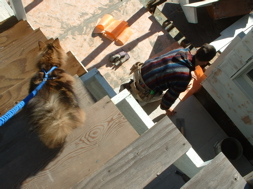
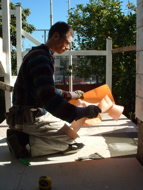
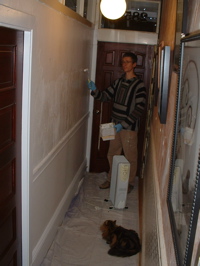
(above right) at the very center of that photo (it’s hard to see) mathew is attaching chicken wire to keep arwen from climbing into the neighbors’ yard. she’s been very active in defending her territory and chasing other cats out of our yard. she’s lucky she’s never gotten a scratch on that pretty face of hers, because she has no idea what she is doing, but her size and total lack of fear has been effective. it’s just annoying to have to go through the neighbors’ house and into their yard to retrieve her!

but now she’s trying to start something with ‘foxy lady’ who lives with the other neighbors and never comes into our yard. i think arwen is just bored and looking for drama.

10-bella-4.9.1311-bella-4.9.13

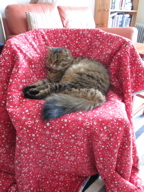
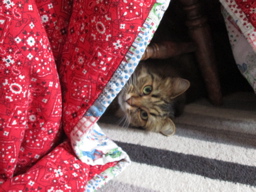
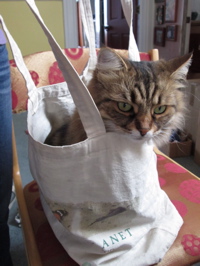
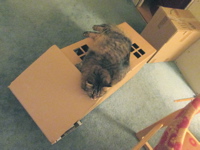
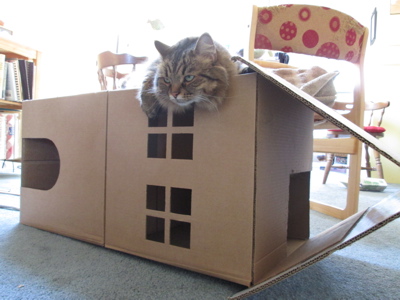
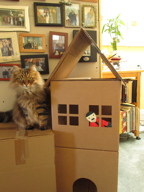
bella LOVES her fort/cave!

6-arwen-4.9.13 7-bella-4.9.13

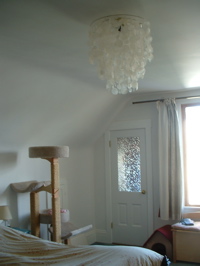
(above left) arwen snuggling with me in the morning. (she tends to be a bit camera-shy.)

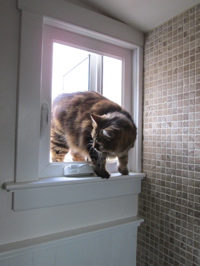
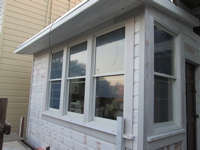
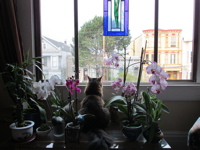
(above right) bella sitting among the orchids (they have NEW blossoms!!) watching the morning bird show.

8-arwen-4.9.13

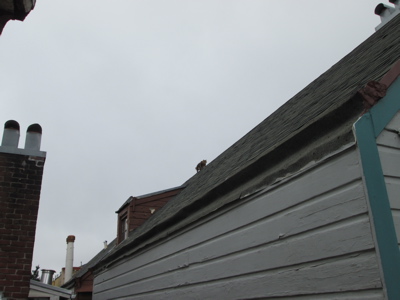
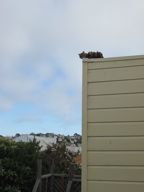
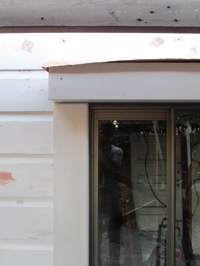
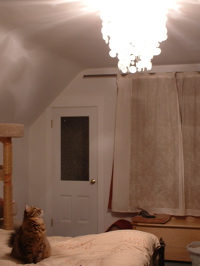
in search of new thrills, arwen decided to climb onto our roof, and then the neighbors’ roof, and then the roof of the next house! she was gone for quite some time and mathew was worried we’d lose her forever. see that lump in the middle of the photo? that’s arwen finally reappearing and coming home.

9-arwen-4.9.13

14-bridget-4.9.13 15-bridget-4.9.13

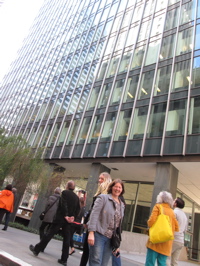
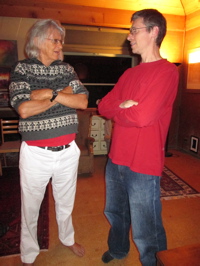
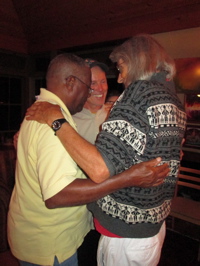
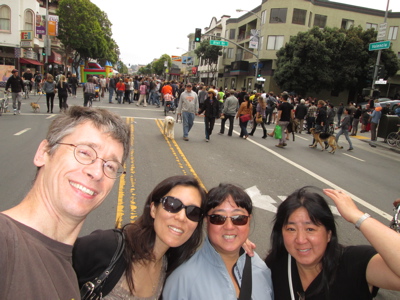
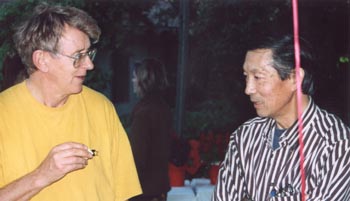
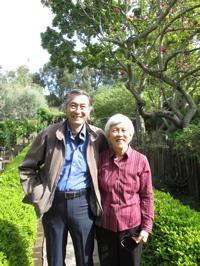
bella and arwen also made some new human friends from sweden! mathew’s aunt, uncle and cousin, bridget, mats and marja-sara. we took them on a guided architectural tour of san francisco and showed them the ferry building and the embarcadero.

16-chris-4.9.13 17-chris-4.9.13

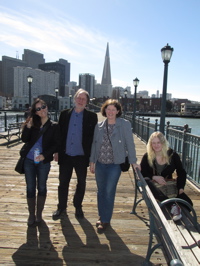
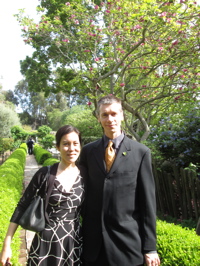
and a few days later mathew’s aunt and uncle, stella and chris flew in from england. we went for a nice walk, showed chris where we got married (he wasn’t able to attend) and had lunch at greens, the site of our wedding reception.

18-bridget-4.9.13 19-bridget-4.9.13

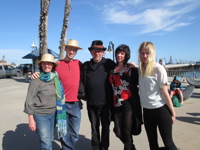
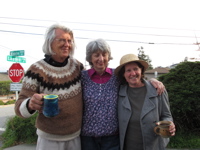
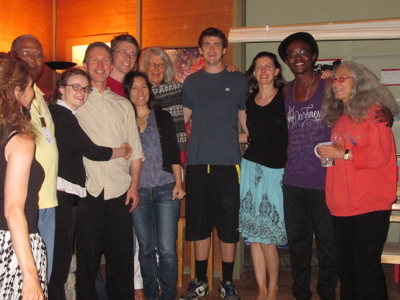
we went to santa cruz to meet up with everyone including bridget’s daughter irya who flew in later.

(above right) international siblings: daniel, stella and bridget.

20-irya-4.9.13 21-irya-4.9.13

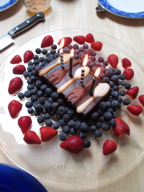
we celebrated irya’s birthday twice because when you’re from sweden and visiting the states, with the time difference it’s hard to know exactly when to celebrate… or maybe we just wanted 2 cakes! (above left) this is cake #2 which appeared after breakfast.

22-wedding-4.9.13 23-wedding-4.9.13

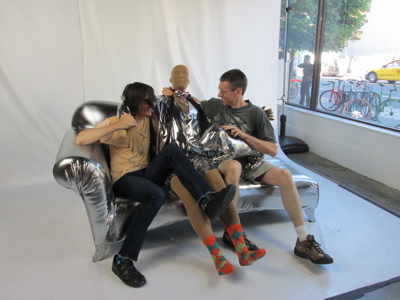
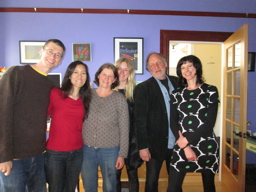
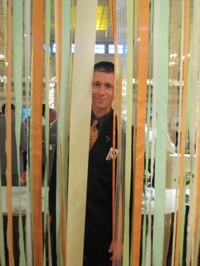
and somehow, when we weren’t entertaining or hosting we had time for thomas and sarah’s FANCY art deco themed wedding! (above left) photo booth photo. (above right) mathew and his buddy bob dancing during dinner. technically, the first dance, but who’s counting. the band was AWESOME and upon request, they played mathew’s fave, ‘bourbon street parade.’

24-stella-chris-4.9.13

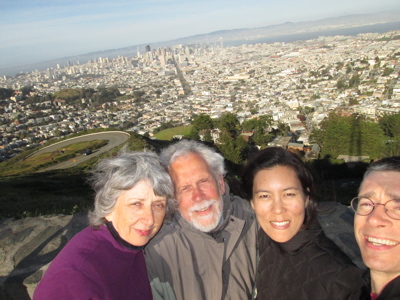
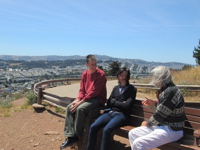
a spectacular view of the city with stella and chris.

25-stella-chris-4.9.13 26-stella-chris-4.9.13

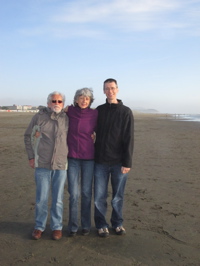
and a quick visit to the beach.

27-jump-4.9.13 28-fly-4.9.13

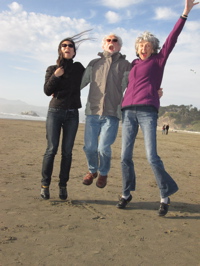
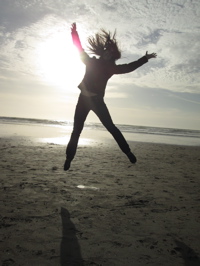
and jumping! or flying? 🙂

30-tulips-4.9.13 31-tulips-4.9.13

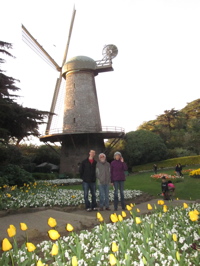
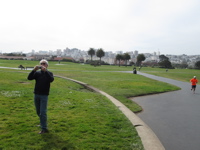
a windmill, daffodils, poppies and tulips at the queen wilhelmina tulip garden in golden gate park.

32-wedding-4.9.13 33-wedding-4.9.13

and then, ANOTHER wedding!? with my parents at darren and jenny’s super hip and modern wedding.

34-wedding-4.9.13 35-wedding-4.9.13

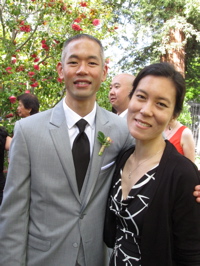
my younger brother justin was a groomsman for his childhood buddy darren.

35a-wedding-4.9.13

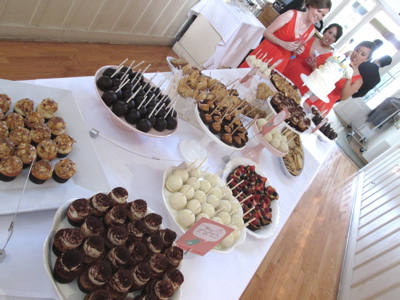
the bridesmaids at the end of the table, admiring the wedding cake. i honestly never looked at the cake because all the cookies, mini cupcakes and cake pops were much too distracting!! (and delicious!)

36-wedding-4.9.13 37-wedding-4.9.13

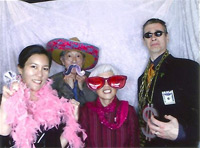
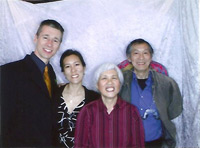
and we had fun with yet another wedding photo booth. with and without props!

38-wedding-4.9.13 39-wedding-4.9.13

i hope everyone is having as much fun this spring as we are.

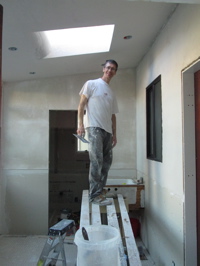
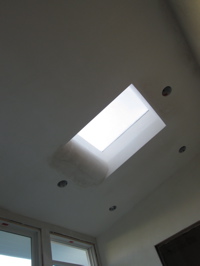
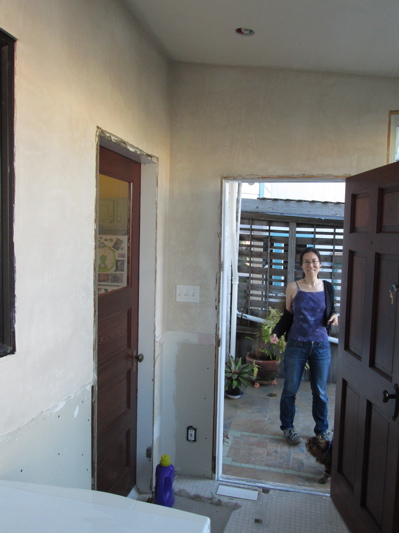
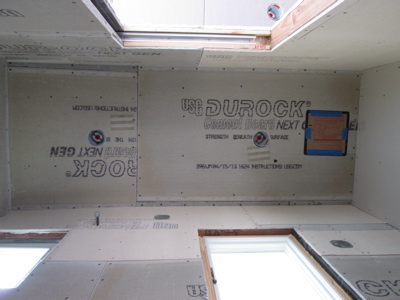
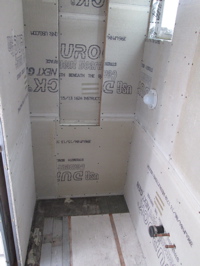
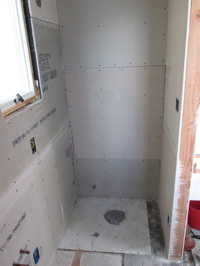
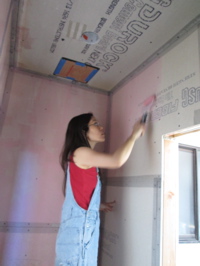
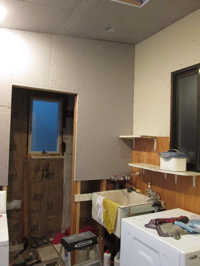
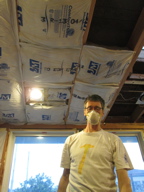
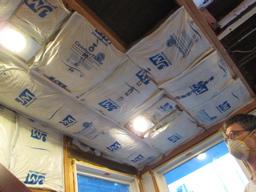
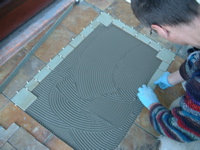
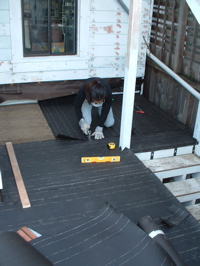
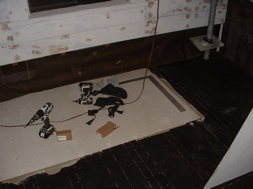
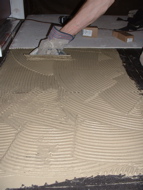
maybe next month we’ll finally catch up on sleep and do some work on the house…

Waterproofing part 2

The roofing felt and cement board do not themselves waterproof the deck. On this deck, I’m using the same material that we used in the showers: Kerdi. It’s a polyethylene sheeting that has a fibrous material bonded to both sides so that it sticks to thinset mortar.

01-kerdi_20130203 02-kerdi_20130203

Here I’m sticking down the Kerdi over the cement board. Arwen is watching from the stairs.

04-troweling_20130203 05-bellaWatching_20130203

To stick it down, I use the same cement-based thinset mortar that’s used under the cement board, and also will be used under the tile. I spread it out with a notched trowel, and then lay the Kerdi onto it. Then I smooth the Kerdi down with a flat trowel. The problem we were having is the cement board was dry, so it was drying out the thinset mortar before I could spread the sheet down. We had to wet down the cement board with a water sprayer so that we had enough time to stick the Kerdi down properly.

Above right Bella is watching the progress.

06-twoCatInspectors_20130203 07-difficultPart_20130203

They both really like tiling, I think. Almost as much as plumbing (they love to sit in the shower and watch the water go down the drain.) Janeen got all the difficult parts of the waterproofing – like fitting it around a pipe penetration.

08-almostDone_20130203 09-layout_20130203

See, another difficult spot: Mole attaching the waterproofing to the side of the building. Above right we are starting to lay out the tile grid. I drew a grid on the Kerdi before starting the actual tile.

10-startingTile_20130203 11-halfwayDone_20130203

Here are the first tiles. Actually, it’s not tile; we’re using a very colorful slate. We really liked the variety of colors in the slate. Each piece is like a little work of art.

Unfortunately we learned, after buying it all, that this slate has a flaw: The color is made by thin layers of impurities in layers within the slate, so it tends to delaminate. We tried to pick through carefully to avoid the tiles with bad layers in them. Hopefully we caught them all.

12-tileCutter_20130203 13-fancyCuts_20130203

Mole did almost all the cutting. She became the tile-saw queen. Even got into some really complicated cuts to fit the slate tiles around pipes.

14-fancyCuts_20130203 15-tileSet_20130203

Once all the slate was done, we let it dry for a week. Because the slate has such a rough surface, I used a pre-grouting sealer on the slate before grouting. Hopefully it will make it easier to clean the grout off the surface.

17-crocus_2013020316-tileSet_20130203

The crocuses are already up! The bulbs we planted under the lemon tree last year have come back this year. So nice. Above right, you can see a rectangle that we left unfinished. I wanted to make a virtual doormat in front of the door, by changing the tile pattern.

18-doormat_20130203 19-doormat_20130203

We used some ceramic tile that a friend gave me for the border (the same tile I used on the front porch as an accent tile). In the field, we just cut the same tile as on the rest of the deck to about 1/3 the size.

20-readyGrout_20130203 21-grouting_20130203

Above left, this is the ‘door mat’ ready to be grouted. Because the tile is so colorful, we chose a grey grout. I had to get mole to pick out colors, because I’ve learned: I wanted to get a really colorful grout… The grey looks really good.

22-grouting_20130203 23-finishGrouting_20130203

Above left mole is wiping off the grout from the tile surface. Above right, after the grout dries for a couple of hours, we came back with a dry cloth and polished off the haze on the surface of the tiles.

24-doormat_2013020325-Bella-Arwen_20130203

Mole is polishing up the ‘door mat.’ Now we can get back to finishing up the siding! Here’s a pic of Arwen and Bella looking out the window from their cat tree.


Deck Waterproofing and Christmas Eve

Well, a lot happens, and I’ve failed to post any of it. Here’s part one..

01-lampshade_20130203 02-lampshade_20130203

Before we moved into this house, mole found a lampshade made out of shells that she really loved. Unfortunately when she ordered it, it was out of stock, and no longer available. Just recently, the store got some more, so she bought it. We put it up in the bedroom.

03-lampshade-bella_2013020304-deckWaterproofing_20130203

Bella and Arwen really like it too. So, back to house projects: almost a year ago, I stopped working on the back stairs, because I started working on the laundry room. It sounds a bit as if I got distracted and went off to another project. But there’s a reason: After dealing with all the rot in this area I had decided that the deck would be waterproofed. The waterproofing needs to attach to the side of the house, but since the laundry room was so strangely built (there was no waterproofing membrane, just vertical boards) I had to rebuild the wall to add a waterproofing membrane.

One thing led to another, and we started jacking the whole thing up to level it… OK, so it did become a bigger project than I planned. The deck at the first floor sat out in the sun and rain for a year, unfinished, while we basically rebuilt the whole laundry room. I don’t want the deck to endure another winter unprotected, so it’s back to the stairs. Above right, I’m putting down heavy weight roofing felt.

05-janeenStapler_20130203 06-finishingUp_20130203

We stapled it down and lapped it, starting at the lowest side of the deck. Here’s mole just finishing up.

07-lateWork_20130203 08-cementBoard_20130203

The felt is just the first layer. This deck is going to have tile on it, so we put down cement board. To make sure there is a uniform surface under the cement board, we put down thinset mortar first, and set the cement board into that. We then screwed it down to the plywood.

09-cementBoard_20130203 10-cementBoard_20130203

It got pretty late working on this. I think I finished about 10pm. I wanted to get the cement board on before the rain, which was due in the next couple of days.

11-cuties_20130203

They are so sweet when they sleep together. We just can’t help taking photos.

12-paintingHallway_20130203 13-bakingBread_20130203

About four years ago, when we were doing the wallpaper stripping in the lower unit, we started stripping the wallpaper in our front hallway too. We stopped, because it smelled moldy, and we figured we’d need to replace the plaster. Well, it sat with the wallpaper partly stripped for all those years. Talk about bad Feng Shui in our entry! So I decided to just paint white over it. At least it will look better until I get around to the replacement work. Because there’s still no heating, the paint wasn’t drying: I had to bring an electric radiator down there. Arwen came down to watch the progress.

My family came over for Christmas Eve again this year. One of my Christmas traditions now is baking bread. Above right I’m just starting to mix.

14-christmas_20130203

Here’s a pic of everyone who came over. Dad got a picture of Elijah for Christmas, and wanted to include him in the photo!